1-12
PVM-14L1/14L1MDE/20L1
SSM-14L1/20L1
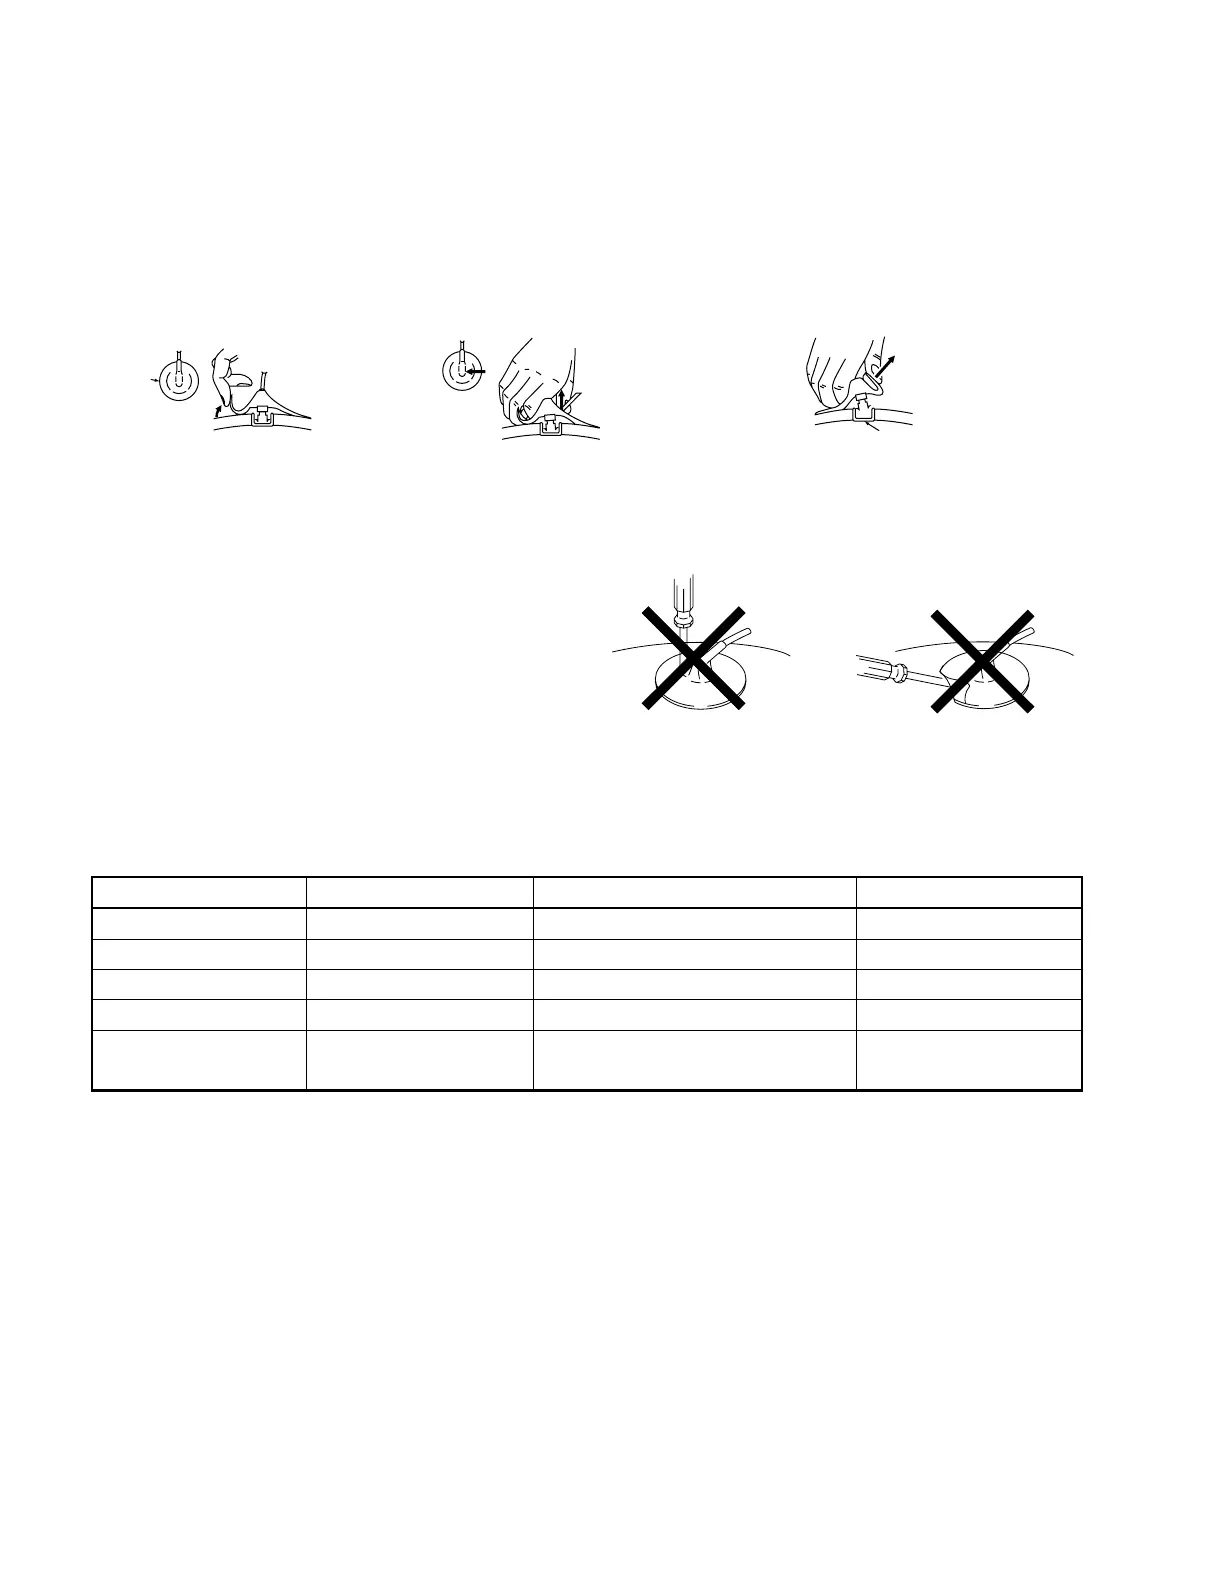
(1) Turn up one side of the rubber cap in the
direction indicated by arrow a.
(2) Using a thumb, pull up the rubber cap
firmly in the direction indicated by
arrow b.
(3) When one side of the rubber cap is
separated from the anode button, the
anode-cap can be removed by turning
up the rubber cap and pulling up it in
the direction of the arrow c.
1-6-6. Anode Cap (20 inch)
n
Short-circuit the anode of the picture tube and the anode cap to the metal chassis, picture tube shield or carbon painted on
the picture tube, after removing the anode.
..
..
. Removal Procedure
..
..
. Handling Precautions
(1) Do not scratch the surface of anode cap with a sharp object.
(2) Do not press the rubber so hard that it damages the inside of
anode caps. A shatter-hook terminal is built into the rubber.
(3) Do not turn the foot of the rubber over.
The shatter-hook terminal will stick out or damage the rubber.
a
a
b
b
c
Anode button
1-7. Warning on Power Connection
Use a proper power cord for your local power supply.
United State, Canada Europe Japan
Plug type LP-30B ––
a)
YP332
Female end LS-13 VM0303B YC-35
Cord type SB-SVT H05VV-F VCTF
Minimum cord set rating 10A/125V 10A/250V 7A/125V
Safety approval UL/CSA SEMKO, NEMKO, DEMKO, SEV, DENAN-HO
KEMA, EI (FIMKO), CEBEC, VDE, BS
a) Note : Use an appropriate rating plug which is applied to local regulations.
 Loading...