68 MS 290, MS 310, MS 390
The diaphragm material as well as
the inlet and outlet valves are
subjected to continuous alternating
stresses and eventually show signs
of fatigue, i.e. the diaphragm
distorts and swells and has to be
replaced.
Install in the reverse sequence.
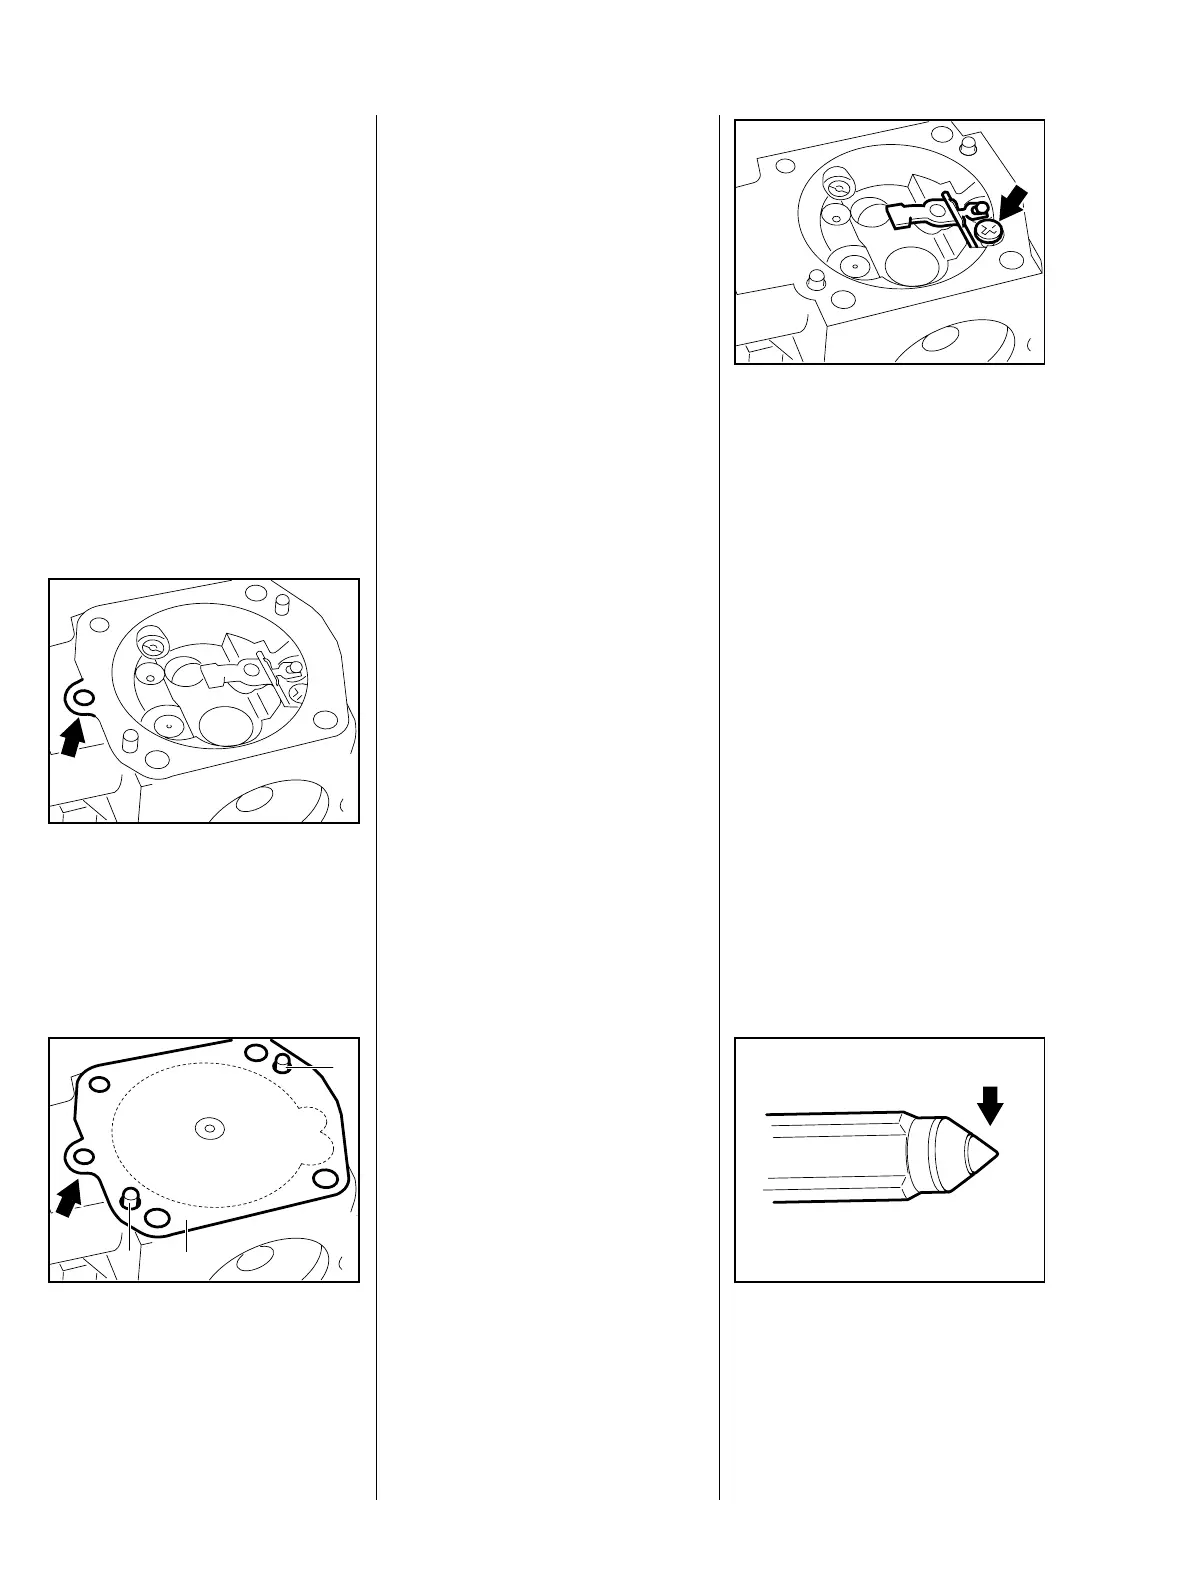
: Place the gasket on the
carburetor body so that the tab
(arrow) points towards the
adjusting screws.
VA
212RA160
: Fit the metering diaphragm (1) on
the carburetor body so that the
perforated plate faces the inlet
control lever and the tab (arrow)
points towards the adjusting
screws.
VA
212RA161
1
2
3
The gasket and metering
diaphragm are held in position by
integrally cast pegs (2+3).
– Fit the end cover.
– Fit screws and tighten them down
firmly, b 3.5
Install all other parts in the reverse
sequence.
– Remove the metering
diaphragm, b 11.3.1
: Take out the screw (arrow).
– Remove the inlet control lever
with spindle.
VA
212RA162
There is a small spring under the
inlet control lever which may pop
out during disassembly.
– Take out the inlet needle.
: If there is an annular indentation
on the sealing cone of the inlet
needle, fit a new inlet needle.
VA
146RA149
11.3.2 Inlet Needle
 Loading...