Rackmounting—485/R 485 Service
8. Push the instrument all the way into the rack and
secure it to the rack with the securing screws and washers as
shown in Fig. 6-6.
Alternate Rear Mounting Methods
Although the following methods provide satisfactory
mounting under normal conditions, they do not
provide solid support at the rear of the instrument. I f
the instrument will be subjected to severe shock or
vibration consult your local TEKTRONIX Field
Engineer for rear support mounting information.
An alternative method of supporting the rear of the
instrument is shown in Fig. 6-8. The rear support brackets
supplied with the instrument allow it to be mounted in a
rack which has a spacing between the front and rear rails of
11 to 24 inches. Fig. 6-8A illustrates the mounting method
if the rear rails are tapped for 10-32 screws, and Fig. 6-8B
illustrates the mounting method if the rear rails are not
tapped for 10-32 screws.
If the rack does not have a rear rail, or if the distance
between the front and rear rails are too large, the
instrument may be mounted without the use of the
slide-out tracks. Fasten the instrument to the front rails of
the rack with the securing screws and washers. This
mounting method should be used only if the instrument
will not be subjected to shock or vibration and if it is
installed in a stationary location.
Removing or Installing the Instrument
After initial installation and adjustment of the slide-out
tracks, the Type R485 can be removed or installed by
following the instructions given in Fig. 6-6. No further
adjustments are required under normal conditions.
To remove the R485 from the rack without removing
the rack mount housing;
a. Remove the 4 screws from the feet at rear of the
instrument.
b. Disconnect all connections to the rear of the instru
ment, unplug the power cord.
c. Remove the blue rear panel rim around the rear of
the instrument.
d. Pull the R485 out the front of the rack mount
housing.
e. To insert the R485 into the rack mount housing
check the maintance section, reinstalling the wrap around
cover, for caution.
Slide-Out Track Lubrication
The slide-out tracks normally require no lubrication. The
special finish on the sliding surfaces provide permanent
lubrication. However, if the tracks do not slide smoothly
even after proper adjustment, a thin coating of paraffin
rubbed onto the sliding surfaces may improve operation.
6-2
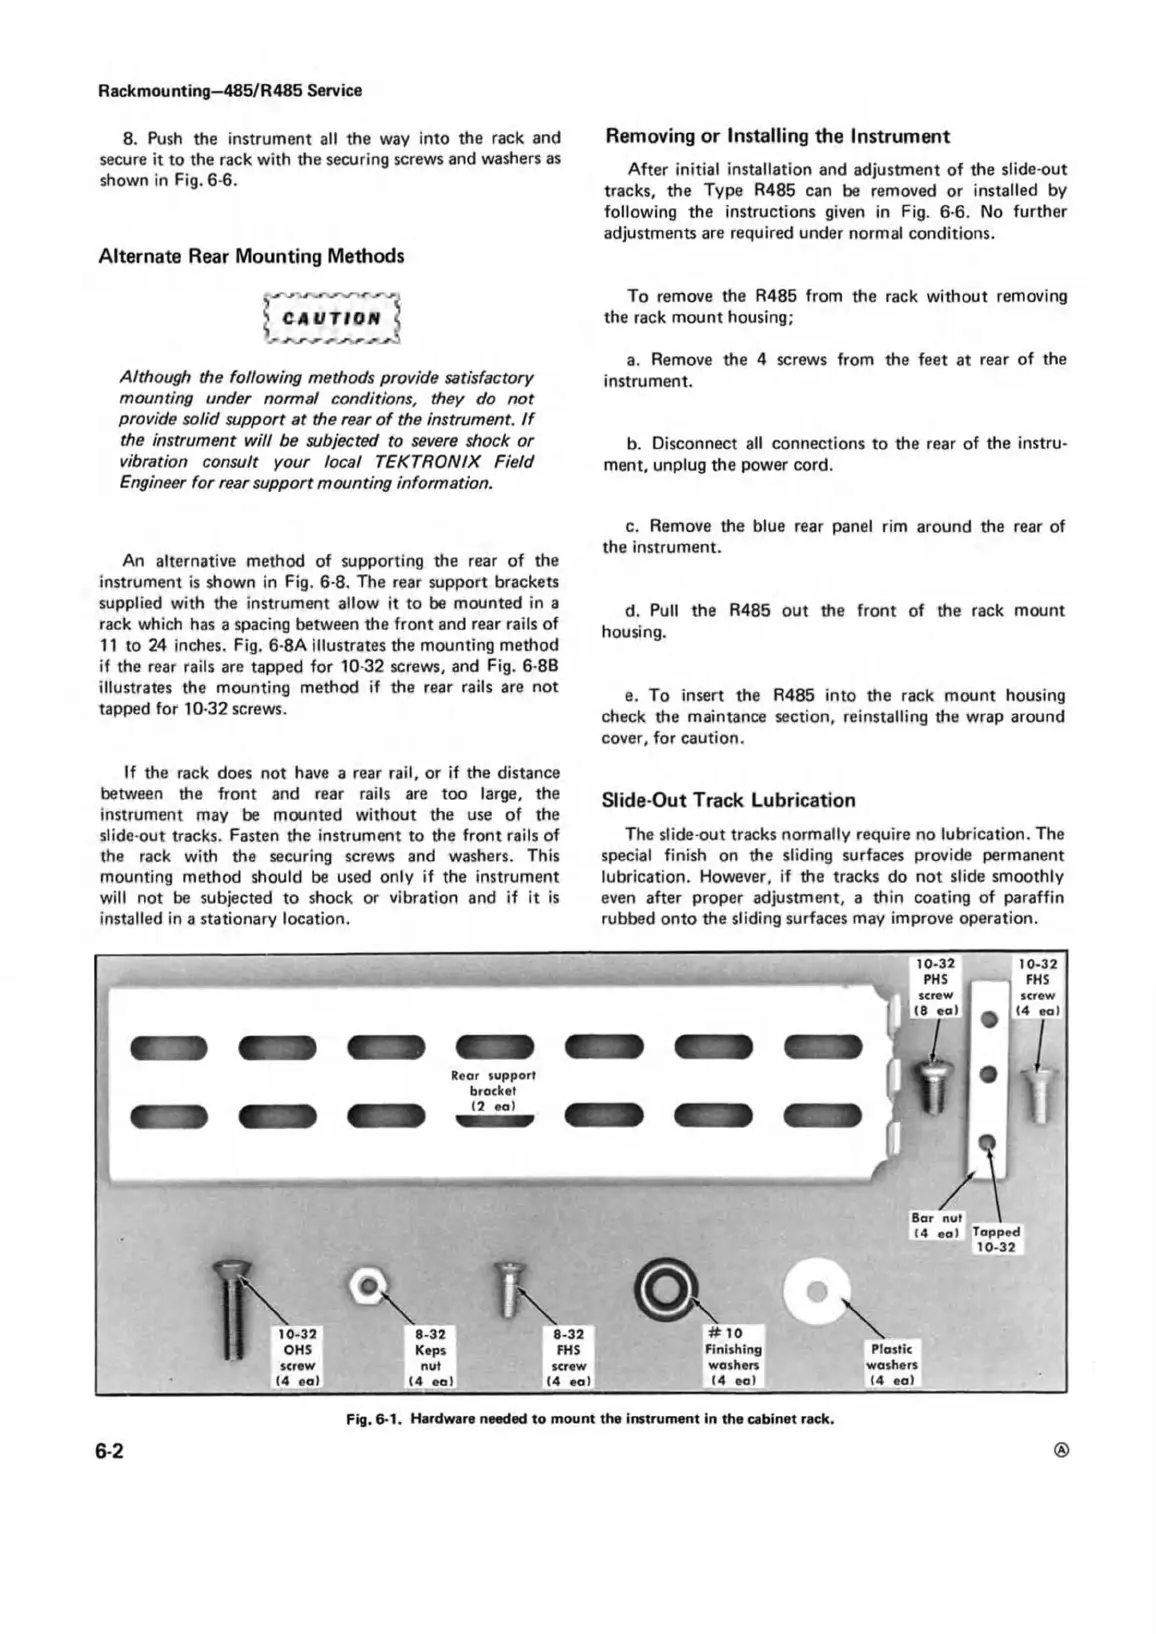
Fig. 6-1. Hardware needed to mount the instrument in the cabinet rack.

 Loading...


