EPD/HB/40521/000
ISSUE 5
EPD TECHNICAL HANDBOOK Page 84
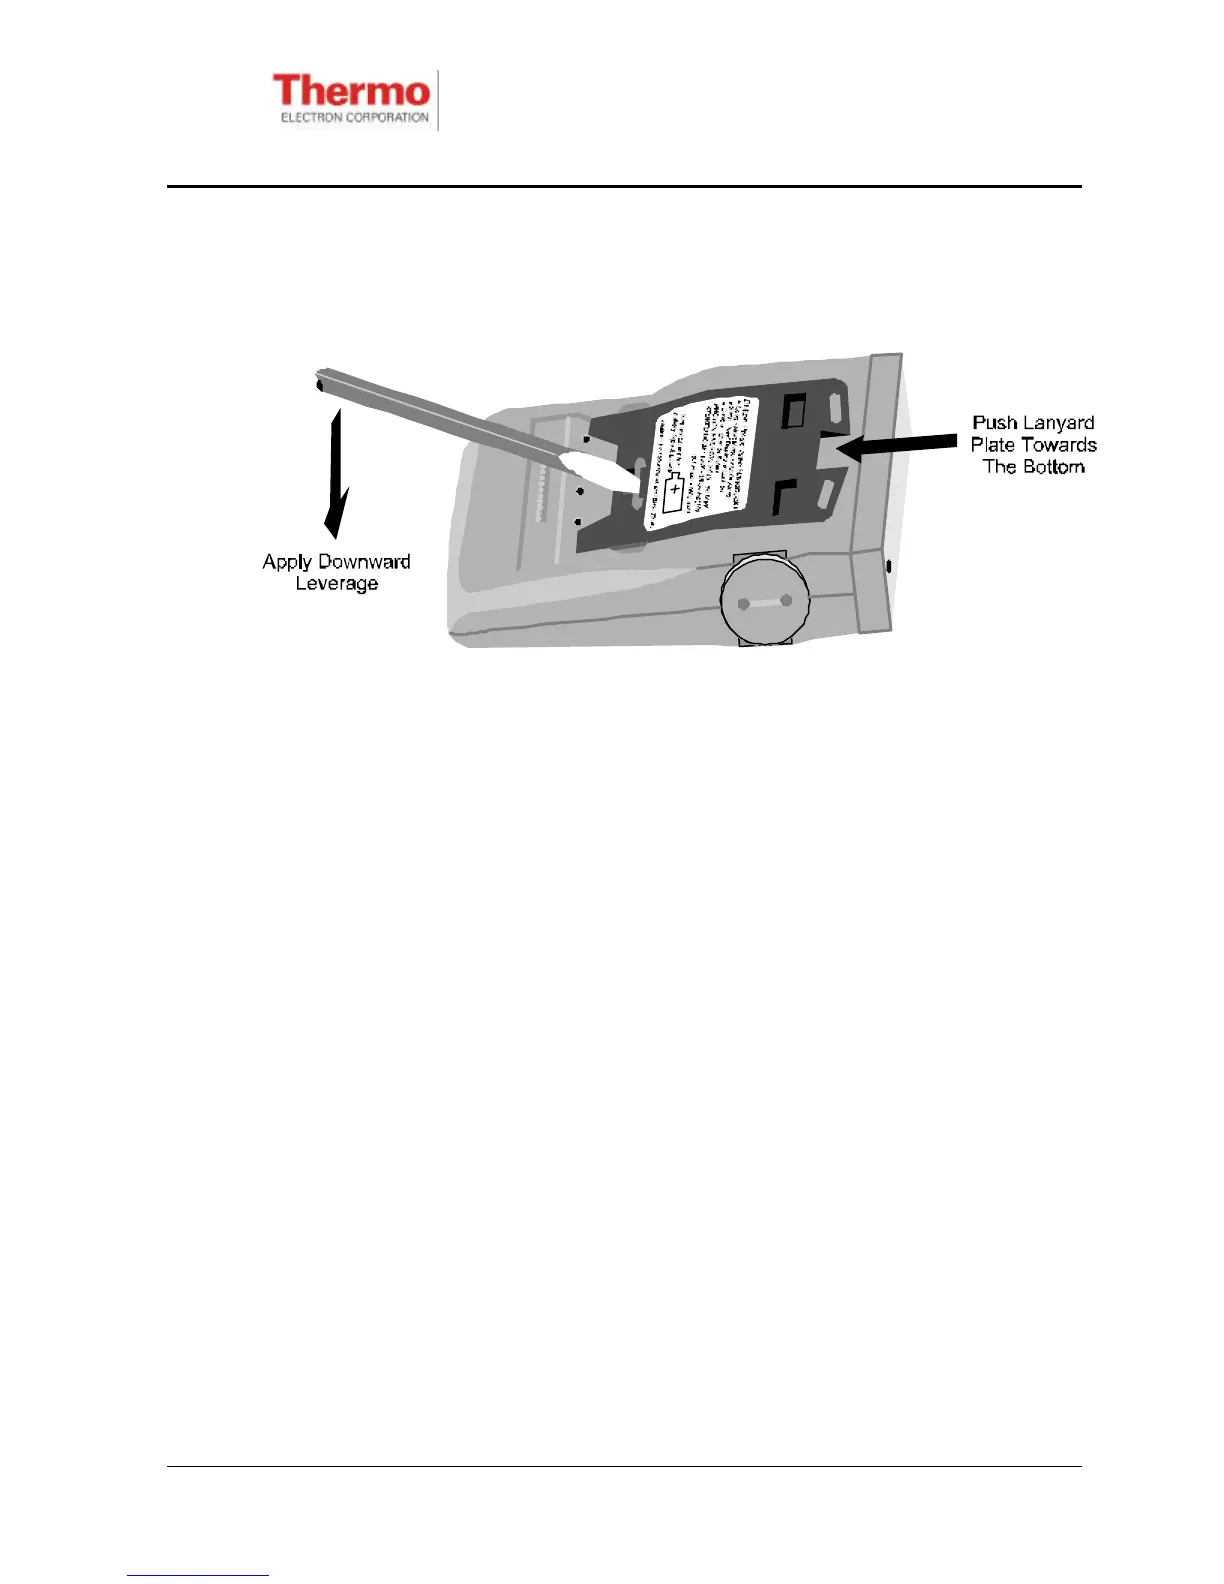
2. Insert a screwdriver, with a blade width of 3 to 4 mm, under the lanyard plate
tang and apply downward leverage on the screwdriver (see Figure 6.4). At
the same time, push the lanyard plate towards the bottom of the EPD so as to
disengage the lanyard plate from the retaining lugs. Remove the lanyard
plate.
(Clip Assembly Removed For Clarity)
Figure 6.4 - Removing The EPD Lanyard Plate/Clip Assembly
6.3.2 Replacing The EPD Lanyard Plate/Clip Assembly
Set the lanyard plate into the recess on the rear of the EPD body. This will be found
to be much easier if the clip and lanyard plate is kept slightly open using a suitable
small separator. The plate should sit with its lugs in the lug recesses. Push the plate
towards the top of the EPD (LCD end), ensuring that the retaining lugs engage in
position in the clip assembly recess. Check that the lanyard plate is locked in
position (the plate remains in position when the assembly is pushed towards the
bottom of the EPD).
 Loading...


