ServicingtheBedbar
RemovingtheBedbar
1.Turnbedbaradjusterscrewscounterclockwise
tobackthebedknifeawayfromthereel(Figure
29).
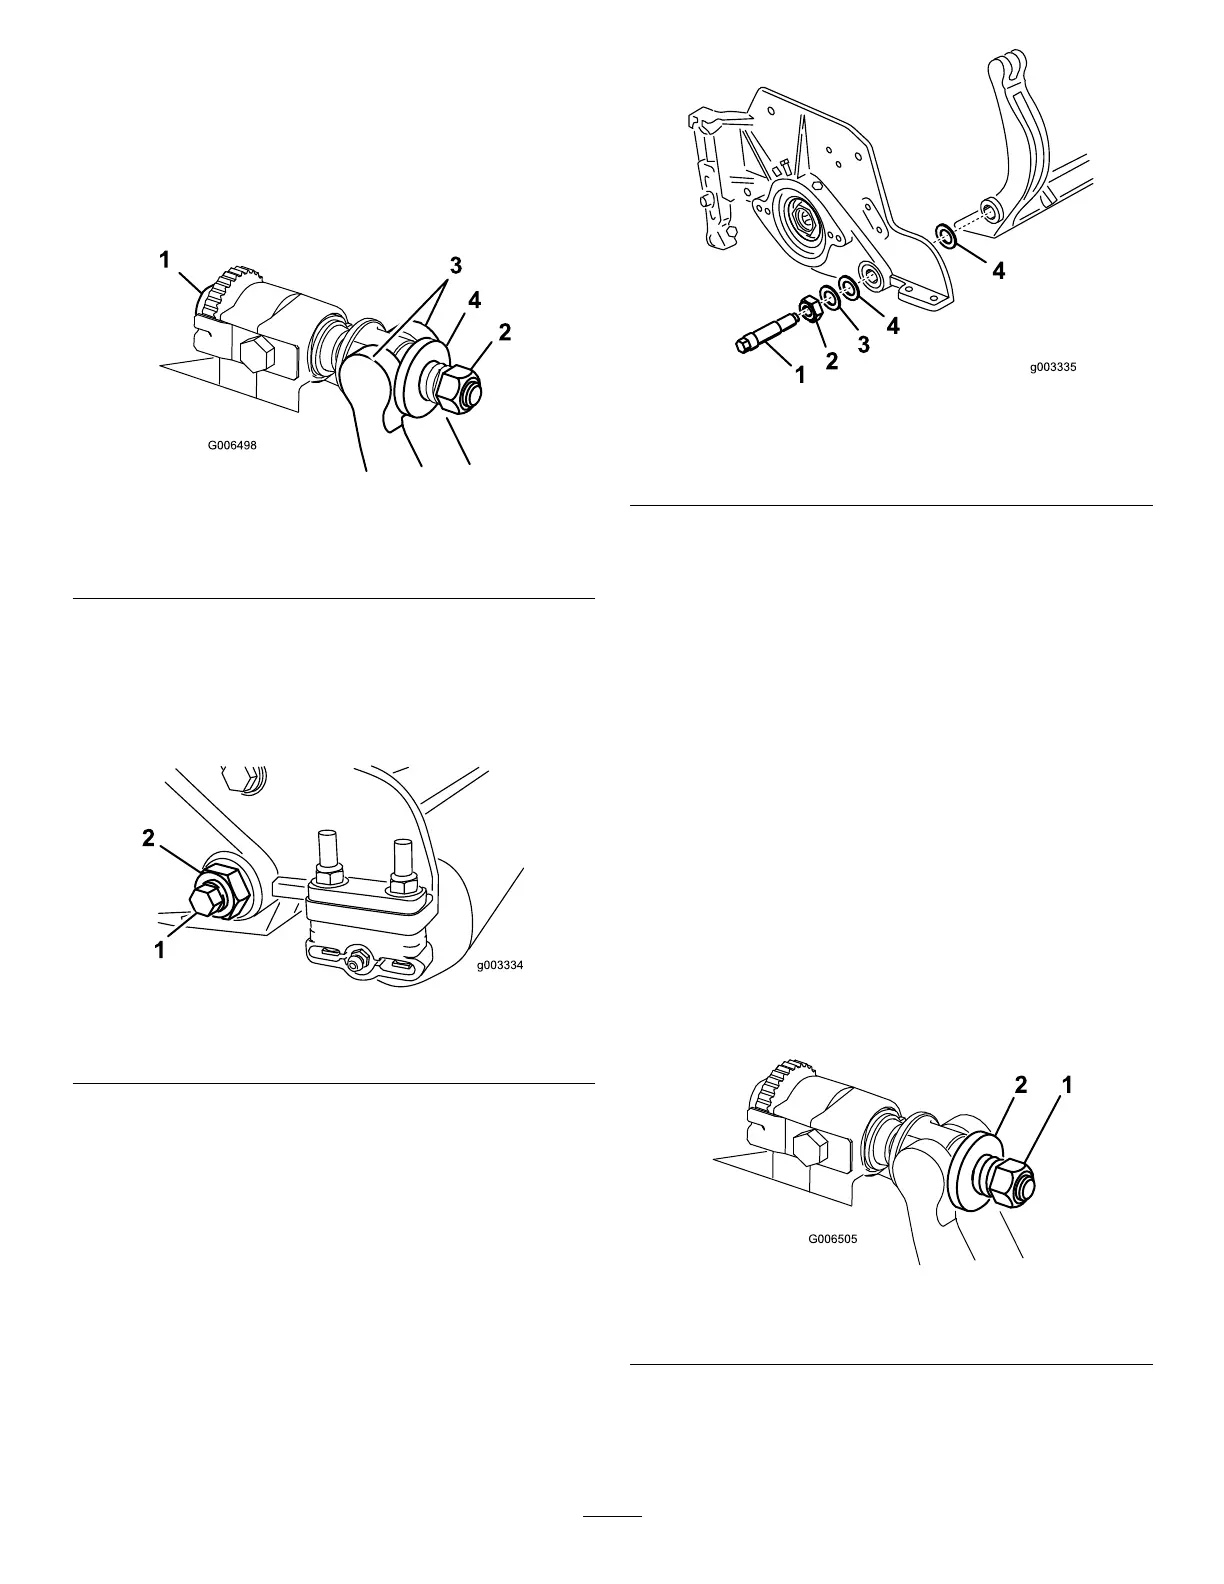
g006498
Figure29
1.Bedbaradjustingscrew3.Bedbar
2.Springtensionnut
4.Washer
2.Backoutthespringtensionnut,untilthewasher
isnolongertensionedagainstthebedbar
(Figure29).
3.Oneachsideofthemachine,loosenthelocknut
securingthebedbarbolt(Figure30).
g003334
Figure30
1.Bedbarbolt2.Locknut
4.Removeeachbedbarboltallowingbedbartobe
pulleddownwardandremovedfrommachine
bolt(Figure30).
Note:Accountfor2nylonand1stampedsteel
washersoneachendofbedbar(Figure31).
g003335
Figure31
1.Bedbarbolt
3.Steelwasher
2.Nut4.Nylonwasher
AssemblingtheBedbar
1.Installthebedbar,positioningthemountingears
betweenthewasherandbedbaradjuster.
2.Securethebedbartoeachsideplatewiththe
bedbarbolts(nutsonbolts)andthe6washers.
Note:Positionanylonwasheroneachside
ofthesideplateboss.Placeasteelwasher
outsideeachofthenylonwashers(Figure31).
3.Torquebedbarboltsto27to36N∙m(240to320
in-lb).
Note:Tightenthelocknutsuntiltheoutside
steelwasherstopsrotatingandtheendplayis
removedbut,donotovertightenordeectthe
sideplates.Washersontheinsidemayhavea
gap.
4.Tightenthespringtensionnutuntilthespringis
collapsed,thenbackoff1/2turn(Figure32).
g006505
Figure32
1.Springtensionnut2.Spring
19
 Loading...