40 41
What to Do?
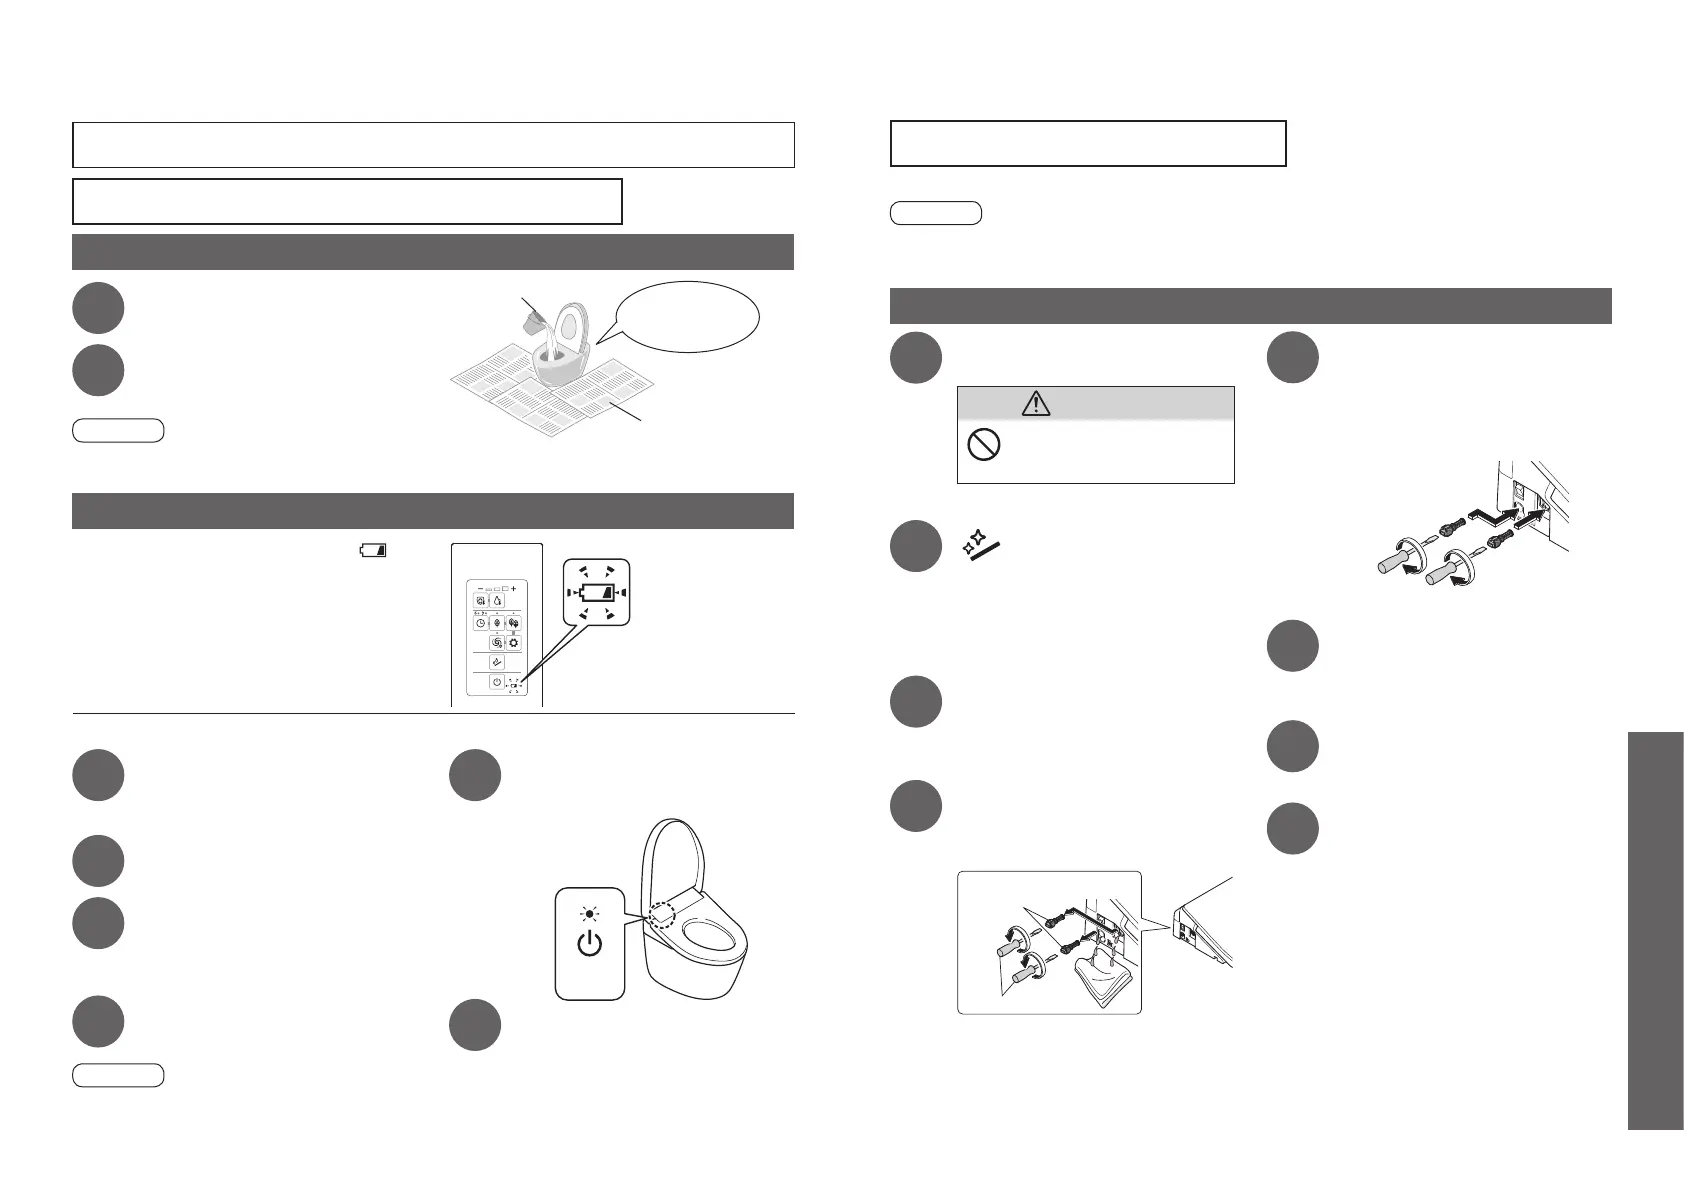
If the water does not fl ow due to a water service interruption
If you cannot operate with the remote control
If you cannot operate with the remote control
If the low battery warning mark "
" on
the back of the remote control is fl ashing,
please replace the batteries.
If the water does not fl ow due to a water service interruption
1
Use a bucket to fl ush water.
2
If the water level is low after
fl ushing, add more water.
•
Prevents odors.
Attention!
•
Before starting to work, set "Auto fl ushing" to "OFF" (Except TCF894CG and TCF896CG). (Page 36)
•
When the water supply is restored, be sure to perform a fl ush. (To prevent waste from remaining in the drain pipe.)
■
Replacing the batteries
1
Remove the cover on the left
side of the main unit, and fl ip
the power switch to "OFF".
(Page 13)
2
Remove the remote control
from the hanger.
(Page 12)
3
Open the battery cover and
replace the two AA batteries.
(Page 12)
•
The low battery warning mark goes off.
4
Mount the remote control in the
hanger.
Attention!
•
"ON" and "OFF" settings of the functions such as the energy saver function may be canceled when the batteries
are replaced.
Set them again.
5
Flip the power switch to ON.
(Page 13)
•
The "Power" LED lights up.
<Power>
6
Reinstall the cover.
(Page 25)
Newspaper, dustcloth, etc.
Large bucket
Pour strongly, aiming
at the center of the
bowl unit.
It is the time to replace the batteries.
When the ambient temperature is likely to drop to 0 °C or lower, take measures to prevent freezing.
Attention!
•
When the ambient temperature is likely to drop to 0° C or lower, do not use the energy saver feature. (May damage the product.)
•
Warm the bathroom or take measures against freezing so that the ambient temperature does not drop below 0°C.
•
Before starting to work, set "Auto fl ushing" to "OFF" (Except TCF894CG and TCF896CG). (Page 36)
How to freeze damage prevention
1
Close the shutoff valve.
(Page 45)
•
The water supply stops.
CAUTION
Do not remove the water fi lter drain
valve while the shutoff valve is open.
(Otherwise, water may leak out.)
2
Press
"Wand CLEAN" button.
(Release the pressure from the water supply
pipe.)
•
Water comes out from around the wand.
3
Remove the cover on the left
side of the main unit, and fl ip the
power switch to "OFF".
(Page 13)
4
Remove the two water fi lter
drain valves.
•
Loosen the water fi lter drain valve with a
fl at-head screwdriver and then pull it.
Water Filter
Drain Valve
Flat-head screwdriver
5
When water draining is
completed, reinstall the two
water fi lter drain valves.
•
Insert the water fi lter drain valve and use a
fl at-head screwdriver to tighten it securely.
6
Flip the power switch to ON.
(Page 13)
•
The "Power" LED lights up.
7
Reinstall the cover.
(Page 25)
8
Set the toilet seat temperature
to "High".
(Page 18)
•
To maintain the temperature, close the
toilet seat and toilet lid after fi nishing work.
■
To use the product again
•
The water needs to be resupplied. (Page 43)
Freeze Damage Prevention
Reference
 Loading...