Buttonhole sewing
Buttonhole sewing to match the size of the button is possible.
For stretch fabric or thin fabric, it is recommended to use a stabilizer for a better
buttonhole finish.
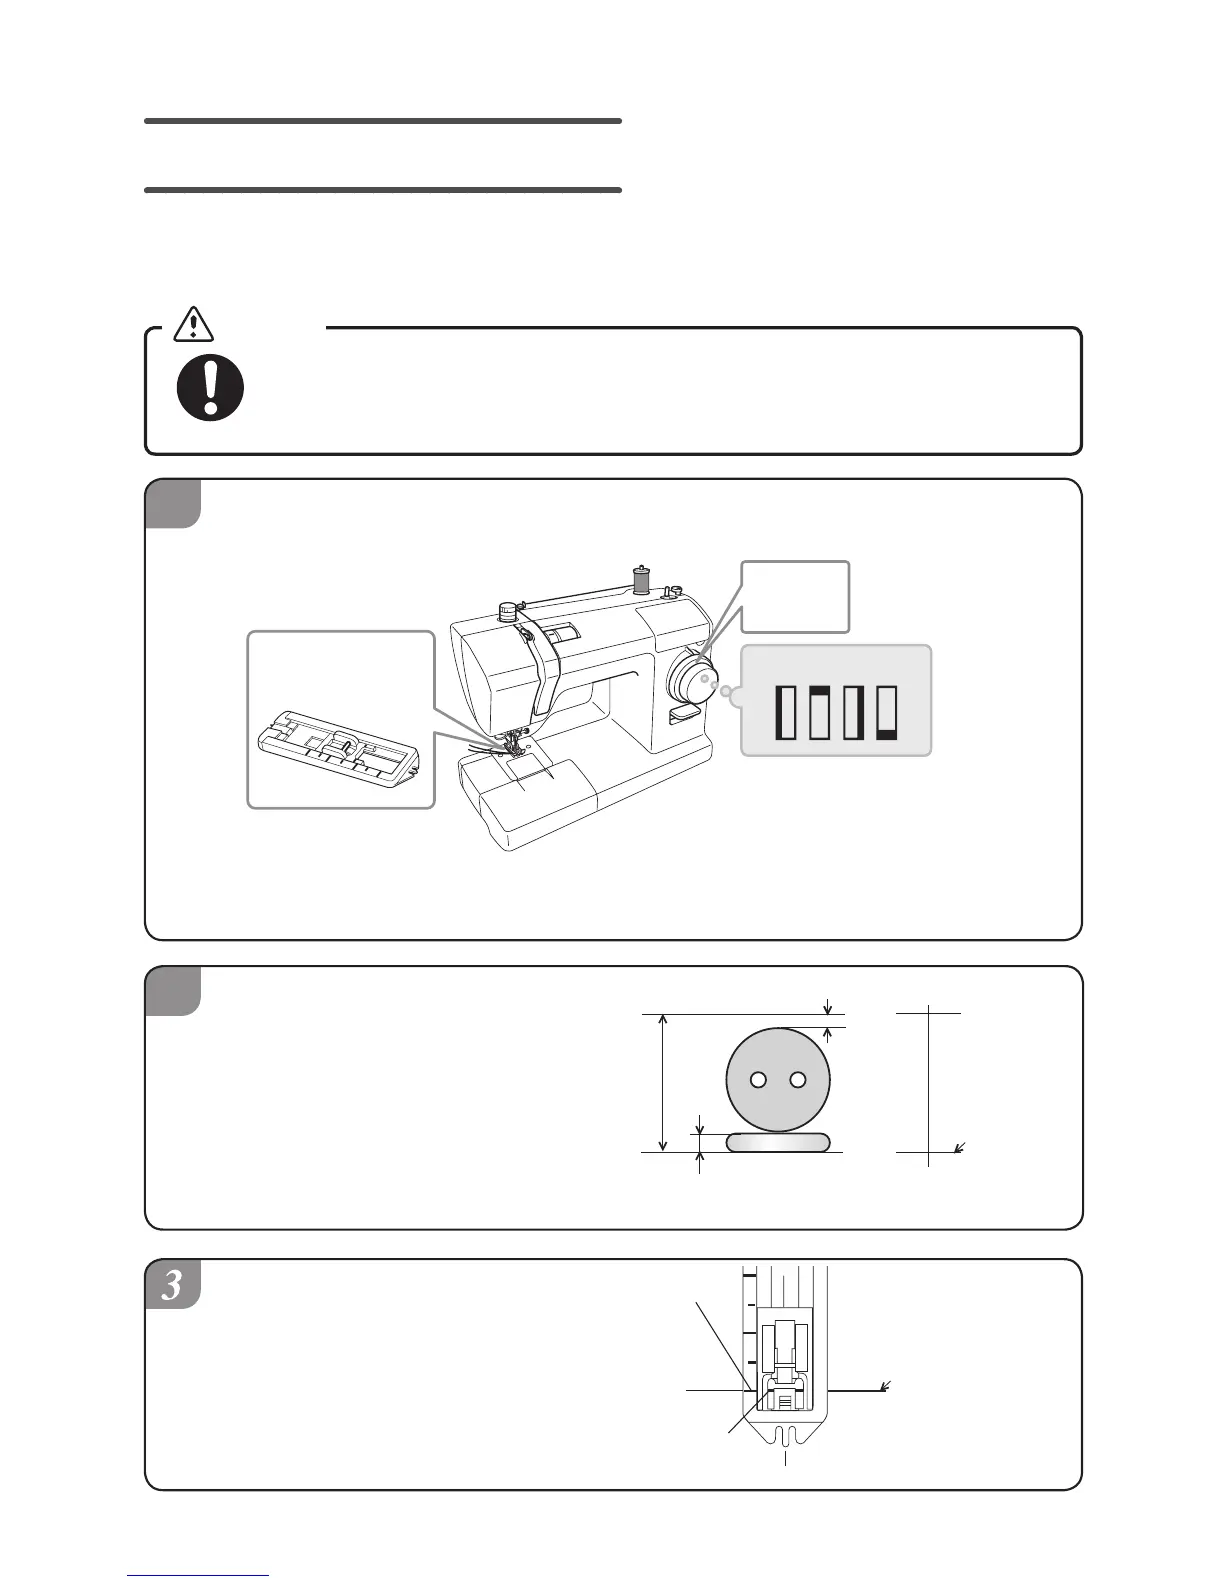
Center line
Buttonhole
size
3 mm
Button thickness
(Button diameter+button thickness+3mm)
Set the buttonhole size and
mark lines on the fabric.
Division line
Start line of sewing
Guide line
Align the buttonhole foot
division line closest to you
with the guide line, and lower
the presser foot to the start
line of sewing on the fabric.
Change to the buttonhole foot.
Set the stitch length dial between “0.4” and “1”.
Start line of
sewing
Center line
Before changing the presser foot, use the main power switch to turn
off the sewing machine.
Not doing so could cause an injury.
Caution
(For details on changing the presser foot, refer to “Changing the presser
foot” on page 26.)
0.4~1
 Loading...