Features and Controls
15
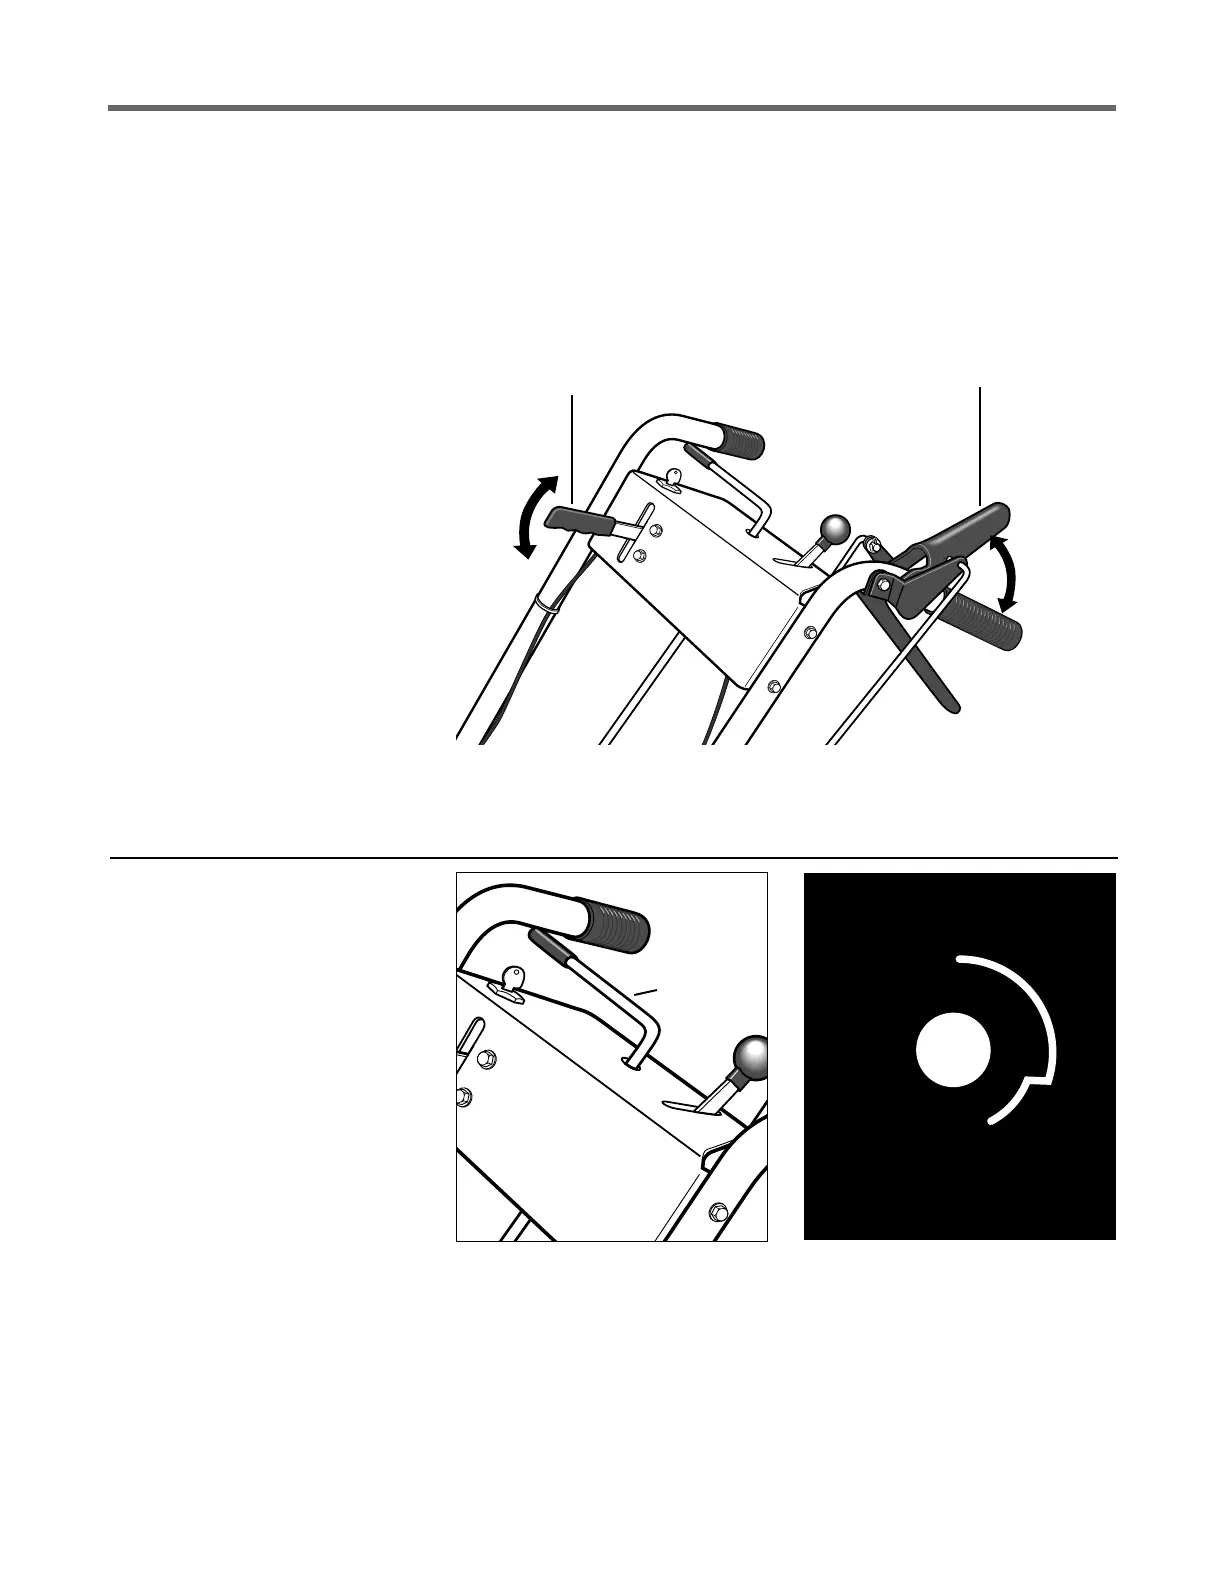
B – BLADE
DRIVE CONTROL
A – OPERATOR
PRESENCE CONTROL
Figure 3-2
Figure 3-3
Figure 3-4: Shift pattern on console.
Blade Drive Control
Use this lever (B, Figure 3-2) to
engage drive to the mower blades.
To engage the blades, first engage
the Operator Presence Control (A,
Figure 3-2). Then, push the spring-
loaded Blade Drive Control lever
(B) forward until it stays in the en-
gaged position.
To stop the blades, release the
Operator Presence Control (A).
Doing so will disengage the Blade
Drive Control (B) and automati-
cally apply the brake that stops the
blades.
When starting the engine, the
Blade Drive Control should be dis-
engaged (released). This helps to
ensure that the blades will not start
turning when the engine starts.
NOTE: Pushing the Blade Drive
Control forward will engage the
blades even though the Operator
Presence Control is not engaged.
However, this procedure is NOT
RECOMMENDED as you must
maintain constant pressure on the
lever (releasing lever disengages
blades). Always engage the
Operator Presence Control before
engaging the Blade Drive Control.
Gear Select Lever
This lever (C, Figure 3-3) is used
to select any of four forward
ground speeds (1 - Slow, 2 and 3 -
Medium, 4 - Fast), N (Neutral) and
R (Reverse). The gear shift pattern
is shown in Figure 3-4.
To avoid damaging the trans-
mission, do not shift gears when
the mower is moving. Select for-
ward ground speeds according to
mowing conditions and terrain (use
slower speeds in high grass or on
rough terrain).
For forward travel, move the
lever into one of the four numbered
settings. To select reverse, shift to
neutral and then pull up on the
lever. Turn the lever to the R (re-
verse) position and release the
lever.
Put the lever in N (neutral) to
manually push the mower and
when the mower is not in use.
 Loading...