Maintenance
26
Changing Oil
Change oil while engine is still
warm from recent operation.
Warm oil flows more freely and
carries away more impurities.
1. Stop engine, wait for parts to
stop moving, and disconnect
spark plug wire.
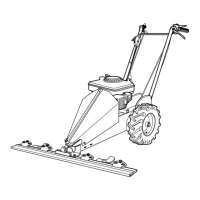
2. Remove dipstick (Z, Figure 5-1).
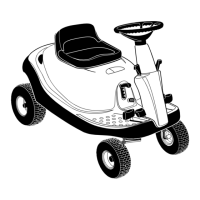
3. Remove protective cap (A,
Figure 5-2) to expose oil drain
port (B).
4. Push oil drain hose (D) (in-
cluded in hardware bag with unit)
onto oil drain port. Route other
end of hose to an appropriate oil
collection receptacle.
5. Twist oil drain fixture (C) to the
open position. Pull out. Drain oil
completely.
6. Push in and twist oil drain fix-
ture to the closed position. Remove
drain hose. Replace protective cap
(A).
7. Refill engine with fresh oil and
securely replace dipstick.
NOTE: Please dispose of all waste
materials in an ecologically re-
sponsible manner. Use proper
waste material storage containers
ENGINE CLEANING
• Stop engine, wait for parts to
stop moving, disconnect spark
plug wire, and allow engine to
cool before inspecting or clean-
ing engine.
• Daily or more often, before run-
ning engine, remove grass and
chaff from recoil finger guard or
rotating screen to prevent engine
damage caused by overheating.
Also keep cooling vanes, governor
linkage, springs and controls free
of debris.
• Daily or more often, before run-
ning engine, clean muffler area
(be sure muffler is cool) to remove
all grass and combustible debris.
If engine is equipped with a spark
arrestor screen, remove assembly
every 50 hours for
cleaning and inspection. Replace
if damaged.
• Grass or chaff may clog engine's
air cooling system, especially after
prolonged operation cutting tall,
dry grass. See engine owner's
manual for instructions on clean-
ing underneath the engine blower
housing.
AIR CLEANER SERVICE
Improper air cleaner maintenance
can cause engine damage. Refer to
the engine owner's manual for
more complete air cleaner service
information.
SERVICE SCHEDULE:
Outer foam pre-cleaner - wash and
re-oil every 25 operating hours or
every season, whichever occurs
first.
Inner paper cartridge - clean or re-
place every 100 operating hours or
every season, whichever occurs
first.
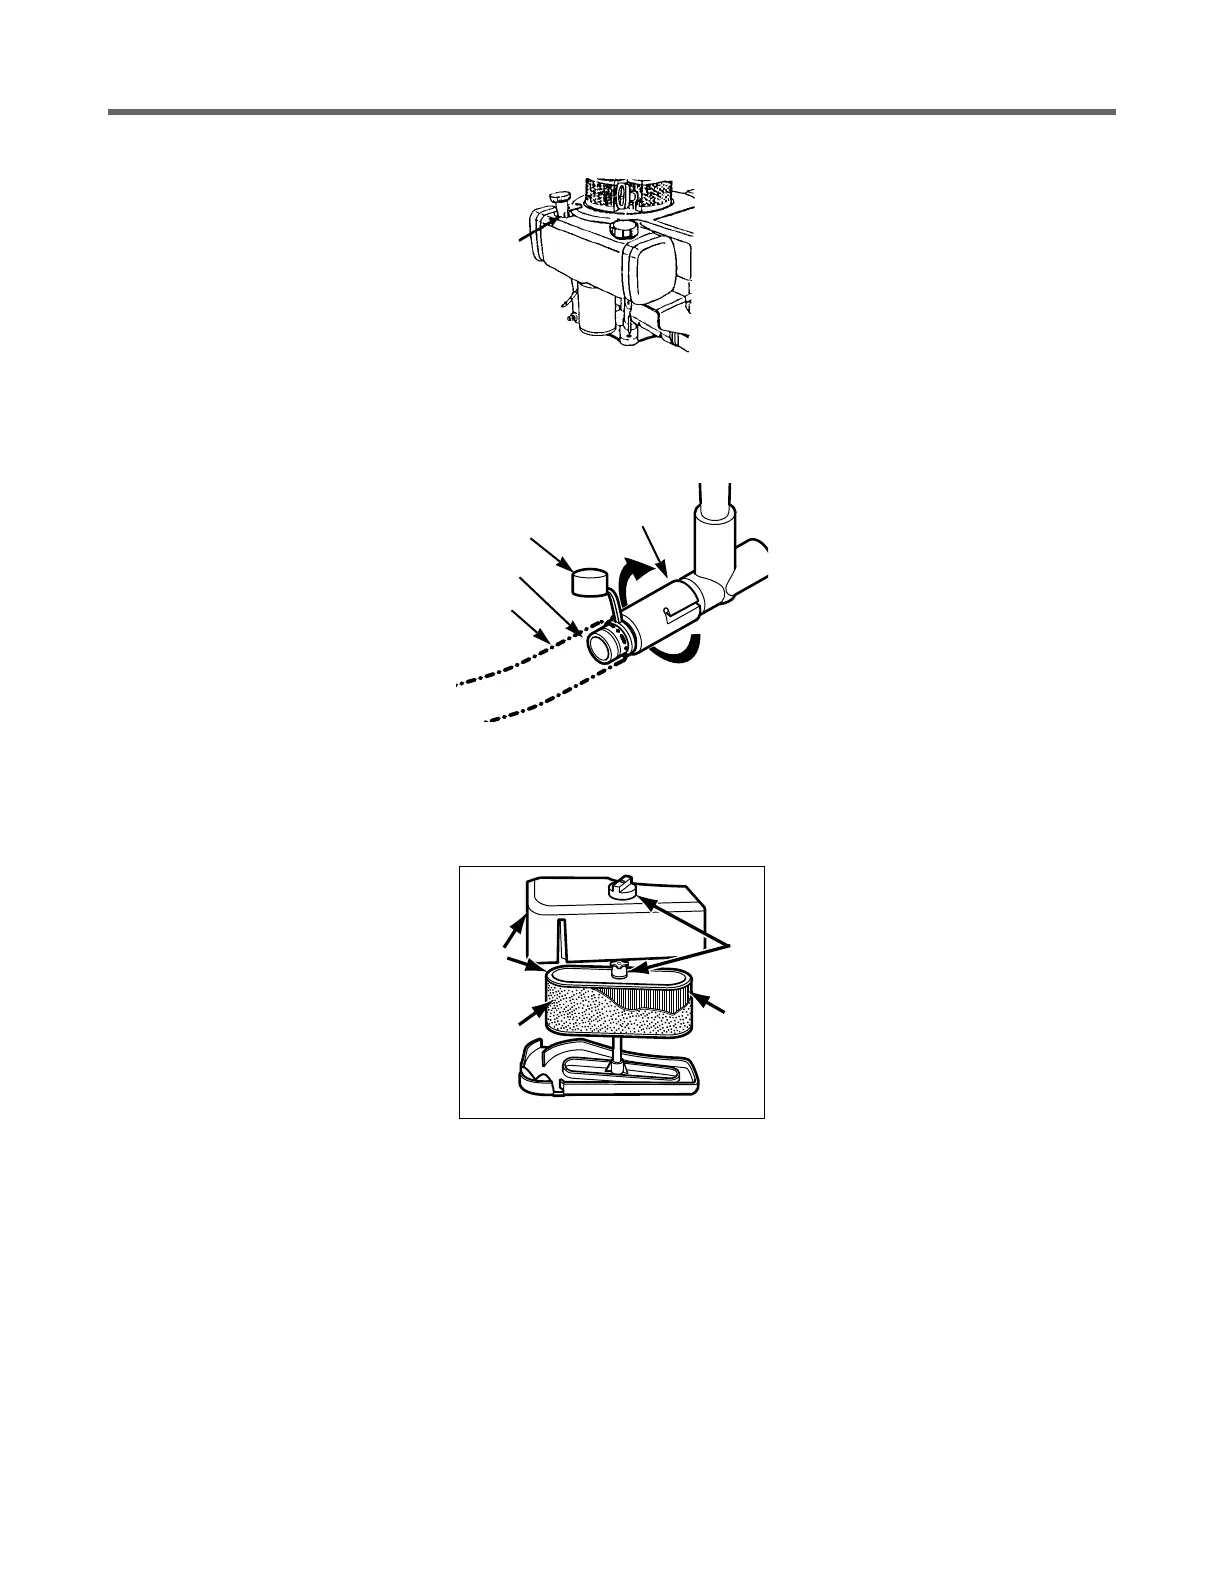
To Service Air Cleaner (Figure 5-3)
1. Stop engine, wait for parts to
stop moving, and disconnect
spark plug wire.
2. Unscrew mounting screws
and/or remove knobs (D). Remove
covers (E). Remove paper car-
tridge (B) and foam pre-cleaner
(A). Separate foam pre-cleaner
from paper cartridge.
3. Wash foam pre-cleaner (A) in
liquid detergent and warm water.
Squeeze dry in a clean cloth.
4. Saturate foam pre-cleaner in
clean engine oil. Wrap in clean,
absorbent cloth and squeeze to re-
move all excess oil.
5. Replace paper cartridge (B) if
necessary.
6. Reassemble air cleaner compo-
nents. Tighten knobs/screws (D)
securely. Secure cover assembly
(E) on air cleaner body.
Figure 5-1: Briggs and Stratton en-
gine oil fill.
Figure 5-2: Oil drain.
Z
C
A
B
D
Figure 5-3: Briggs and Stratton air
cleaner assembly.
E
D
B
A
 Loading...