33
Top
1
3
2
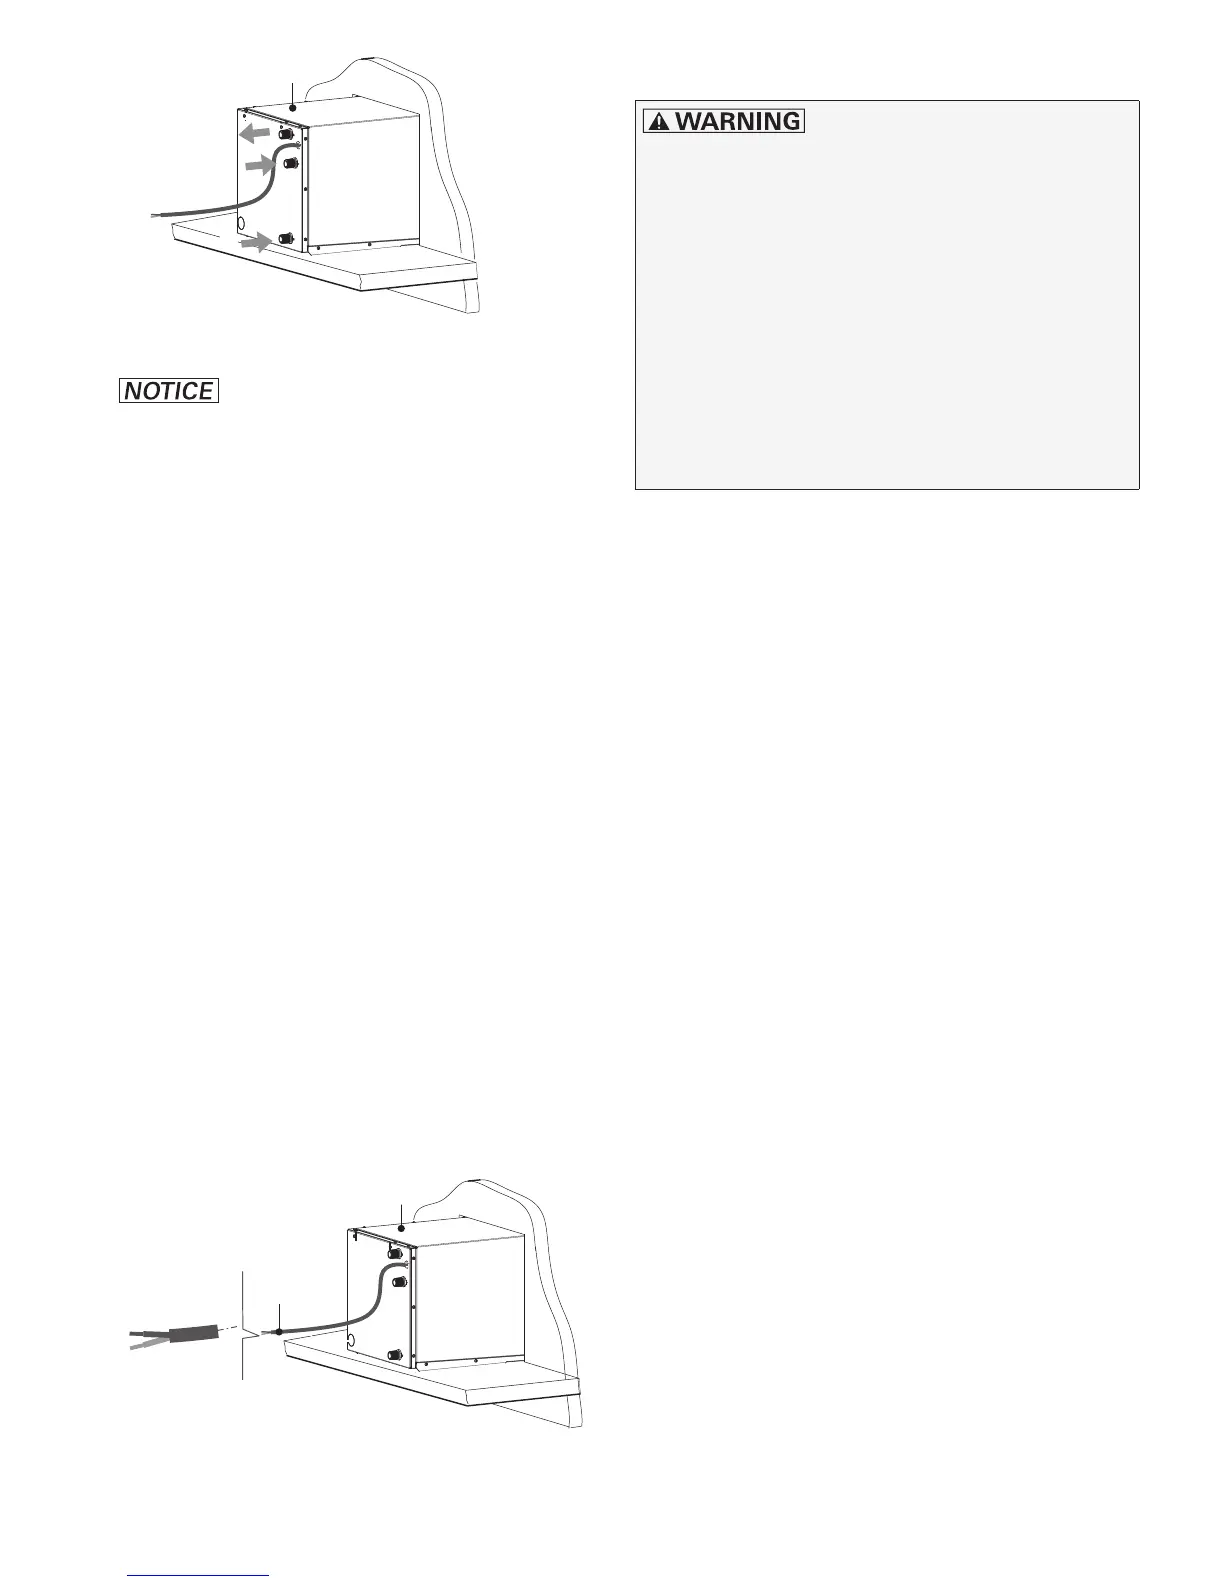
Fig. 24
• Damage to the appliance and
the connections!
– Make sure that no gas lines, water hoses
or electrical lines are kinked or pinched.
– When establishing the water connections,
observe the installation instructions and
torques specified by the manufacturer.
• Connect the hose for cold water (1) at the
bottom of the appliance.
• Connect the hose for hot water (2) at the top
of the appliance.
• Model AquaGo® comfort plus only:
Connect the hose for the circulation line (3).
• Check all connections for water leaks.
– Repair leaks as needed.
– Repeat check for water leaks and take
any necessary steps to repair the leaks at
all water connections.
• Connect the electrical lines with the proper
polarity to the 12 V DC power supply. Refer
to “Electrical connection for all models” on
page31). Install a 7.5 A fuse (see Fig. 20).
Top
+ red
– black
12 V DC
Fig. 25
Gas connection
Risk of explosion or poisoning due to
improper installation!
• Permit only a certified service technician
to perform installation.
• Make sure that the manual shut-off valve
in the gas line of the appliance is closed.
• Make sure that the gas line is centered
and tension-free when it enters the grom-
met so that the gas line will not abrade
the grommet.
• Make sure that the gas line has an
SAE 45° Flare Female connector.
Additional rules for the appliance gas con-
nector.
• Make sure that the gas line is free of dirt,
chips, etc.
• Never use pipe dope on a flare fitting. The
flare fitting is a dry seal.
Connecting the gas line (gas side
connection)
• Only AquaGo® comfort /
AquaGo® comfort plus (with control panel)
– Feed the control panel cable (approx.
10 in. (25 cm)) from outside through the
gas pipe grommet (side).
– Attach the control panel cable to the con-
trol unit.
– Hook the control panel cable on to the clip.
• Guide the prepared gas line through the gas
pipe grommet (side).
• Screw the gas line’s union nut (wrench size
3/4 in. (19 mm)) onto the appliance’s gas
connection so it is finger-tight.
 Loading...