41
APPENDIX E – Notes for painting the access door and cover plate
Important Information
Observe all safety notes/instructions for
painting the access door and cover plate.
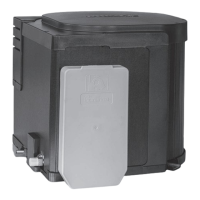
The following parts (see Fig. 37) may be
painted:
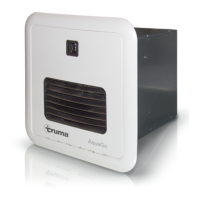
• The white cover plate
• The white outer surfaces of the access door
Material of the parts:
• The parts are made from a polycarbonate
material.
• Check whether the paint to be used is suit-
able for polycarbonate.
• For optimum adhesion of the paint it may be
necessary to apply a primer to the surfaces
that will be painted.
• Use of unsuitable paints may
damage the parts. Follow the recommenda-
tions of the paint manufacturer.
The following parts (see Fig. 36) must not
be painted:
• The black venting grid
• The turn lock
• The webbings
Work before painting
In order to simplify painting and reduce the
work for masking, the turn lock and the
venting grid can be removed/disassembled.
Please follow the steps below to remove
the venting grid and the turn lock:
1. Open the access door.
2. Remove the venting grid:
• Using a Torx T-15 remove the 4 screws
securing the venting grid to the access
door.
• After removing the screws, depress the
four (4) clips on the side of the venting
grid and remove it as shown in Fig. 36.
3. Remove the turn lock:
To remove the turn lock, depress the four (4)
clips and remove it as shown in Fig. 36.
4. Mask the venting grid opening from the back
side (side with waffle pattern).
5. Close the access door and fix it in the closed
position for painting.
• This can be done with help of tape that
joins the flue fan and the edge of the turn
lock opening (see Fig. 37 for this detail).
• Remove any tape that hangs over the
edge by more than 0.12 in. (3 mm).
• Finally mask the turn lock opening with
tape (hatched area). Take care not to ex-
ceed 0.12 in. (3 mm) from the edge (this
is the area that will be covered by the
turn lock).
6. Paint the access door and the cover plate.
Work after painting
7. Remove all masking.
8. Assemble the venting grid and the turn lock
in the reverse order. Make sure that they are
installed in the right direction.
9. Ensure turn lock operates correctly (if un-
sure: see “Closing the access door“ on
page9).
 Loading...