66250980-EN - V1.0 - 06/02/14
10
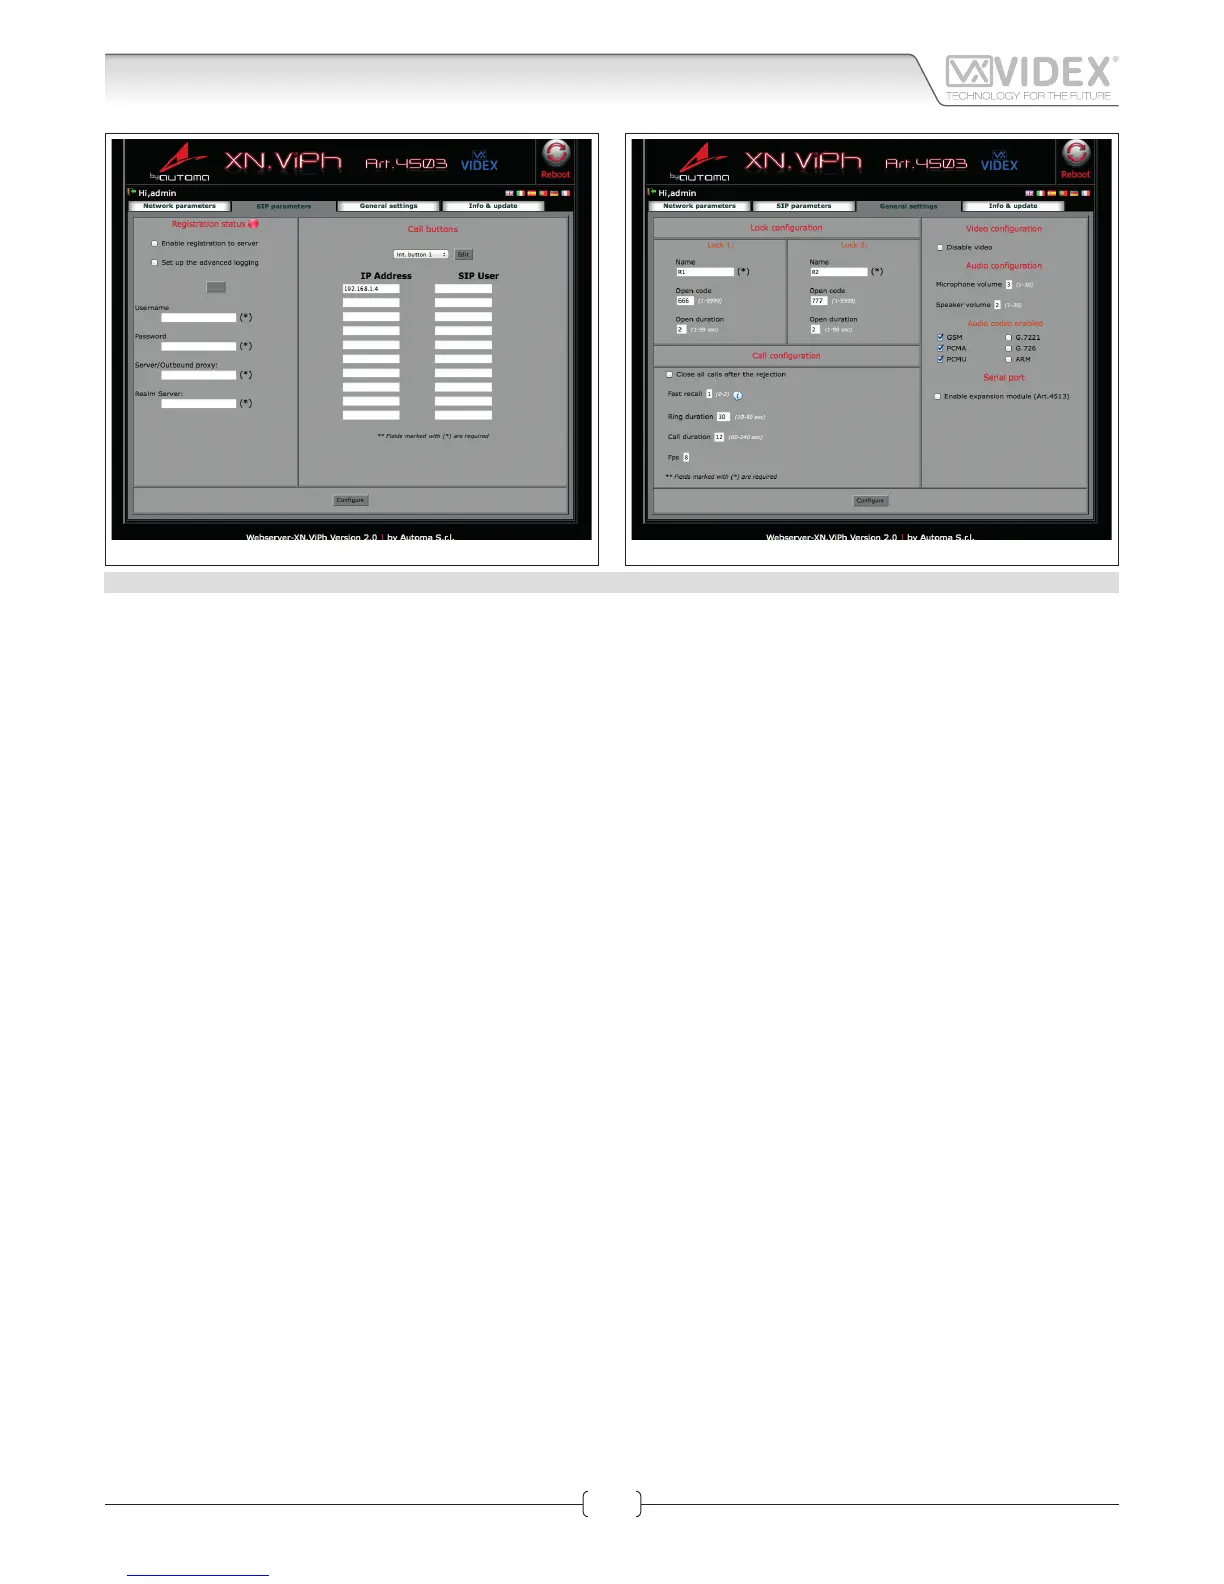
Fig. 3 SIP parameters & Call Buttons
Fig. 4 General Settings
SIP PARAMETERS & CALL BUTTONS
In this section it is possible to enable SIP server communication and address the call buttons to call IP addresses or SIP ID’s of other
devices such as videophones, tables, smartphones or PC’s. Fig. 3
The use of the module in combination with a SIP server is an additional feature, if you are not using the IP speaker unit module with
a SIP server you don’t need to set the relevant elds but it is always necessary to set the IP addresses to be called when a specic
button is pressed.
For the correct setup of the “SIP SERVER CONNECTION” elds, it is necessary to know the specic parameters of the SIP server to
which you are connecting the device.
Note: You need to press the edit button if you are changing previously stored settings.
If you are using a simplied SIP registration ( “setup advanced logging” unchecked) the following parameters are requested:
• Username: it is the username used during the SIP account/extension generation on the SIP server.
• Password: it is the password for the username above used during the SIP account/extension generation on the SIP server.
• Server/Outbound proxy: is the server machine with name of DNS:port or IP:port
• Realm server: is the SIP protocol used
If you check “setup advanced logging” the following additional parameters are required:
• Extension: it is the numeric extension code generated on the SIP server for the username above.
• Domain: it is the domain of the service where you will try to register with. It can be an IP address or a fully qualied domain.
After completing the SIP server connection elds remember to check the “Enable registration to server”.
Press the “Congure” button followed by “Apply conguration”. A short countdown signals that the device is updating the changes.
If the setup is correct, after a while, the “Registration Status” indicator should switch from RED to GREEN.
The dierent colours of the “Registration Status” indicator have the following meanings:
RED: registration to SIP server not enabled;
GREY: registration to SIP server enabled but the status is still not recognized;
ORANGE: registration to SIP server enabled but the server has still not conrmed the registration;
GREEN: registration to SIP server enabled and the server has conrmed the registration.
CALL BUTTONS
This subsection addresses the call buttons (2 integral to the module and up to 64 using the special interface module Art.4513 com-
bined with standard expansion modules Art.4842..45).
• From the dropdown list, select the button for which you want to set the destination addresses.
• For the currently selected button, under the dropdown list, 10 elds will appear for IP addresses and 10 elds for SIP addresses.
• If you are using a connection to a SIP server, ll in the SIP Extension elds otherwise ll in the IP Address elds (from 1 to 10, each
button can call up to 10 devices).
• After completing all the necessary elds for the currently selected button, press “Congure” followed by “Apply conguration”. A
short countdown signals that the device is updating the changes.
• Repeats the steps above for each button on your device.
When a button is pressed it will call all the addresses for that call button simultaneously.
Art.4503 IP Video Speaker Unit Module
Web Server
 Loading...