66250980-EN - V1.0 - 06/02/14
9
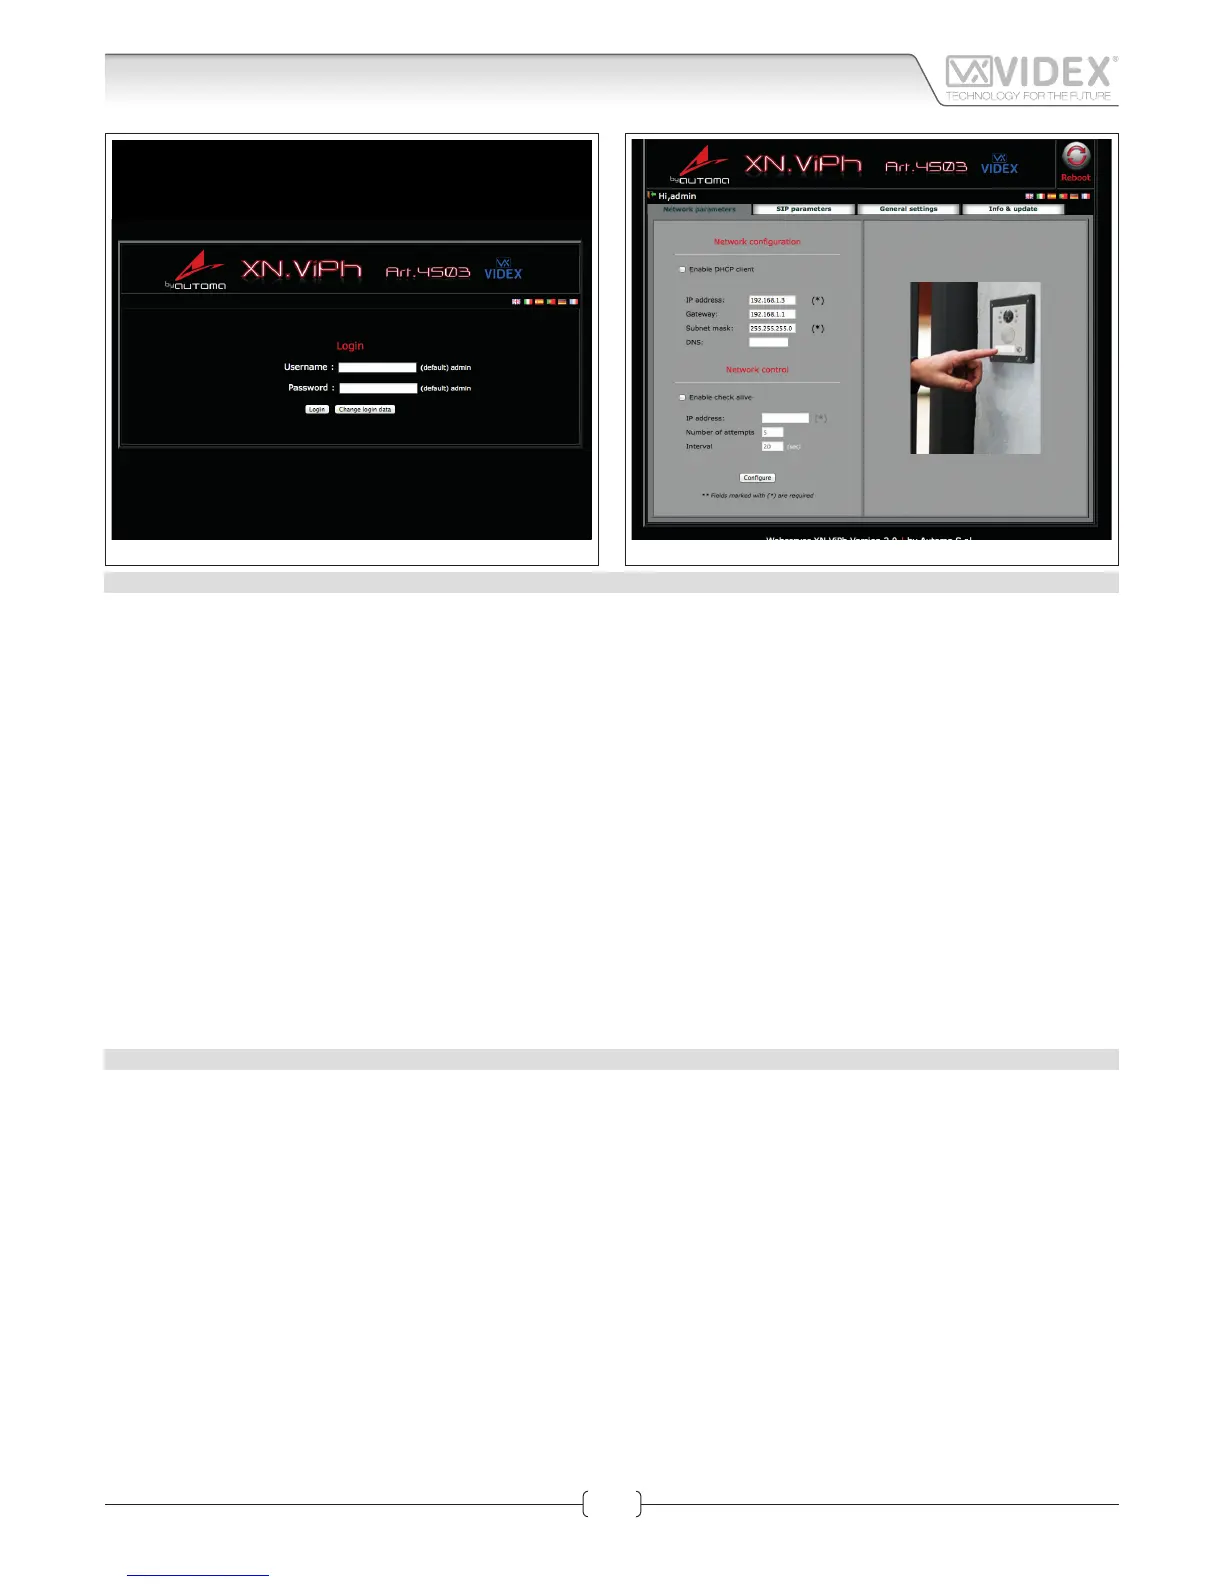
Fig. 1 Login
Fig. 2 Network parameters
LOGIN PAGE
It is recommended that this device is installed by an engineer with an understanding of Ethernet installations and TCP/IP protocols.
In the case of installations using existing networks it maybe necessary to request information from the network administrator.
More than one unit can be installed on a system. Each unit must have a unique IP address which is not currently in use on that
network.
The default network parameters are:
• Static IP Address: 192.168.1.3
• Subnet mask: 255.255.255.0
• User Name: admin
• Password: admin
If the default IP address on the device is free and in range with your network then, from a PC, tablet or smartphone connected to
the same network, open a browser and enter the URL “http://192.168.1.3”.
Alternatively if the default IP address is not compatible with your network it will be necessary to change this as shown in the
“Art.4503 Hardware setup” section on page 2.
The internal webserver will show the login page of Fig. 1.
Enter the user name and password then start to setup the IP module through the dierent tabs.
In case of problems or mistakes, the module can be restored to the factory preset following the procedure described in the section
“Restore the factory preset” on page 3.
NETWORK PARAMETERS
This tab allows the editing of all network parameters Fig. 2.
NETWORK CONFIGURATION
“Enable DHCP Client” allows the unit to obtain a dynamic IP address from the network. It is better to leave it disabled and use a xed
IP address.
Edit the elds of the subsection “Network conguration” (Refer to the Network Settings paragraph on page”Network settings” on page
12 of this manual) according to the network requirements then press the “Congure” button followed by “Apply conguration”.
A short countdown signals that the device is updating the changes.
NETWORK CONTROL
“Enable Check Alive” enables the device to constantly check the ethernet connectivity.
When this option is set, the module will repeatedly check connection with the IP address entered and if connection is lost will force
a reboot of the unit. If you enable this setting you must set the IP address to ping, the number of connection attempts and the time
interval between the attempts. Enable this function when network connection problems could exist.
After changing this setting, press the “Congure” button followed by “Apply conguration”.
A short countdown signals that the device is updating the changes.
Art.4503 IP Video Speaker Unit Module
Web Server
 Loading...