8 | Unite Configuration Interface
20 / 37 5111967A OI-II Webasto Unite
NOTE
Wi-Fi hotspot limitations
u
The web configuration interface via Wi-Fi hotspot is
limited to a maximum of 3 users.
u
The web configuration interface via Wi-Fi hotspot
only works on the 2.4 GHz band.
8 Unite Configuration
Interface
The Unite Configuration Interface has a horizontal top menu bar
which provides the following functions:
– Logout
The Log out button on the upper right corner of the
screen enables you to exit the User Configuration Inter-
face. log out.
– Change password
– Display language
The drop-down list on the left of the Log out button
enables you to change the web configuration interface
language.
Available languages are: Czech, Danish, English, French, Ger-
man, Hungarian, Italian, Norwegian, Polish, Romanian, Slov-
akian, Spanish, Swedish, Turkish.
The boxes are configured in English by default.
The top bar also provides access to the following pages:
– Main Page - see also: chapter8.1, "Main page" on page
20.
– General Settings - see also: chapter8.2, "General Set-
tings" on page 20
– Installation Settings see also: chapter8.3, "Installation
Settings" on page 20
– OCPP Settings - see also: chapter8.4, "OCPP Settings"
on page 22
– Network Interfaces - see also: chapter8.5, "Network In-
terfaces" on page 22
– Standalone Mode - see also: chapter8.6, "Standalone
Mode" on page 23
– Local Load Management
– System Maintenance - see also: chapter8.8, "System
Maintenance" on page 25
– Firmware Update Screen Flow
8.1 Main page
After logging in successfully, you are directed to the main page.
The main page shows general information about the device
such as software versions, connection interface and IDs.
8.2 General Settings
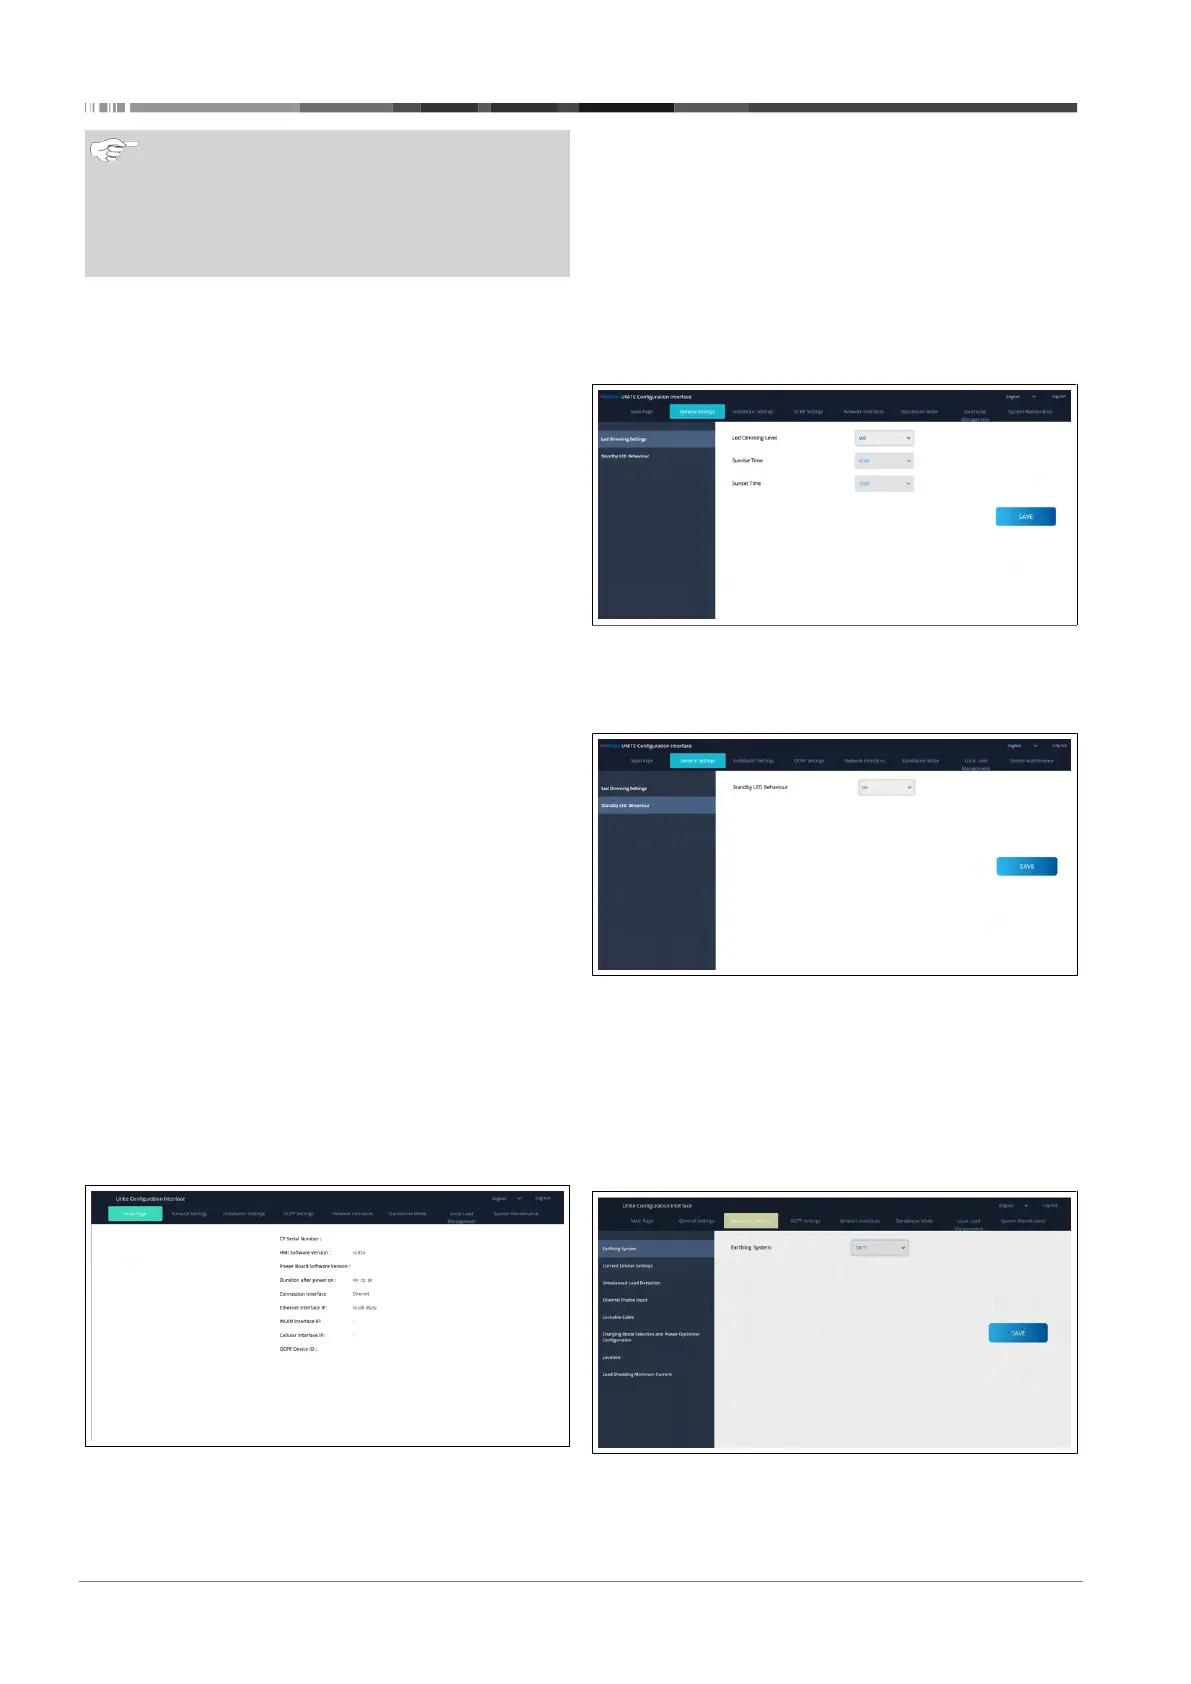
8.2.1 Setting the LED dimmer
To adjust the brightness level of the LED ring, select the desired
option in the drop-down list.
If you select the LED dimming level as “Time Based”, then the
options “Sunrise Time” and “Sunset Time” are shown and can
be configured. “Sunrise Time” defines the transition time of low
to high dimming level. Similarly, “Sunset Time” defines the
transition time of high to low dimming level. Sunrise and sunset
time-based configuration is a periodic daily setting.
8.2.2 Setting the standby LED behavior
To enable standby LED behaviour, select “On” in the drop-down
list. When set to "Off" the LED indicator is not illuminated when
in standby. The default setting is "On".
8.3 Installation Settings
8.3.1 Earthing system
Select the Earthing System tab from the web configuration in-
terface.
If you select earthing type IT, then the protective earth error
check is disabled.
The earthing type is set to TN/TT by default in the web config-
uration interface.

 Loading...