Xerox
®
N60w Scanner Scan Settings and Preview
5-2 User Guide
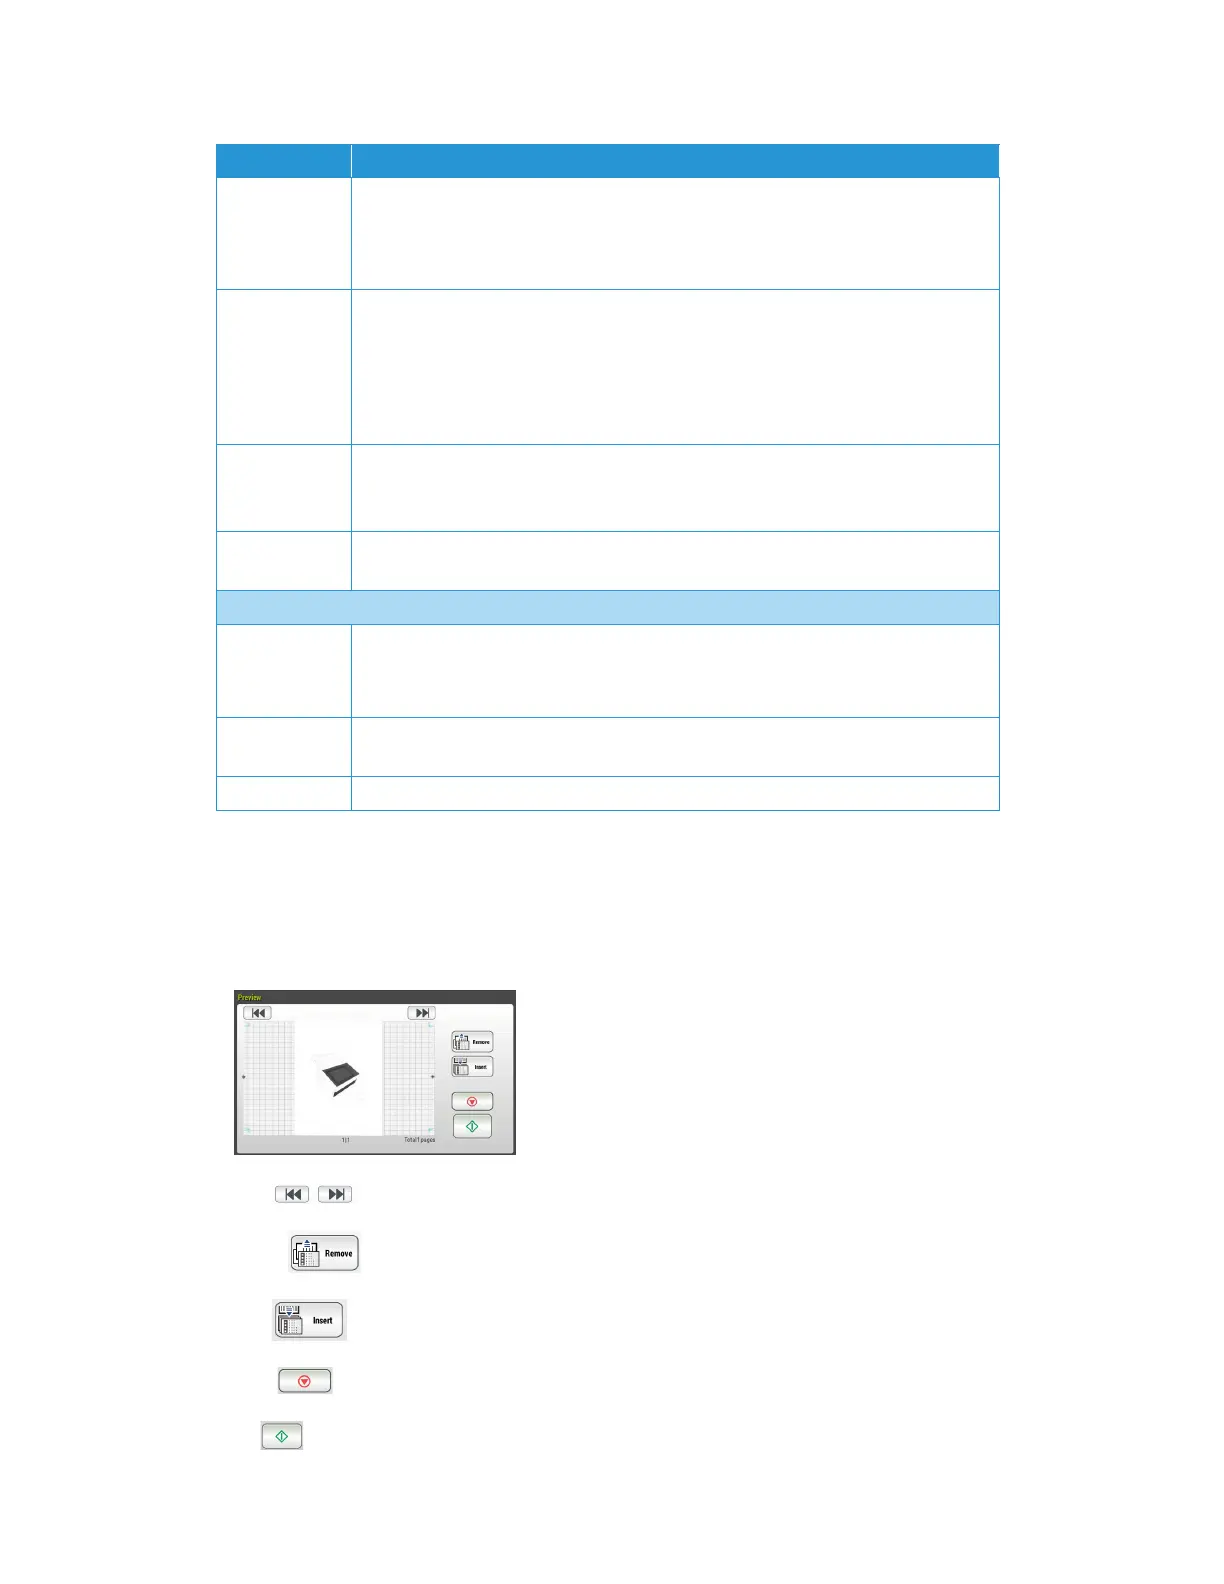
Preview
Check if the scanned image is correct. Once the scan is complete, the preview image will be
displayed.
Arrows : Navigate between pages.
Remove : Delete the displayed page.
Insert : Insert a new page (initiates a new scan).
Cancel : Delete the entire scan job.
Scan : Processes the scan to its defined destination.
Quality/File
Size
Choose the quality level of your scanned image. The higher the quality, the larger file
size.
Select: Normal Quality/Small File (default), Higher Quality/Larger File, Highest Quality/
Largest File
Document
Ty p e
Choose your document type.
Select: Mixed (default), Photo, Text
Mixed: Suitable for common business document with photo or text.
Photo: Suitable for document that contains photos.
Tex t: Suitable for document contains that pure text.
Multifeed
Detection
Enable the Multifeed Detection via ultrasonic unit. Ultrasonic Detection allows you
to set overlapped document by detecting paper thickness between documents.
Select: On/Off (default)
Highlight Used to adjust the brightness of the entire image. The smaller the number, the higher
the brightness. Range: 128-255 (default)
Layout Adjustments
Original Size Select scan area.
Auto: Let the machine automatically detect the scan area according to your original.
Detectable size: 4x6, 5x7, A4, LTR (Letter), LGL (Legal)
Auto
Orientation
When Auto Orientation is turned On, images can be rotated to their proper
orientation based on their contents. By default, it is set to Off.
Preview On/Off Use the toggle to enable or disable the preview.
Item Description
 Loading...