VESDA by Xtralis VESDA Pipe Network Installation Guide
www.xtralis.com 17
5 Installing Pipe Networks
Pipe network designs are specific to a site and are dependant upon site conditions, the application, customer
requirements and local codes and standards. Installing pipe networks requires knowledge of the components
used, guidelines that should be followed, and an understanding of the more commonly used air sampling
options. For information on the theory of pipe networks refer to the VESDA Pipe Network Design Guide.
This section of the manual contains the instructions for installing pipe networks into the common types of
sites. For information on installing pipe networks to specialized environments refer to the VESDA Application
Design Guides.
5.1 Ceilings and Floors
5.1.1 On Ceiling
On-Ceiling installation is the most common type of installation and is often installed in a standard room not
having any special requirements. The pipes are installed directly onto the ceiling of the area to be protected.
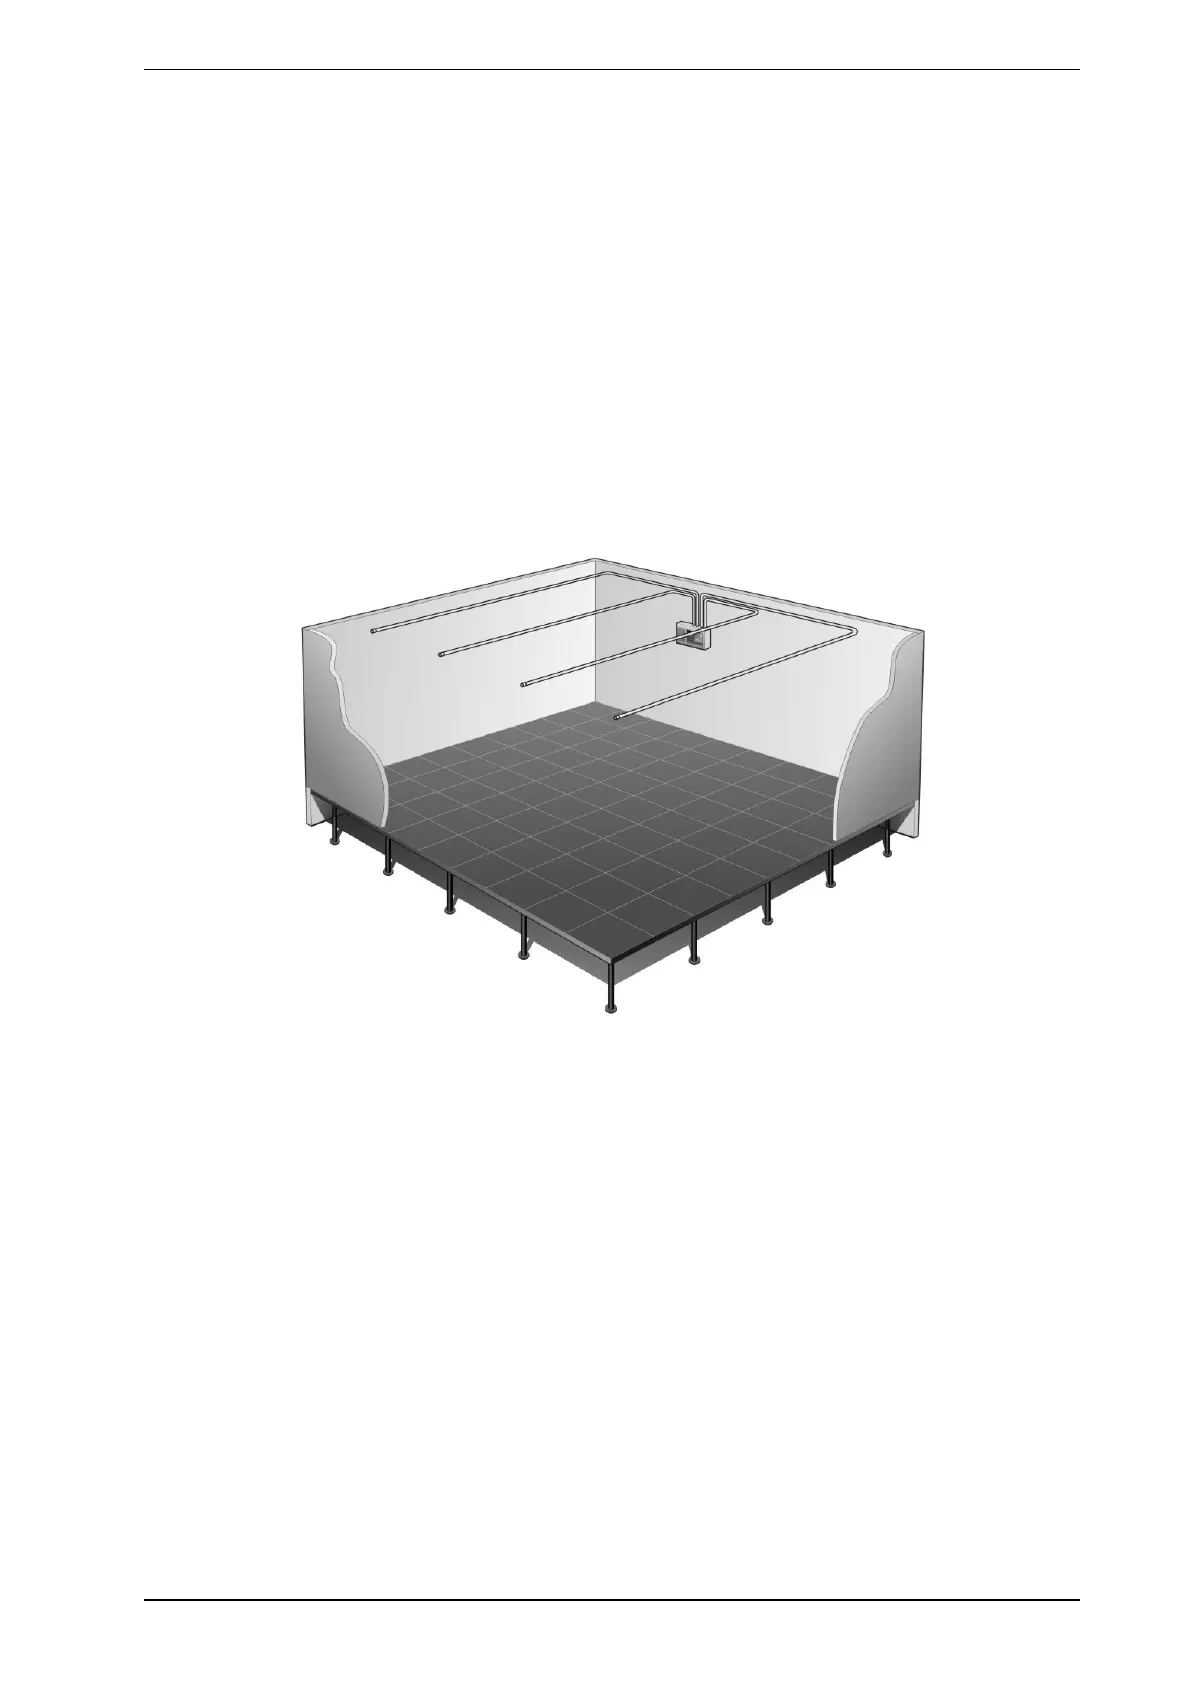
Figure 5-1: Typical on-ceiling installation
The normal procedure for installing an on-ceiling pipe network is:
1. Check the design documents to gather information on the size and configuration of the pipes. The
design documents could include pipe network design specifications, or an ASPIRE Installation Data
Pack (IDP) or a pre-engineered design.
2. Mark the spot where the detector is to be installed.
3. Measure and mark the spots for pipe mounting clips as per the design documents.
4. Install the detector. For further information refer to the detector documentation.
5. Secure the pipe mounting clips to the ceiling ensuring that the distance between the ceiling and the
pipe is according to the design documents.
6. Mount and join the pipes onto the clips, as per the guide lines in Section 4.4 on page 14. Do not glue the
pipes at this stage.
7. Drill sampling holes in the pipe ensuring that the spacing between sampling holes is as per the design
documents and the holes are at the correct orientation.
8. Check to see if the design documents require end caps with holes. Install as required.
9. Run the pipe to the detector.
10. Insert the pipes into the detector ensuring there is a minimum of 500 mm (20 in.) of straight pipe before
the pipe enters the detector. Do not glue the pipes to the detector manifold.

 Loading...