Periodic maintenance and adjustment
9-32
9
4. Insert a new bulb into the socket.
5. Install the socket (together with
the bulb) by turning it clockwise.
EAUU1121
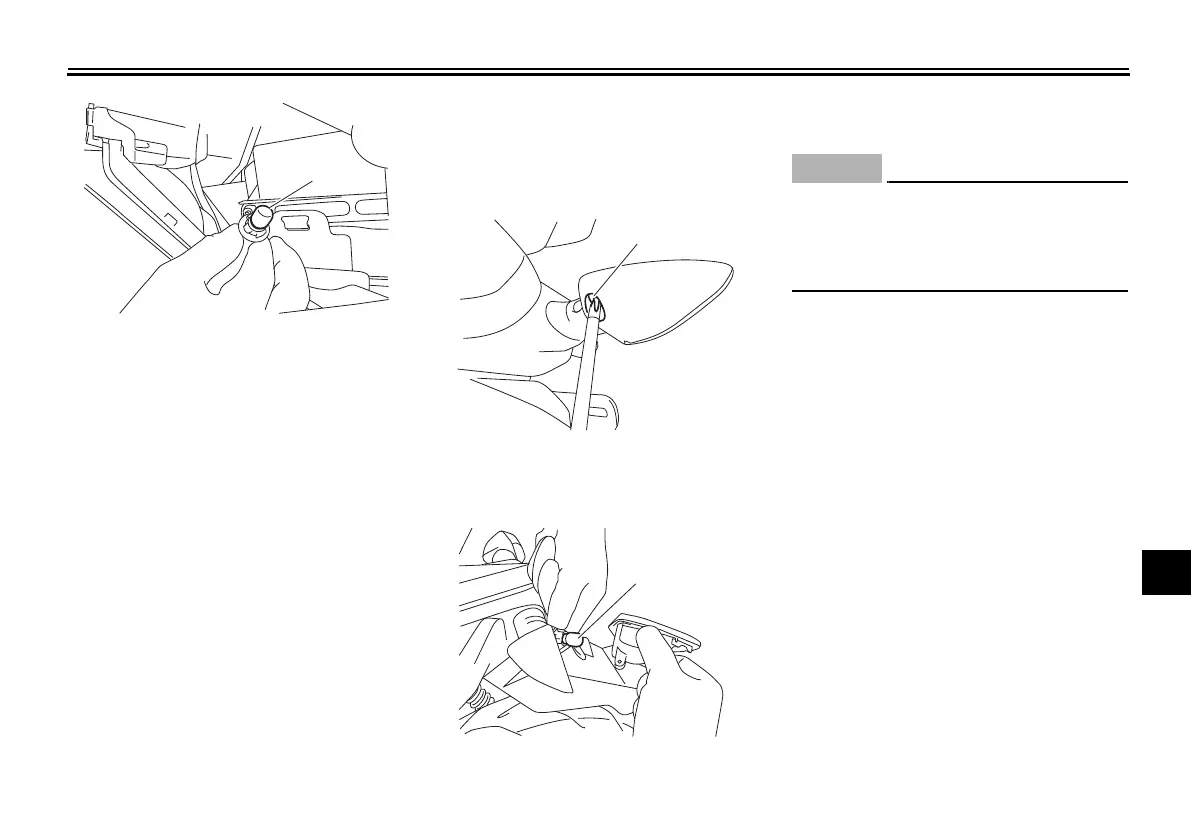
Replacing a rear turn signal
light bulb
1. Remove the rear turn signal lens
by removing the screw.
2. Remove the burnt-out bulb by
pulling it out.
3. Insert a new bulb into the socket
by pushing it in.
ECAU0081
If a turn signal light bulb of different
wattage than recommended is used,
the turn signal light flashing may be
affected.
4. Install the lens by installing the
screw.NOTI CE: Do not over-
tighten the screw, otherwise the
lens may break.
[ECA11192]
1. Turn signal light bulb
1. Screw
1. Turn signal light bulb
UBF6EYE0.book Page 32 Friday, July 14, 2017 3:39 PM
 Loading...