16
RX-V861/HTR-6080/DSP-AX861SE/DSP-AX861
RX-V861/HTR-6080/DSP-AX861SE/
DSP-AX861
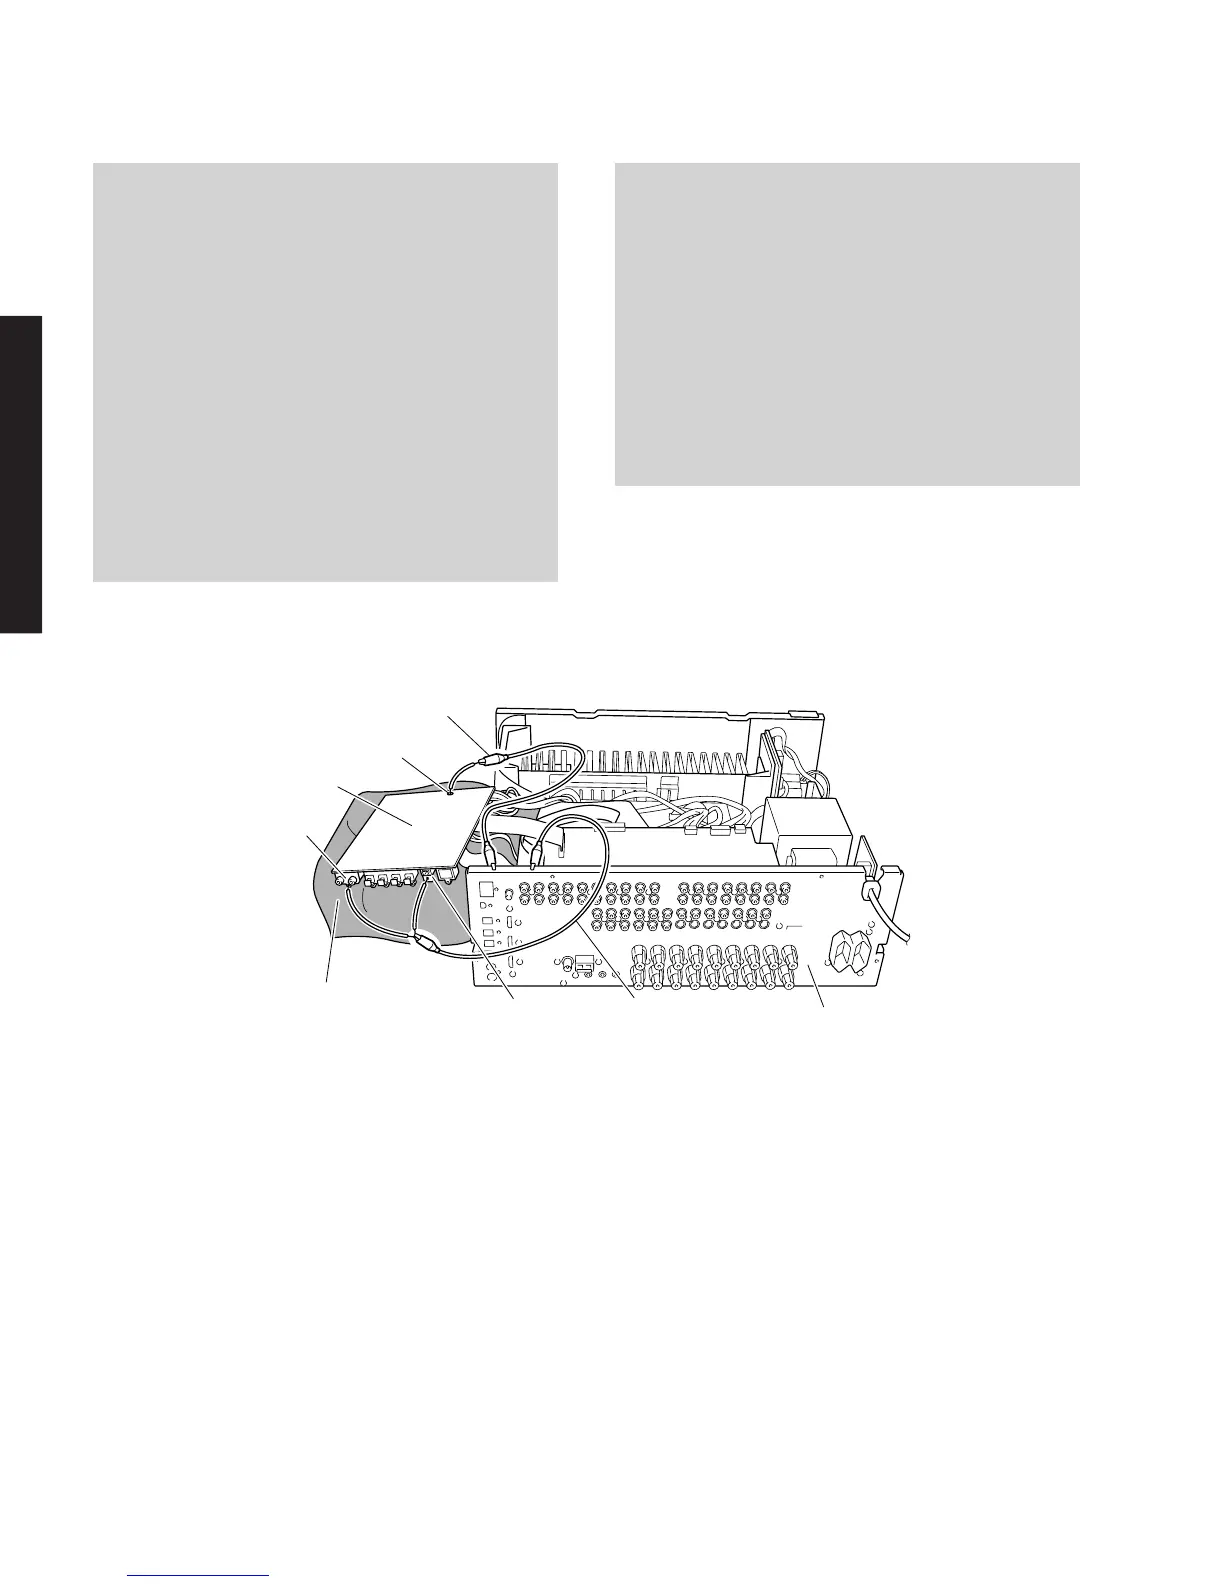
Fig. 4
P.C.B.チェックをする場合には:
・ 本機の上にゴムシートと布を敷き、その上にDSP
P.C.B.を裏返しに置いてチェックします。(Fig.4)
・ 外したケーブル(コネクター)をすべて接続します。
・ カード電線を接続する際、極性に注意してください。
・ 本機ではP.C.B.のアースがリアパネルおよびシャーシ
に接続されています。
DSPP.C.B.をリアパネルおよびシャーシより取り外
した場合、リード線等でアースポイントをリアパネル
またはシャーシに接続してください。(Fig.4)
DSPP.C.B.:G601 (Ground)
DSPP.C.B.:PJ41 (COAXIALIN)
DSPP.C.B.:CB41/ST41(Ground)
When checking the P.C.B.:
• Put the rubber sheet and cloth over the equipment.
Then place the DSP P.C.B. upside down on the cloth
and check it. (Fig. 4)
• Reconnect all cables (connectors) that have been
disconnected.
• When connecting the flexible flat cable, be careful
with polarity.
• In this unit, the ground of P.C.B.s shown below is
connected to the rear panel and chassis.
When DSP P.C.B. is removed from the rear panel
and chassis, connect the ground point to the rear
panel or chassis, using a ground lead or such. (Fig. 4)
DSP P.C.B.: G601 (Ground)
DSP P.C.B.: PJ41 (COAXIAL IN)
DSP P.C.B.: CB41/ST41 (XM: U, C models / Ground:
R, T, K, A, B, G, E, L models)
Ground lead
アース線
Ground lead
アース線
CB41/
ST41
PJ41
G601
DSP P.C.B.
Rubber sheet and cloth
ゴムシートと布
Rear panel
リアパネル
 Loading...