25
RX-V861/HTR-6080/DSP-AX861SE/DSP-AX861
RX-V861/HTR-6080/DSP-AX861SE/
DSP-AX861
SW301
FLASH
UCOM
OTHER
RS232C cross cable /
RS232Cクロスケーブル
RS232C conversion adapter /
RS232C変換アダプター
Flexible flat cable (9P) / カード電線(9P)
Serial port (RS232C) /
シリアルポート(RS232C)
Writing port / 書き込み用ポート
PC
Rear panel
DSPへの書き込みWriting to DSP
1. 本機の電源を切り、電源コードをACコンセントから抜
きます。
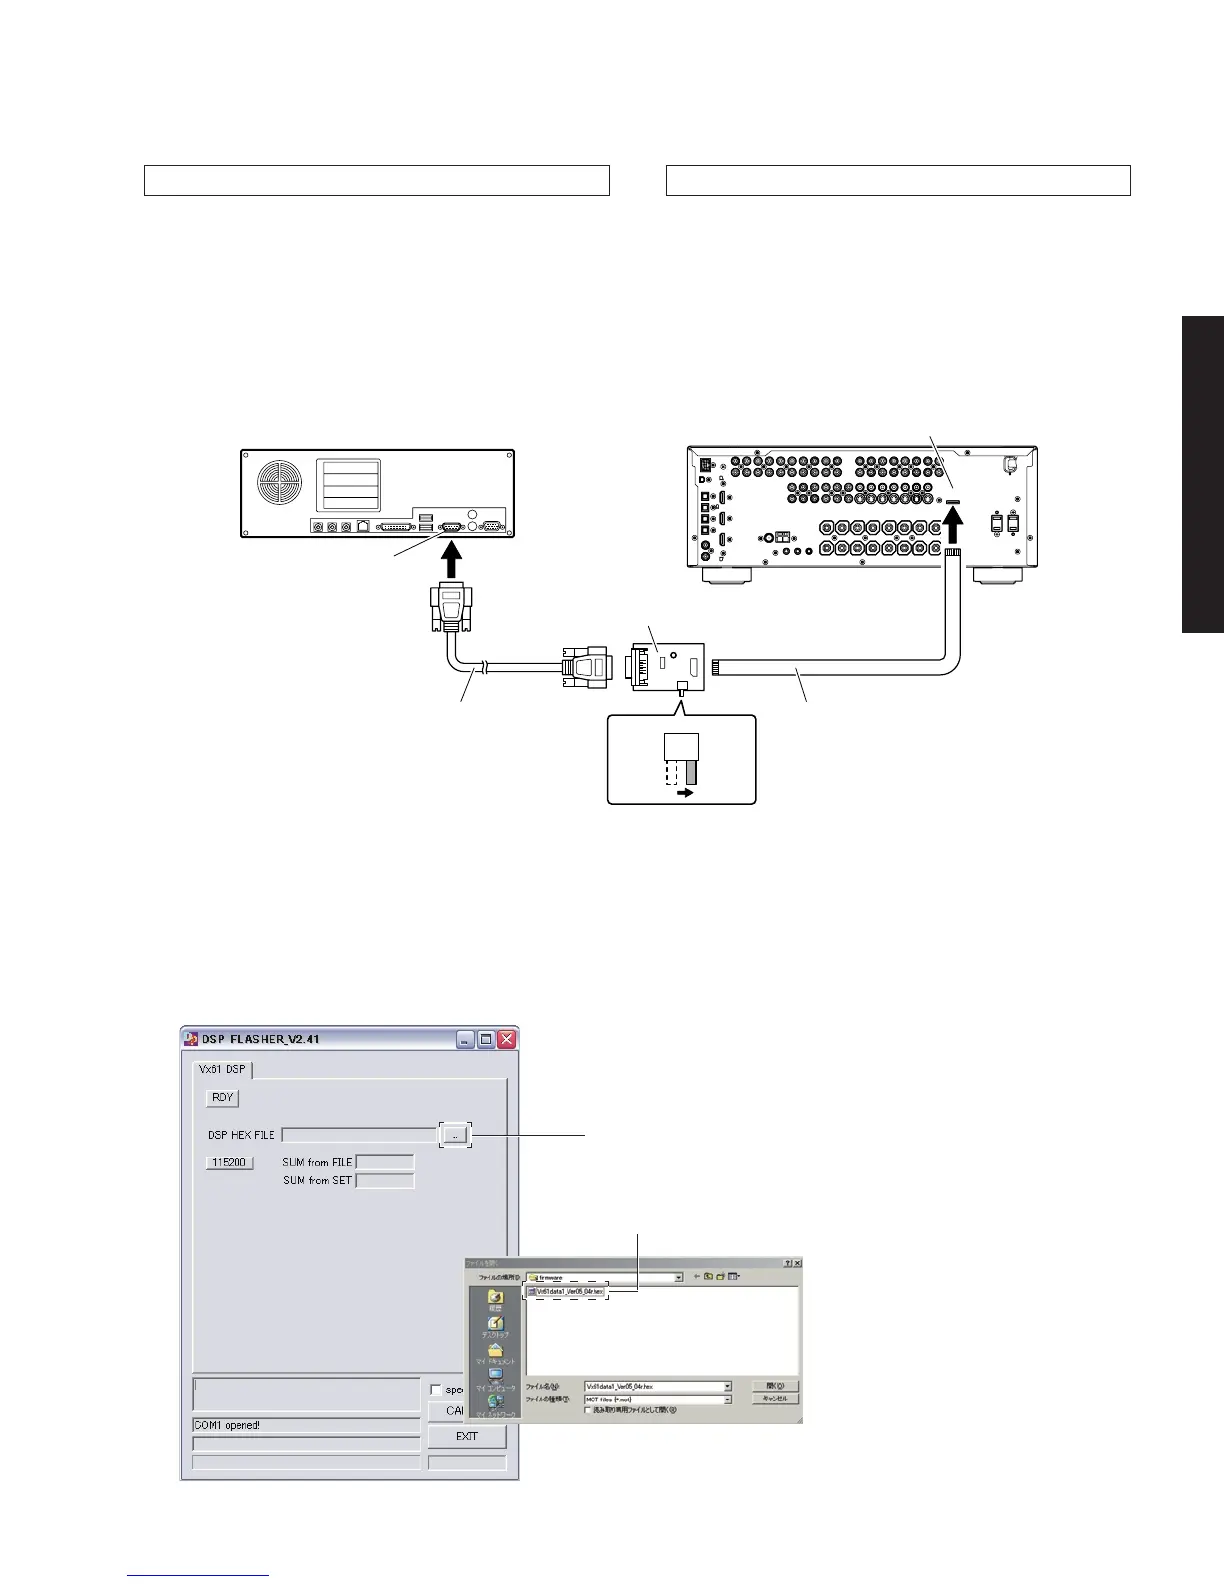
2. RS232C変換アダプターのスイッチ(SW301)をOTHER
側に設定します。(Fig.6)
3. 本機の書き込み用ポートとPCのシリアルポート(RS232C)
を下記のように接続します。(Fig.6)
1. Turn off the power of main unit and disconnect the
power cable from the AC outlet.
2. Set the switch (SW301) of RS232C conversion
adapter to the “OTHER” side. (Fig. 6)
3. Connect the writing port of the main unit to the serial
port (RS232C) of the PC with RS232C cross cable,
RS232C conversion adapter and flexible flat cable as
shown below. (Fig. 6)
Fig. 6
Fig. 7
4. DSPFLASHER.exeを起動します。
すると下記画面が表示されます。(Fig.7)
5. [...]ボタンを押し、Vx61data1Verxxxxx.hexを選
択します。(Fig.7)
When the [...] button is pressed, the “Open File” screen is displayed.
[...]ボタンを押すと、ファイルを開く画面が表示されます。
Select “Vx61 data1_Verxx_xxx.hex”.
Vx61data1Verxxxxx.hexを選択します。
4. Start up “DSP_FLASHER.exe”.
Then the screen shown below is displayed. (Fig. 7)
5. Press the [...] button and select “Vx61 data 1_Verxx_xxx.hex”.
(Fig. 7)
 Loading...