24
RX-V861/HTR-6080/DSP-AX861SE/DSP-AX861
RX-V861/HTR-6080/DSP-AX861SE/
DSP-AX861
※ 表示されたファームウェアのバージョンおよび
チェックサムが、書き込んだファームウェアのバー
ジョン、およびチェックサムと異なる場合、マイコ
ンの書き込みの1から11までをもう一度実施してく
ださい。
・ 本機の初期化
※ ファームウェアのアップデート後は、必ず本機を初
期化してください。
1. 本機の電源コードをACコンセントに接続します。
2. STRAIGHTキーとAUDIOSELECTキーを押し
ながら、STANDBY/ONキーを押し、ダイアグを
起動します。(Fig.5)
3. DIAG9.FACTORYPRESETを選択します。
4. PRESETRSRVを選択します。
CHECK SUM:xxxx
VER. xxxx
9.PRESET INHI 9.PRESET RSRV
4. DIAG23-2.Allchecksumを選択します。
表示されたチェックサムが書き込んだファームウェ
アのチェックサムと同じであることを確認します。
Checksum:xxxx (チェックサム値は指定ダウン
ロード先に記載されています。)
PRESET RESERVED (Initialization reserved) /
初期化予約
PRESET INHIBIT (Initialization inhibited) /
初期化禁止
4. Select the DIAG menu “23-2. All checksum”.
Check the displayed checksum is the same as the
written firmware checksum.
Checksum: xxxx (The checksum value is found
where downloading is specified to.)
* When the displayed firmware version and checksum
are different from written firmware version and
checksum, follow the steps from 1 to 11 of writing
microprocessor again.
• Initializing of the main unit
* After updating the firmware, be sure to initialize the
main unit.
1. Connect the power cable of main unit to the AC outlet.
2. Press the “MASTER ON/OFF” (RX-V861 / HTR-
6080: G model) / “STANDBY/ON” (HTR-6080: U, C
models / DSP-AX861SE / DSP-AX861) key while si-
multaneously pressing the “STRAIGHT” and “AUDIO
SELECT” keys. (Fig. 5)
Then the DIAG function is activated.
3. Select the DIAG menu “9. FACTORY PRESET”.
4. Select the “PRESET RSRV”.
1. 本機の電源コードをACコンセントに接続します。
2. STRAIGHTキーとAUDIOSELECTキーを押し
ながら、STANDBY/ONキーを押し、ダイアグを
起動します。(Fig.5)
3. DIAG23-1.Versionを選択します。
表示されたファームウェアのバージョンが書き込ん
だファームウェアのバージョンと同じであることを
確認します。(Fig.5)
Firmware:Vx61xxxx.mot
1. Reconnect the power cable of main unit to the AC
outlet.
2. Press the “MASTER ON/OFF” (RX-V861 / HTR-
6080: G model) / “STANDBY/ON” (HTR-6080: U, C
models / DSP-AX861SE / DSP-AX861) key while
simultaneously pressing the “STRAIGHT” and “AU-
DIO SELECT” keys. (Fig. 5)
Then the DIAG function is activated.
3. Select the DIAG menu “23-1. Version”.
Check the displayed firmware version is the same
as the written firmware version. (Fig. 5)
Firmware: Vx61_xxxx.mot
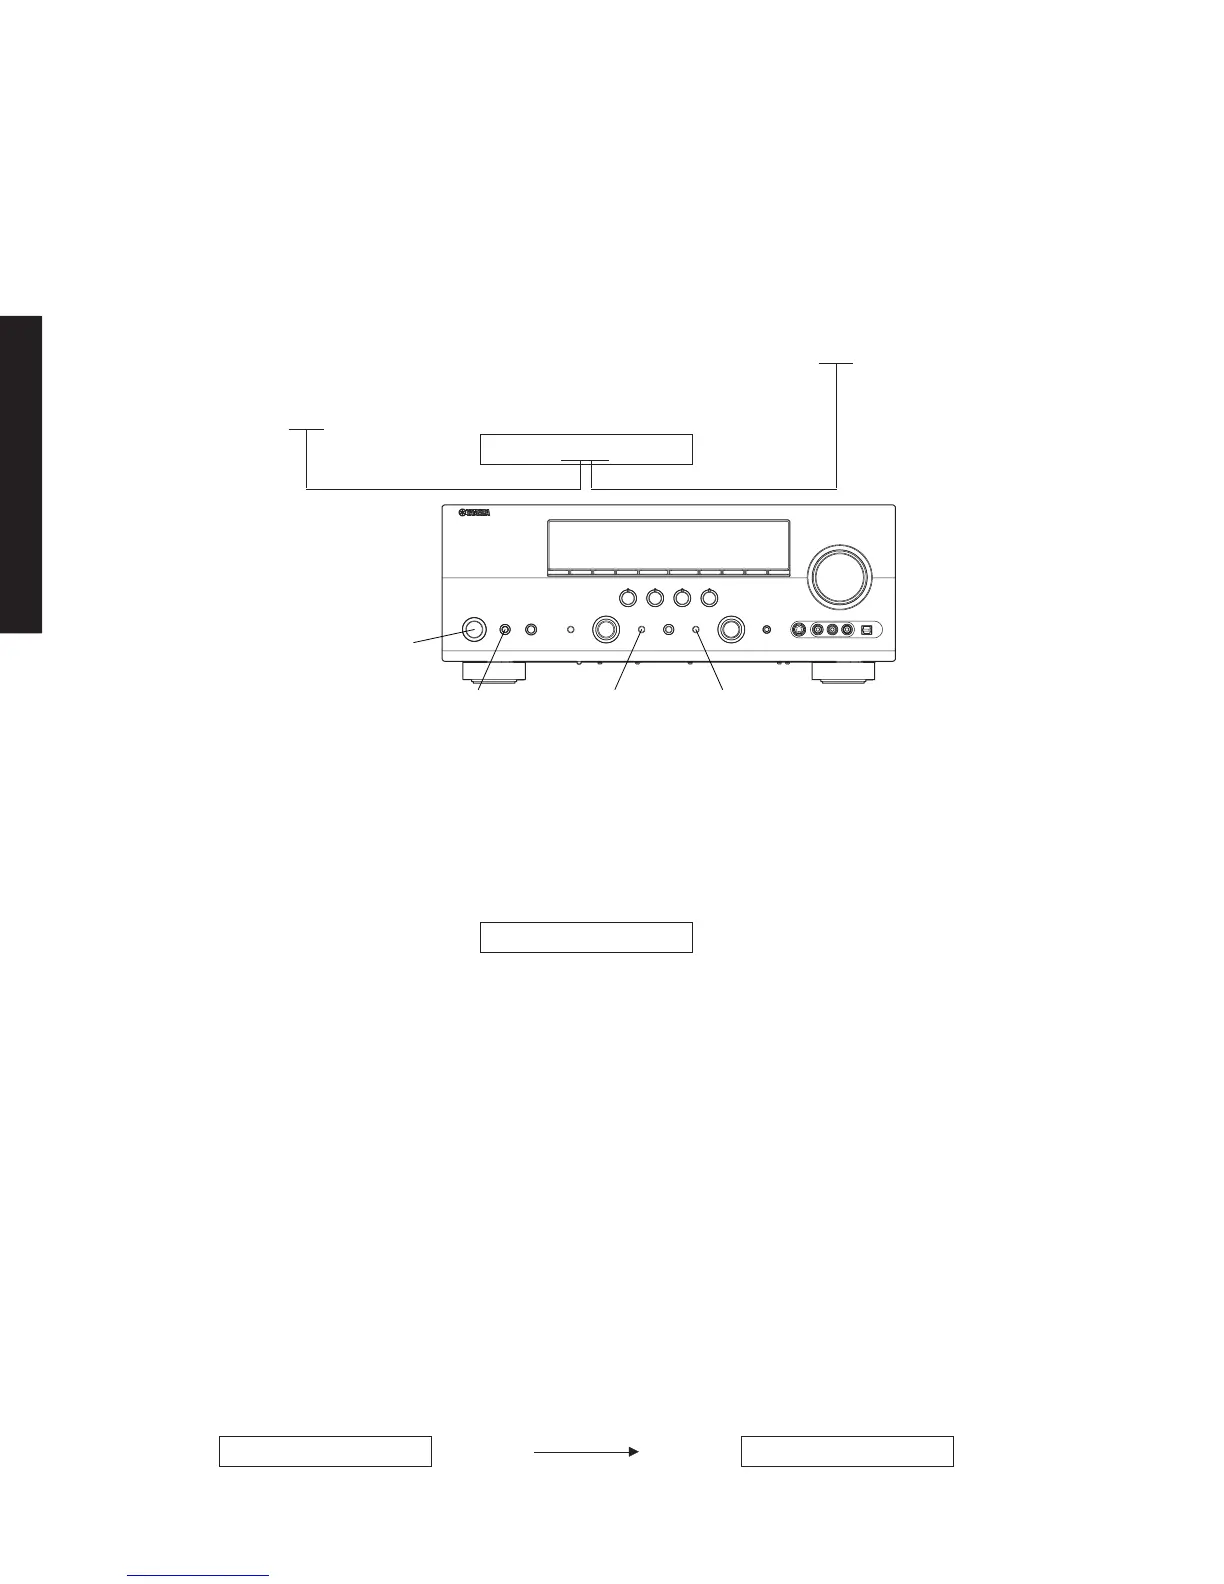
"STRAIGHT" Key"MASTER ON/OFF" Key
(RX-V861 / HTR-6080: G model)
"STANDBY/ON" Key
(HTR-6080: U, C models /
DSP-AX861SE / DSP-AX861)
"AUDIO SELECT" Key
5. 本機の電源を切り、電源コードをACコンセントか
ら抜きます。
5. Turn off the power of main unit and disconnect the
power cable from the AC outlet.
Fig. 5
 Loading...