PERIODIC MAINTENANCE AND ADJUSTMENT
6-40
1
2
3
4
5
6
7
8
9
2. Lift the front wheel off the ground
according to the procedure in the
previous section “Supporting the
motorcycle”.
3. Remove the axle nut.
4. Pull the wheel axle out.
5. Remove the spacers and the
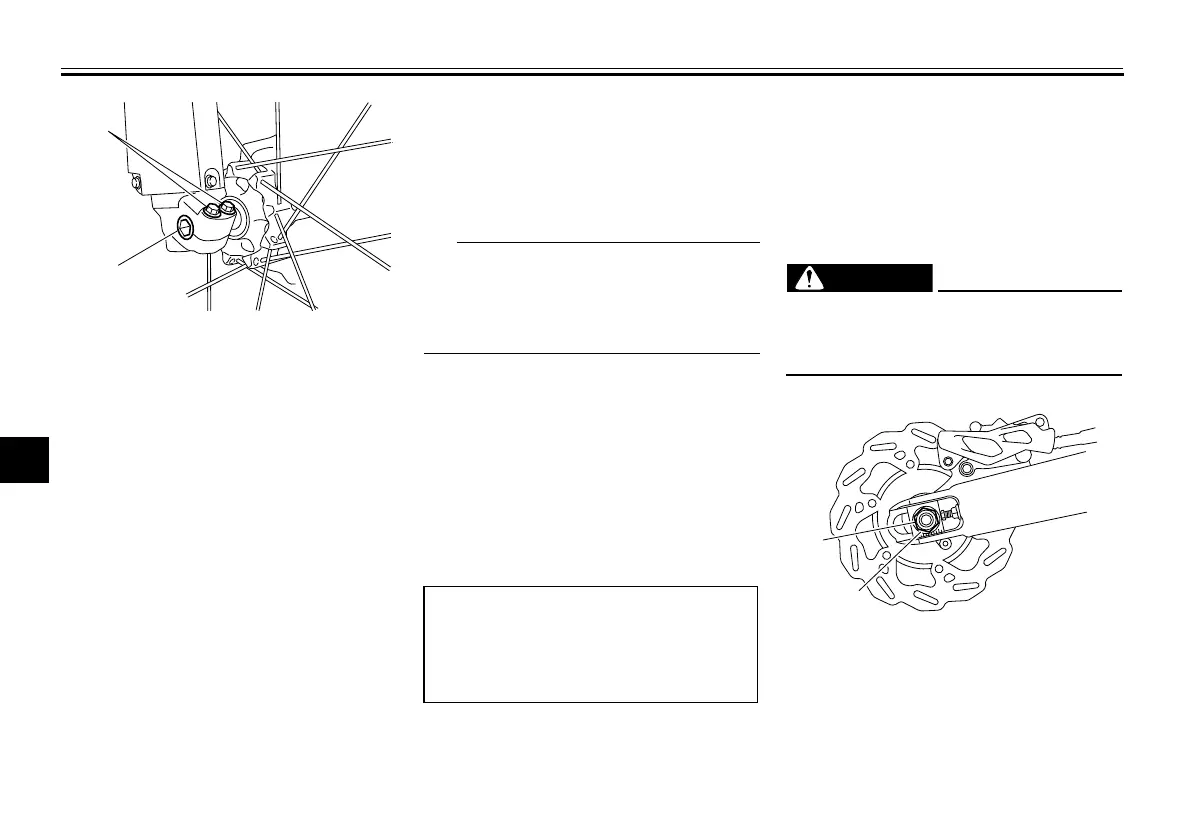
wheel. NOTICE: Do not apply the
brake after the wheel and brake
disc have been removed, other-
wise the brake pads will be
forced shut.
[ECA11073]
To install the front wheel
1. Install the spacers into both sides
of the wheel hub. NOTICE: When
installing the spacers, be sure
to install them on the correct
side.
[ECA17701]
2. Lift the wheel up between the fork
legs.
Make sure that there is enough space
between the brake pads before install-
ing the brake caliper onto the brake
disc.
3. Insert the wheel axle from the
right-hand side.
4. Install the axle nut.
5. Lower the front wheel so that it is
on the ground, and then put the
sidestand down.
6. Tighten the axle nut, and then the
front wheel axle pinch bolts to the
specified torques.
7. Push down hard on the handlebar
several times to check for proper
fork operation.
EAU25081
Rear wheel
EAU56691
To remove the rear wheel
EWA10822
To avoid injury, securely support the
vehicle so there is no danger of it
falling over.
1. Loosen the axle nut.
2. Lift the rear wheel off the ground
according to the procedure on
page 6-39.
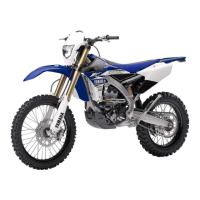
1. Front wheel axle pinch bolt
2. Wheel axle
Tightening torques:
Axle nut:
63 Nm (6.3 m·kgf, 46 ft·lbf)
Front wheel axle pinch bolt:
23 Nm (2.3 m·kgf, 17 ft·lbf)
1. Axle nut
2. Washer
32D-28199-EB.book 40 ページ 2013年7月3日 水曜日 午前11時8分

 Loading...