Required equipment
NoteSpare part no.Equipment, etc.
Standard and Foundry.3HAC10814-1Wrist, 5 kg
Loctite 574-Locking liquid
The content is defined in the section
Standard tools on page 229.
-Standard toolkit
These procedures include references
to the tools required.
Other tools and procedures may
be required. See references to
these procedures in the step-by-
step instructions below.
CAUTION
Always cut the paint with a knife and grind the paint edge when disassembling
parts. See Cut the paint or surface on the robot before replacing parts on page 117.
Removal, wrist unit
The procedure below details how to remove the wrist from the robot upper arm.
The wrist, which includes axes 5 and 6, is a complete unit comprising drive units
and gearboxes. It is a replacement unit of complex design and should not normally
be serviced on-site. Instead it should be sent to ABB for service etc.
ABB recommends its customers to carry out only the following servicing and repair
work on the wrist.
Note/IllustrationAction
DANGER
Turn off all electric power, hydraulic and
pneumatic pressure supplies to the robot!
1
xx0300000104
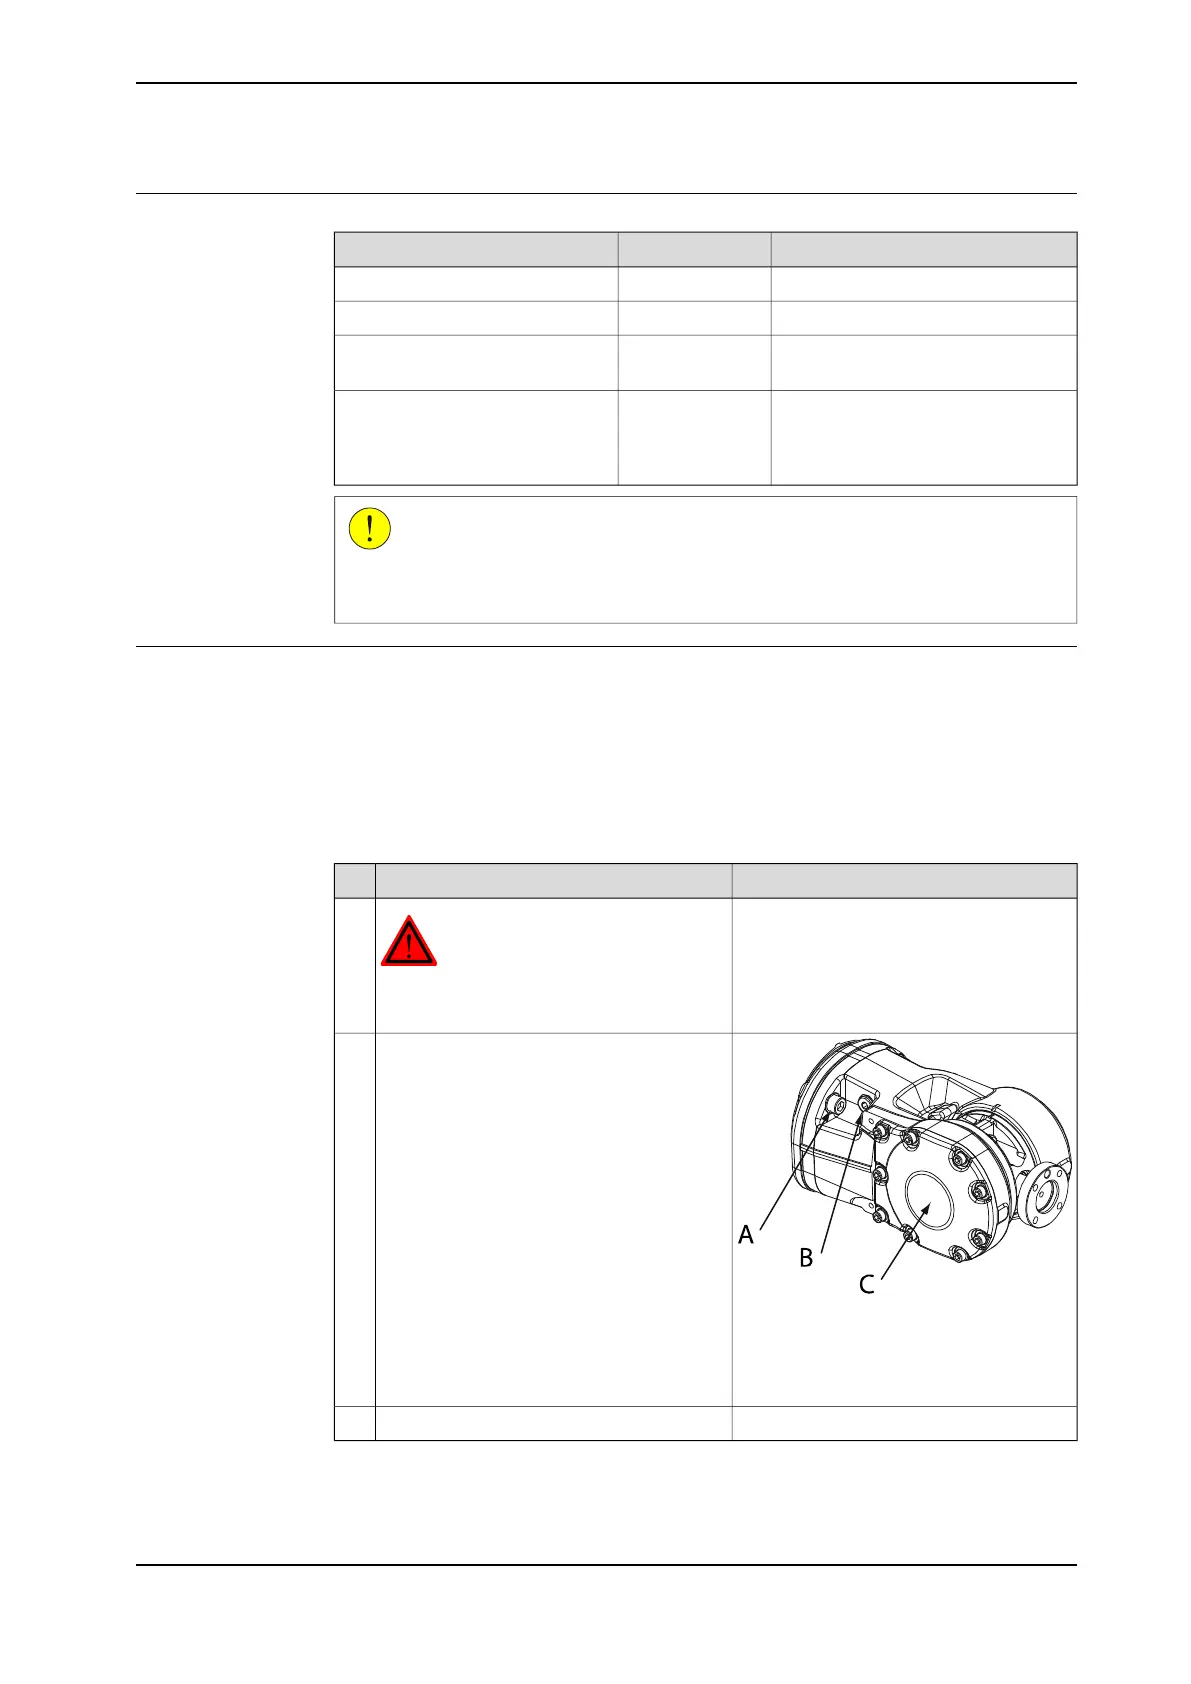
Remove the oil plug from the wrist and
drain it from all the oil.
2
A Screw
B Oil plug (air inlet)
C Wrist unit
Undo the screws and remove the wrist.3
Continues on next page
Product manual - IRB 2400 139
3HAC022031-001 Revision: P
© Copyright 2004-2018 ABB. All rights reserved.
4 Repair
4.4.2 Replacement of wrist IRB 2400L
Continued

 Loading...


