6.10. Current procedure folder
The current procedure folder is created automatically and named with the date of the
procedure followed by the procedure number of the day (format: YYYY-MM-DD_XXX).
The image and video files created during the procedure are saved in the current procedure
folder. After the procedure has ended, the current procedure folder moves to the Procedures
folder, which is accessible via the Archive tab in the Toolbar.
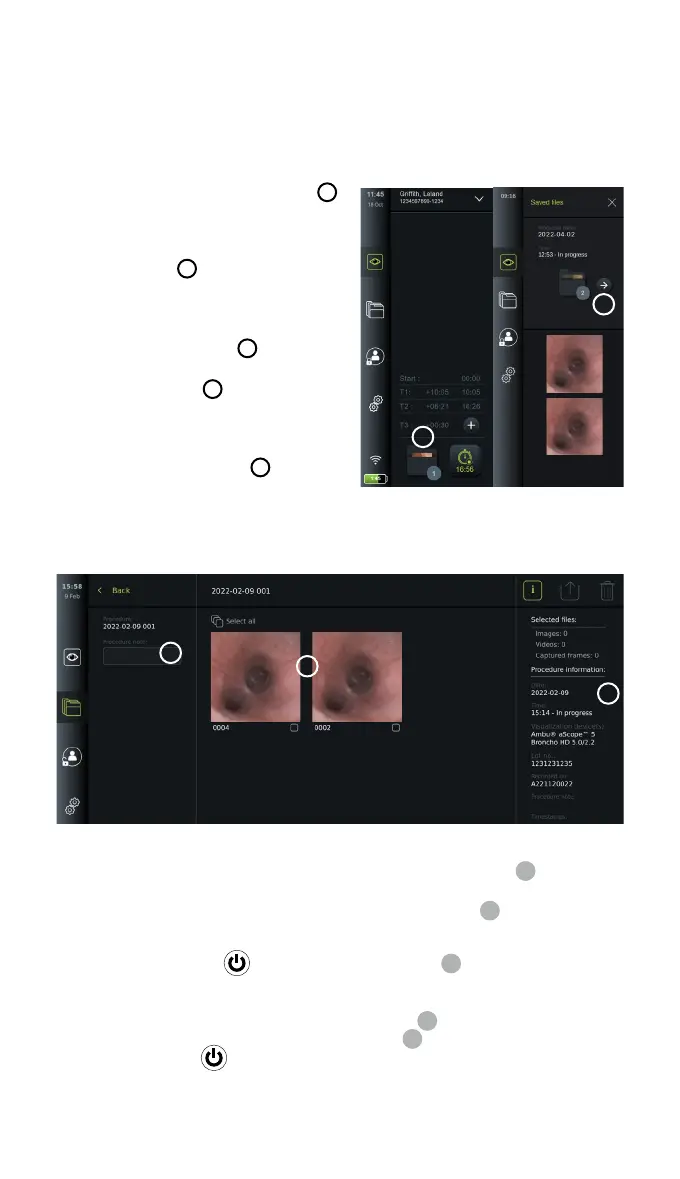
View the files in the current procedure folder:
• Press the current procedure folder icon
20
.
The current procedure folder icon shows the
total number of photos and videos saved
during the current procedure.
• Press arrow right
21
.
• The current procedure overview shows the files
in the folder and information about the current
procedure, such as date, time, connected
endoscope and timestamps
22
.
• To add a note to the folder, press the
Procedure note field
23
and enter the text
(max. 40 characters). The notes field can be
used for adding a short description to specific
procedures or files.
• Scroll through the thumbnails
24
and press the
required image or video to see a larger view.
• To add a note to the file after opening it, press the File note field and enter the text
(max. 40 characters).
• To use video playback functions, see section 8.3.2.
22
23
24
6.11. After use of the displaying unit
Follow the steps below after use of the displaying unit. Letters in grey circles refer to the
illustrations in the Quick Guide on page 2.
1. Disconnect the Ambu visualization device from the displaying unit
J
. For disposal
of the visualization device, please refer to the Instructions for Use for the specific
visualization device.
2. Press the power button
to turn the displaying unit OFF
I
. Press OK.
3. If necessary, remove the displaying unit from the bracket. Use both hands to hold the
displaying unit while pressing the two grey release buttons on the bracket behind the
displaying unit. Pull the displaying unit towards yourself
K
.
4. Clean and disinfect the displaying unit (see chapter 9)
L
.
5. If the power button
is flashing orange when the displaying unit is turned OFF,
the battery level is below 20 %. In this case, charge the displaying unit.
20
21
26
 Loading...