93
General Maintenance
Headlight
NOTE: The bulb portion of the headlight is fragile. HANDLE WITH CARE.
When replacing the headlight bulb, do not touch the glass portion of the bulb.
If the glass is touched, it must be cleaned with a dry cloth before installing.
Oil residue from your skin on the bulb will cause the bulb to fail.
To replace the headlight bulb, use the following procedure:
1. Ensure the key switch is in the “OFF” position.
2. Disconnect the wiring connector from the back of the headlight.
3. Grasp the bulb housing and turn it counter-clockwise to remove the bulb.
4. Install the new bulb into the housing and rotate it clockwise completely.
5. Reinstall the wiring harness connector.
When replacing the headlight bulb, be careful not to touch the glass portion of the
bulb. Grasp the new bulb with a clean cloth.
CAUTION
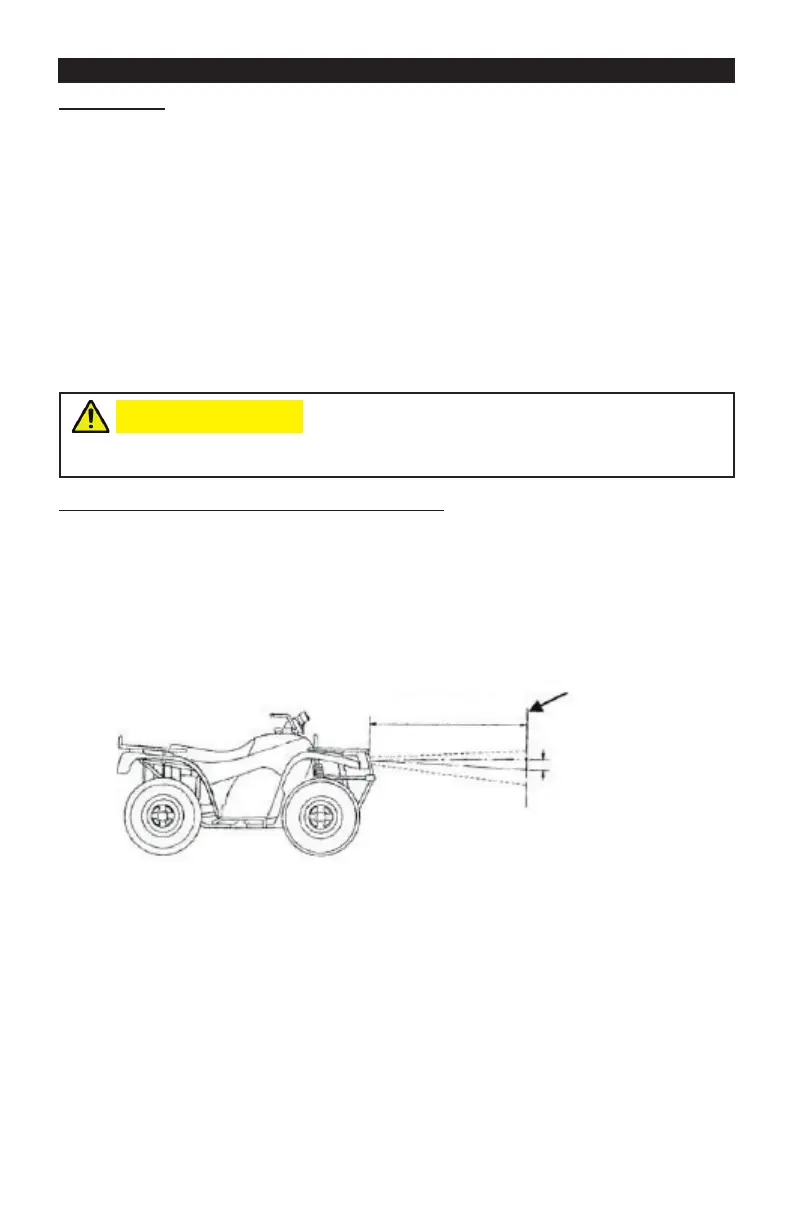
Checking / Adjusting Headlight Aim
Headlights can be adjusted vertically and horizontally. The projected center of the
HIGH beam should be used for vertical and horizontal aiming.
1. Position the ATV on a at, level surface so the headlights are approximately
20 ft (6.1 m) from a vertical aiming surface.
NOTE: There should be an average operating load on the ATV when adjusting
the headlight aim.
20 ft (6.1 m)
2 in (5 cm)
Aiming Surface
2. Measure the distance from the oor to the center of each headlight.
3. Using the measurements obtained in step 2, make horizontal marks on the
aiming surface.
4. Make vertical marks that intersect the horizontal marks on the aiming surface
directly in front of the headlights.
5. Switch the ATV lights to the “ON” position. Make sure the HIGH beam switch
is on. DO NOT USE LOW BEAM.
6. Observe each headlight beam aim. Proper aim is achieved when the most
intense beam is centered on the vertical mark 2 in (5 cm) below the horizontal
mark on the aiming surface.
 Loading...