5000
40 en | Settings
6.4.2
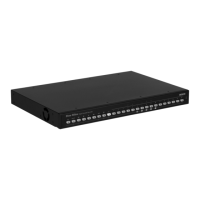
DIVAR 2000 / DIVAR 3000 / DIVAR
– Select here the days you want to assign as free days or work days and click <Save>
– Now assign the active time periods for the work day or free day – these same time
periods will be copied to all the assigned work days or free days
5. When ready, click <OK> to return to the Alarm or Detect screen. Do not forget to click
<Save> here to save your settings.
De-bounce time: Set here a timer for how long the detect alert should stay active after it is
first activated (default is 5 seconds). During this time, the system will activate the alarm
display, alarm output, tour, PTZ, snapshot, channel recording and buzzer (if they are all
selected). An alarm upload and email will also be sent (if selected). If a new alarm is detected
within the De-bounce time, the timer will be reset for the alarm display, alarm output, tour,
PTZ, snapshot, channel recording and buzzer (no new alarm upload or email are sent).
Alarm out: If an alarm occurred, the system will enable a peripheral alarm device connected to
the selected outputs (default is 1).
Latch: When the ‘De-bounce time’ is ended, the alarm output relay you selected in ‘Alarm out’
will remain activated for this extra ‘latch’ period (from 1 to 300 seconds - default is 10). The
latch is still valid even if you manually disable the alarm event.
PTZ activation: Here you can set PTZ movement when an alarm occurs. See below.
Delay: Set here an extra timer for channel recording to remain active (from 10 to 300 seconds
- default is 10) after the ‘De-bounce time’ has elapsed.
Display Mon. A: Here you can enable a tour function (a sequence of camera views) when an
alarm occurs. The system supports only one-window tour for alarms. See System > Display >
Sequence for how to pre-select the tour sequence and interval. Choose also which channels
to display in the tour sequence.
Display Mon. B: Select both check boxes here to enable a tour function on Monitor B when
there is an alarm signal. Choose also which channels to display in the tour sequence.
Send email: An alert email is sent if an alarm is detected.
Show message: The system will pop up a message in the local host screen to alert you.
Buzzer: Select here to activate the buzzer when an alarm occurs.
After completing setup, click <Save> to save your settings and go back to the previous menu.
Note
In the Detect menu, the Copy function is only valid for the same event type, which means you
cannot copy a channel setup in video loss mode to camera masking mode.
PTZ Set
Setup the PTZ as follows for each camera associated with the input:
1. Click on the drop-down menu to set the activation operation for:
– None (default)
– Shot – this will swivel the channel camera to a preset PTZ position this is setup in
the Camera > Configuration > PTZ submenu
– Tour – this will switch the channel views in a preset sequence
– Pattern – this will swivel the camera in a pre-assigned pattern
2. Click on the next field to enter a pre-position number from 0 (default) to 255 to send the
camera to a specified pre-position.
3. Repeat these steps for each of the PTZ cameras that require a preset.
If required, access the Pan/Tilt/Zoom menu (Main menu > Setting > Pan/Tilt/Zoom) to setup
the video channel, baud rate, dome protocol, etc.
Video loss
See Alarm > Motion detect for a description of applicable fields.
Operation Manual Bosch Security Systems2016.09 | v1.0 | AM18-Q0717
 Loading...