19Bosch Security Systems 10/22 BLCC615U
Solution 6000-IP User Guide
3. Press the [ON] key to turn chime mode on, or, press
[OFF] to turn chime mode off.
4. Press the [OK] key to exit.
Holding down the 4 key on the keypad for 2 seconds
will also turn chime mode on and off.
Areas > Commands >
Chime Mode
MENU 2-0-6
This menu allows you to program how the chime alert
behaves when a chime zone is triggered. There are four
different modes available: - Chime Always, Chime After ???
Seconds, Chime For ??? Seconds and Latching.
Enter programming mode (PIN + MENU) then,
1. Enter [MENU] + [2] + [0] + [6].
A list of different areas will display on the keypad.
2. Use the [] and [] keys to select the area that you
want to program the chime mode for, then press
[OK] to select. Alternatively, you can enter the area
number that you want to program the name, then
press [OK].
The keypad will display the following:
Chime Mode A1
Chime For 000 Seconds
Press OK to SAVE
3. Use the [] and [] keys to scroll through the
different options available. If the mode selected
requires you to enter a time then use the [] and
[] keys to move to the time field and then use the
[] and [] keys to scroll through the available time
options.
4. Press [OK] to save and exit, or press [MENU] to exit
without saving.
Areas > Area Properties >
Area Name
MENU 2-1-0
This menu allows you to program the name for each
area. Each area name can be programmed with up to 20
characters. At factory default, only Area 1 is used. The
control panel can have a maximum of 8 independent areas
programmed.
Enter programming mode (PIN + MENU) then,
1. Enter [MENU] + [2] + [1] + [0].
A list of different areas will display on the keypad.
2. Use the [] and [] keys to select the area that you
want to program the name, then press [OK] to
select. Alternatively, you can enter the area number
that you want to program the name, then press
[OK].
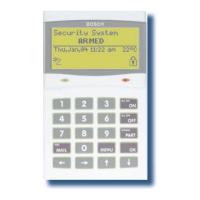
The keypad will display the following:
Area Name A1
Security System
Press OK to SAVE
3. Use the [] and [] keys to scroll the cursor left
and right across the area name text. Use the [] and
[] keys to scroll through the different characters
available. To clear all text from the cursor position
to the right, press the [OFF] key.
4. When the user name is complete, press [OK].
Areas > Area Properties >
Part Mode 1 Name
MENU 2-1-6
This menu allows you to program a name for the part mode
1. Each area can have its own part mode 1 name if required.
Up to 20 characters can be entered to help explain the
behaviour of the area when it is armed in part mode 1. For
example, Downstairs all armed or Shed Disarmed.
Enter programming mode (PIN + MENU) then,
1. Enter [MENU] + [2] + [1] + [6].
A list of different areas will display on the keypad.
2. Use the [] and [] keys to select the area that you
want to program the part mode 1 name for, then
press [OK] to select. Alternatively, you can enter the
area number that you want to program the name,
then press [OK].
The keypad will display the following:
Part Mode 1 Name A1
Part 1 Area 1 Name
Press OK to SAVE
3. Use the [] and [] keys to scroll the cursor left and
right across the name text. Use the [] and [] keys
to scroll through the different characters available.
To clear all text from the cursor position to the right,
press the [OFF] key.
4. When the name is complete, press [OK].
Areas > Area Properties >
Part Mode 2 Name
MENU 2-1-7
This menu allows you to program a name for the part mode
2. Each area can have its own part mode 2 name if required.
Up to 20 characters can be entered to help explain the
behaviour of the area when it is armed in part mode 2. For
example, Downstairs all armed or Shed Disarmed.
Enter programming mode (PIN + MENU) then,
1. Enter [MENU] + [2] + [1] + [7].
A list of different areas will display on the keypad.
 Loading...
