Getting Started
3
1
Power Supply
1
This printer is powered by the AC adapter
(included in the box with the printer).
The AC adapter supplies power directly to the
printer, making it suitable for high-volume
printing.
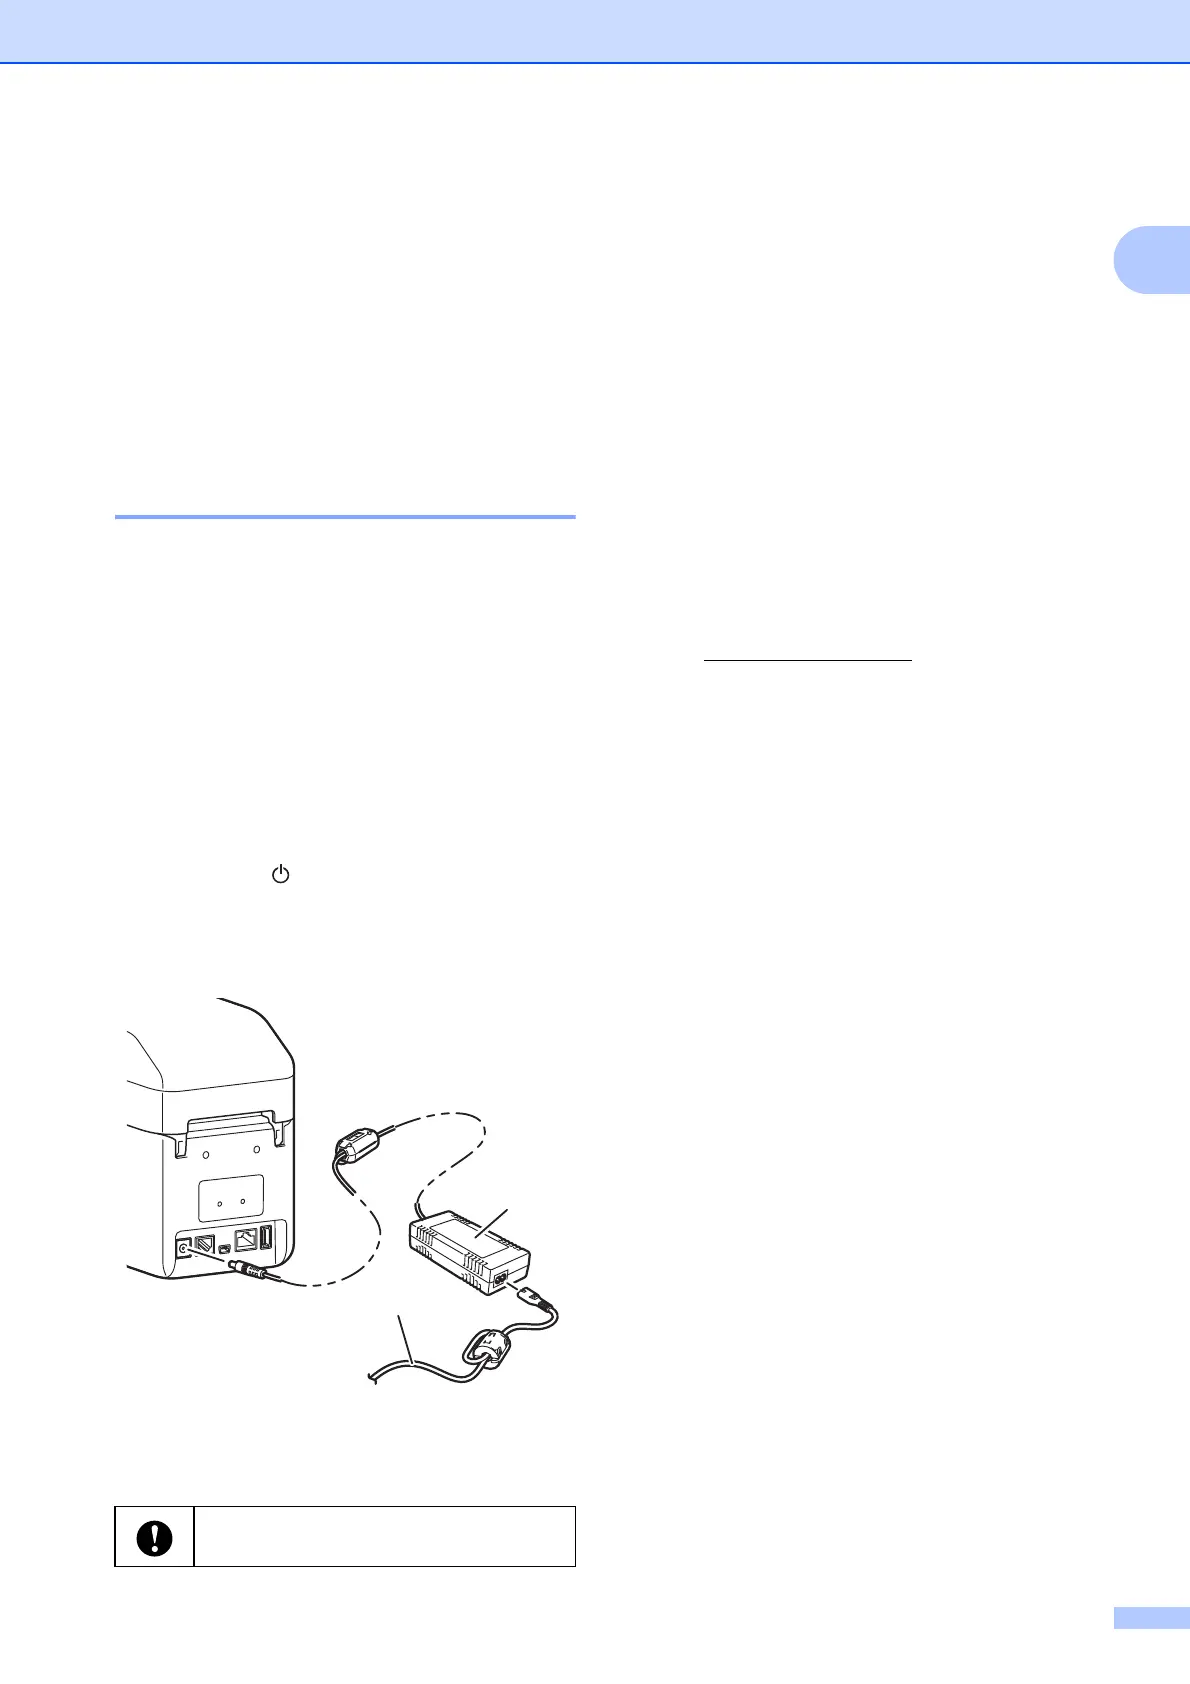
Connecting to an electrical
socket 1
Connect the AC adapter to the printer, and
then plug the AC power cord into an electrical
socket to power the printer.
a Connect the AC adapter to the printer.
b Connect the AC power cord to the AC
adapter.
c Connect the AC power cord to a nearby
electrical socket (100 - 240 V,
50/60 Hz).
d Press the (Power) button on the
printer to turn it on. The POWER
indicator turns green to indicate the
printer is in the standby mode.
1 AC adapter
2AC power cord
Installing the Printer
Driver and Software
1
The printer driver and software can be
installed using one of the following four
methods:
USB cable connection
Wired LAN connection (TD-2125N/
2135N/2125NWB/2135NWB only)
Wireless LAN connection
(TD-2125NWB/2135NWB only)
Bluetooth connection
(TD-2125NWB/2135NWB only)
Go to support.brother.com
to download
printer drivers, software and manuals for your
printer and to view FAQs.
Double-click the downloaded file and follow
the on-screen installation instructions.
Registering Paper Size
Information with the
Printer
1
Paper size information must be registered
with the printer for correct operation.
a Connect the computer to the printer with
a USB cable.
b In the "Printer Setting Tool" select
[Paper Size Setup]. Specify the size
information for the media to be used,
and then add the paper format. Printer
settings including [Energy Rank],
[Import] and [Export] can also be
adjusted and added to the paper size
information.
c To register your paper size information
with the printer, click the [Option] button
in the [Paper Size Setup] dialog box,
and then select [Register Paper Size
With Printer]. For more information,
see Paper Size Setup on page 38.
Do not use the cords while they are
bundled.
1
2
 Loading...