23
Step 7 — Install Outside Air Hood (Factory-
Option)
The outside air hood for factory-option economizer and two-posi-
tion damper is shipped in knock-down form and requires field as-
sembly. The panel for the hood top is shipped on the end of the
unit (see Fig. 20). The remaining parts for the hood assembly (in-
cluding side panels, filters and tracks) are shipped in a carton that
is secured to the rear of the blower assembly. Access the carton lo-
cation through rear panel (see Fig. 21).
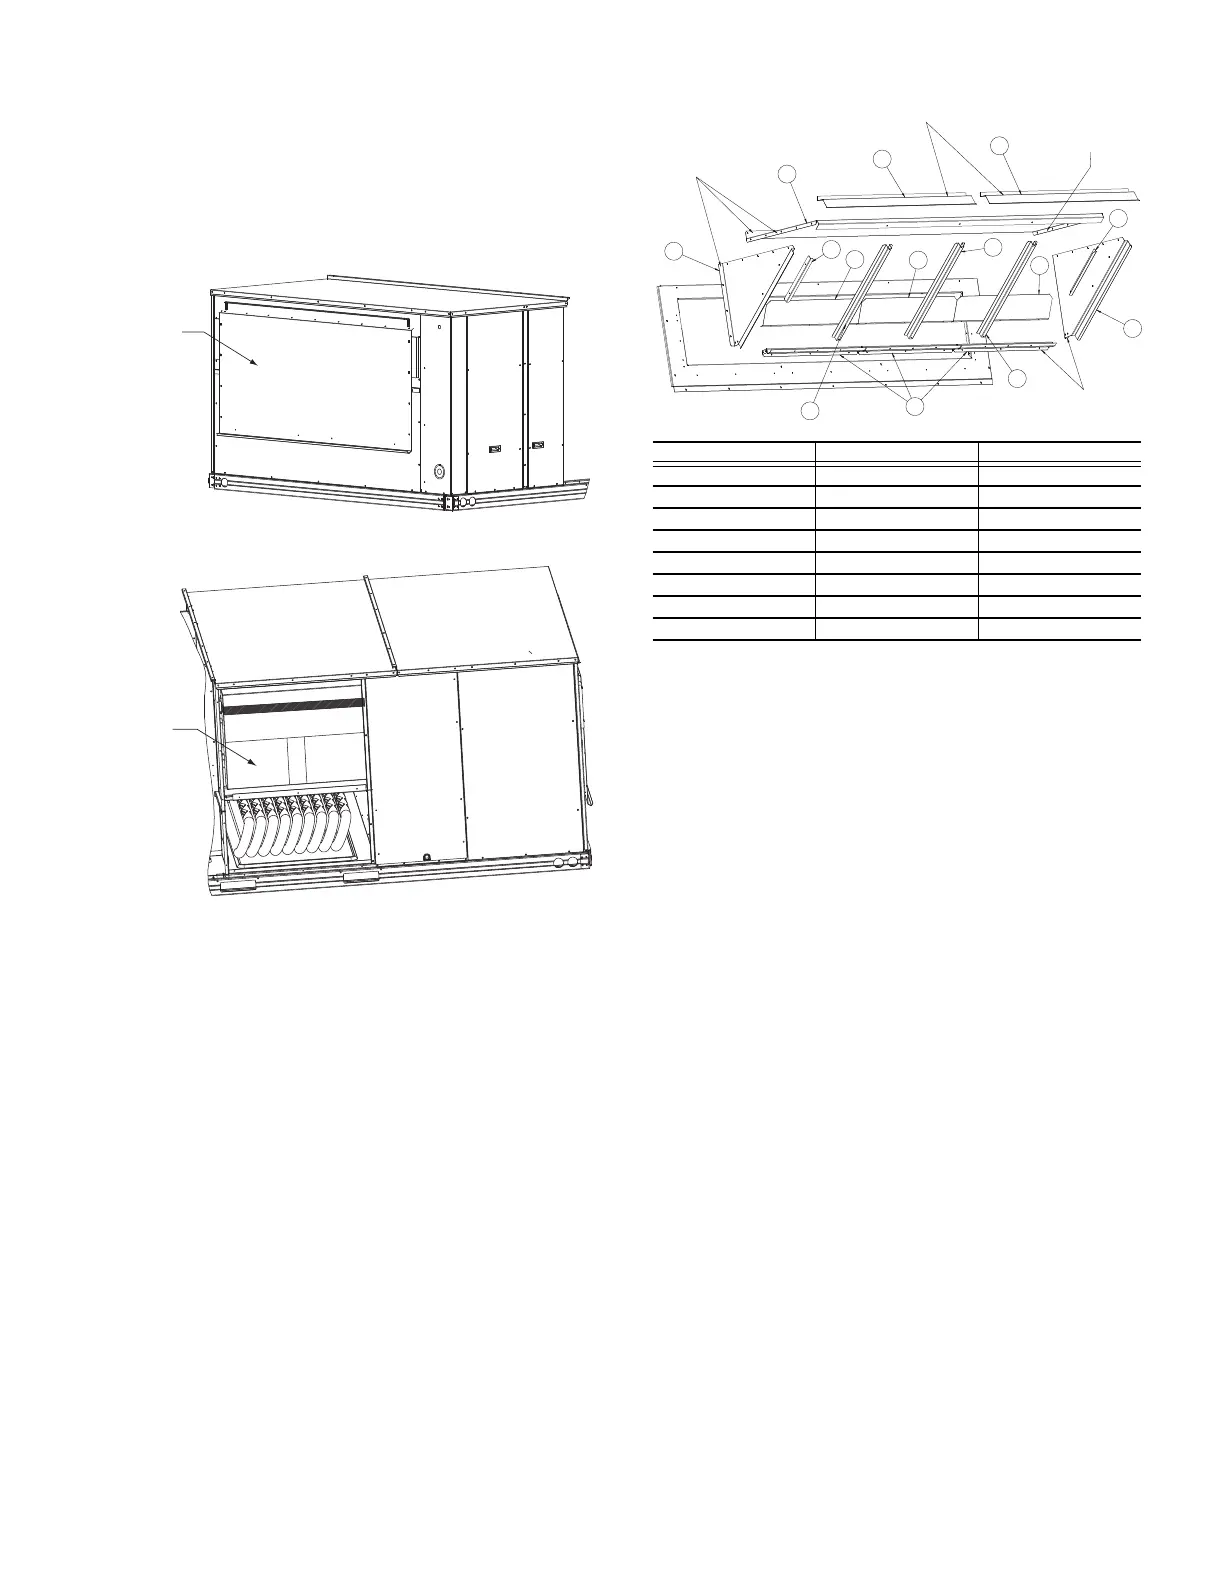
Fig. 20 — Hood Top — Shipping Position
Fig. 21 — Hood Package — Shipping Location
To remove the hood parts package:
1. Remove the back blower access panel.
2. Locate and cut the strap, being careful to not damage any
wiring.
3. Carefully lift the hood package carton through the back
blower access opening.
Fig. 22 — Hood Part Identification and Seal Strip
Application Areas
To assemble the outside air hood (see Fig. 22 for hood compo-
nent locations):
1. Remove hood top panel from shipping position on unit end.
2. Install filters supports (item #1) to the upper end panel using
the screws provided.
3. Install each deflector (item #8) on to each filter support (item
#1) using the screws provided.
4. Apply seal strip to mating flanges on side plates of hood
(items #4 and #5).
5. Secure side panels (items #4 and #5) to upper panel using the
screws provided.
6. Apply seal strip to mating flange of the hood (see Fig. 22).
7. Secure hood (item #3) to upper panel using the screws
provided.
8. Secure side retainers (item #6) to side panels (items #4 and
#5) using the screws provided, screwing from outside of the
hood.
9. Secure each central retainer (item #2) to the hood (item #3).
Then align central retainers to holes located on filter support
(item #1), so central retainer is perpendicular to hood and
each filter support. Secure using screws provided.
10. Apply seal strip to top diverters (item #7).
11. Secure top diverters (item #7) to hood (item #3).
12. Install outdoor air screens by sliding them into each of the
four spaces created by the hood, filter support and central
retainers. To do so, first insert the air screens into pocket cre-
ated at the end of hood (item #3), then fully put the air screen
into place, and then slide them back into pocket created in the
filter support (item #1). Repeat this for each air screen (see
Fig. 23). See Fig. 24 for completed hood assembly.
HOOD TOP
SHIPPING
POSITION
APPLY SEAL STRIP
TO THE FRONT OF
THIS FLANGE
APPLY SEAL STRIP
TO THE BACK
OF THIS FLANGE
APPLY SEAL STRIP
TO THE BACK
OF THIS FLANGE
APPLY SEAL STRIP
TO THE BACK
OF THIS FLANGE
7
7
3
5
6
8
8
2
8
6
4
2
1
2
ITEM # DESCRIPTION QTY
1 Filter Supports 3
2 Central Retainer 3
3 Hood Top 1
4 Left Hood Side 1
5 Right Hood Side 1
6 Side Retainer 2
7 Top Diverters 2
8 Deflector 3
 Loading...