EN-56
MIDI Recorder (Tutorial)
6.
After you are finished punch-in recording,
touch “Y”.
Anything in the track following the point where you
touched “Y” will be retained as-is.
• If you want to cancel punch-in recording part way
through and retain the original track data, touch
“Cancel Punch”.
You can use the following procedure to specify a
particular range for punch-in recording.
1.
Enter the MIDI recorder recording mode and
then select the track where you want to
perform punch-in recording.
• For information about how to select a track, see steps
4 and 5 under “Recording to a Specific Song
Performance Part (Track Recording)” (page EN-54).
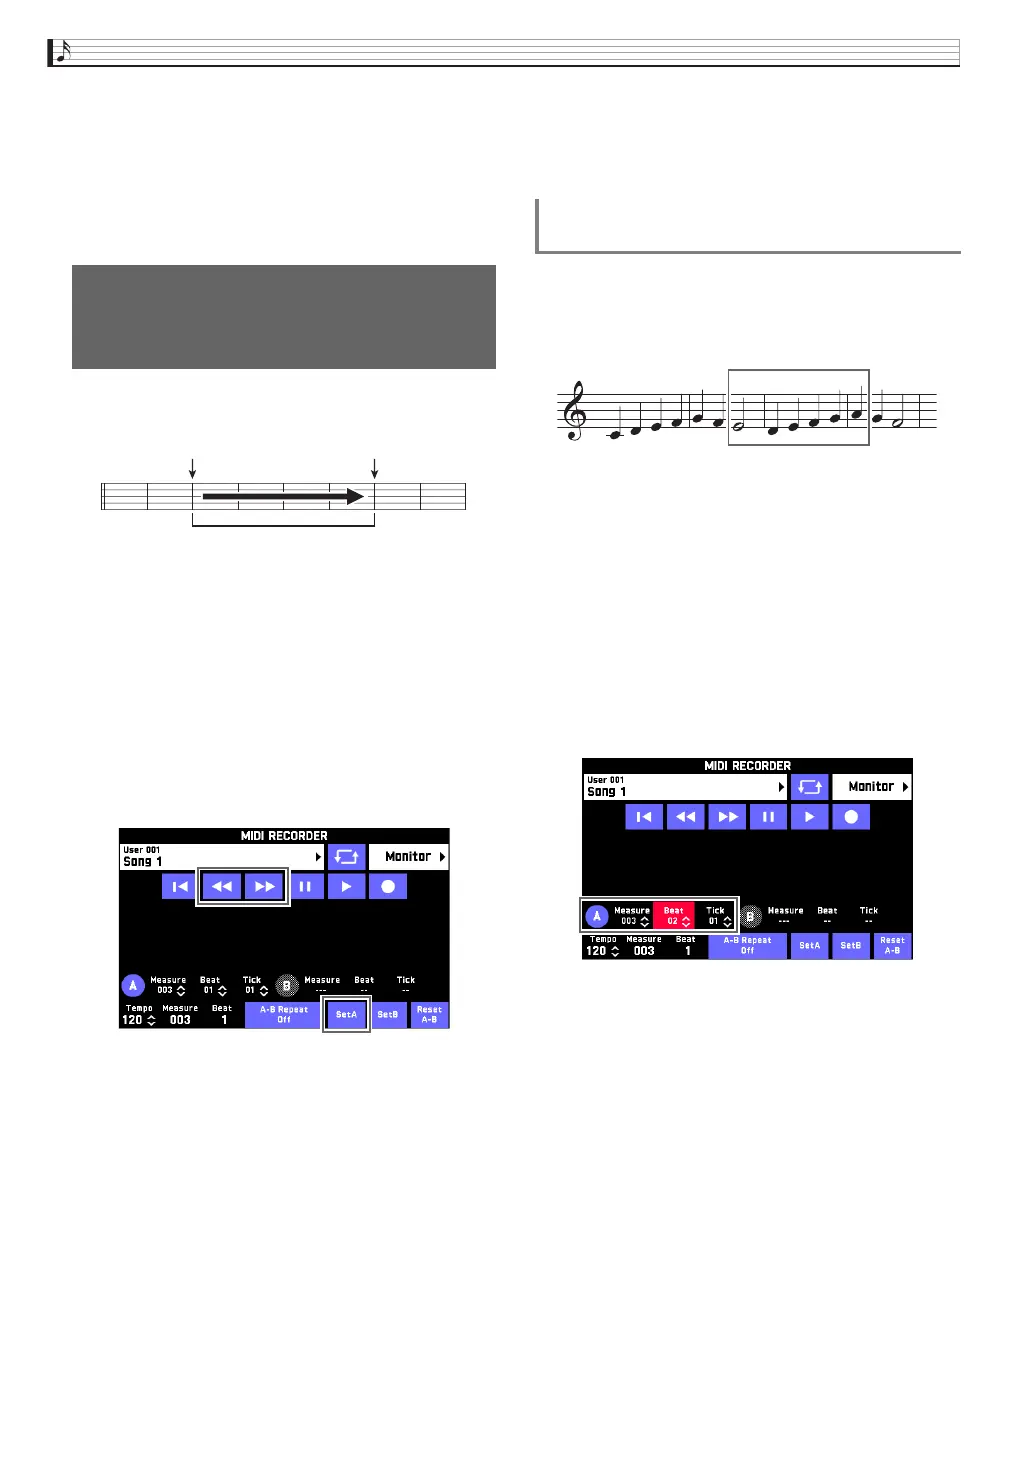
2.
Use “s” and “d” to display the first
measure of the section you want to record
and then touch “Set A”.
3.
Use “s” and “d” to display the last
measure and then touch “Set B”.
4.
Touch “
Y
” to return to the beginning of the
song, or use “
s” and “d” to adjust the
position to start playback.
5.
Touch “Rec Type”.
6.
Touch “Punch In A-B”.
7.
Touch “”.
• Punch-in recording automatically starts when
playback reaches the start point and ends when it
reaches the end point you specified in step 3.
Use the procedure below to specify a punch-in
recording area that includes a part of a measure.
Example: To re-record from beat 3 of measure 2 up to beat
1 of measure 4
1.
Use the MIDI Recorder to start playback of
the song that contains the section you want to
re-record.
2.
When playback reaches the point where you
want to start punch-in recording, touch
“Set A”.
• After touching “Measure”, “Beat”, or “Tick” for Point
A, you can then use the 9 w, q buttons to make
fine adjustments to the start point.
Specifying the Punch-in
Recording Location
(Auto Punch-in Recording)
Start measure End measure
Punch-in recording range
To re-record an area smaller than one
measure
To re-record this section
 Loading...