EN-5
Editing a Tone (User Tones)
Use the procedures in this section to edit the tones of
each part (Upper1-2, Lower1-2), and to add effects to
suit your needs.
1.
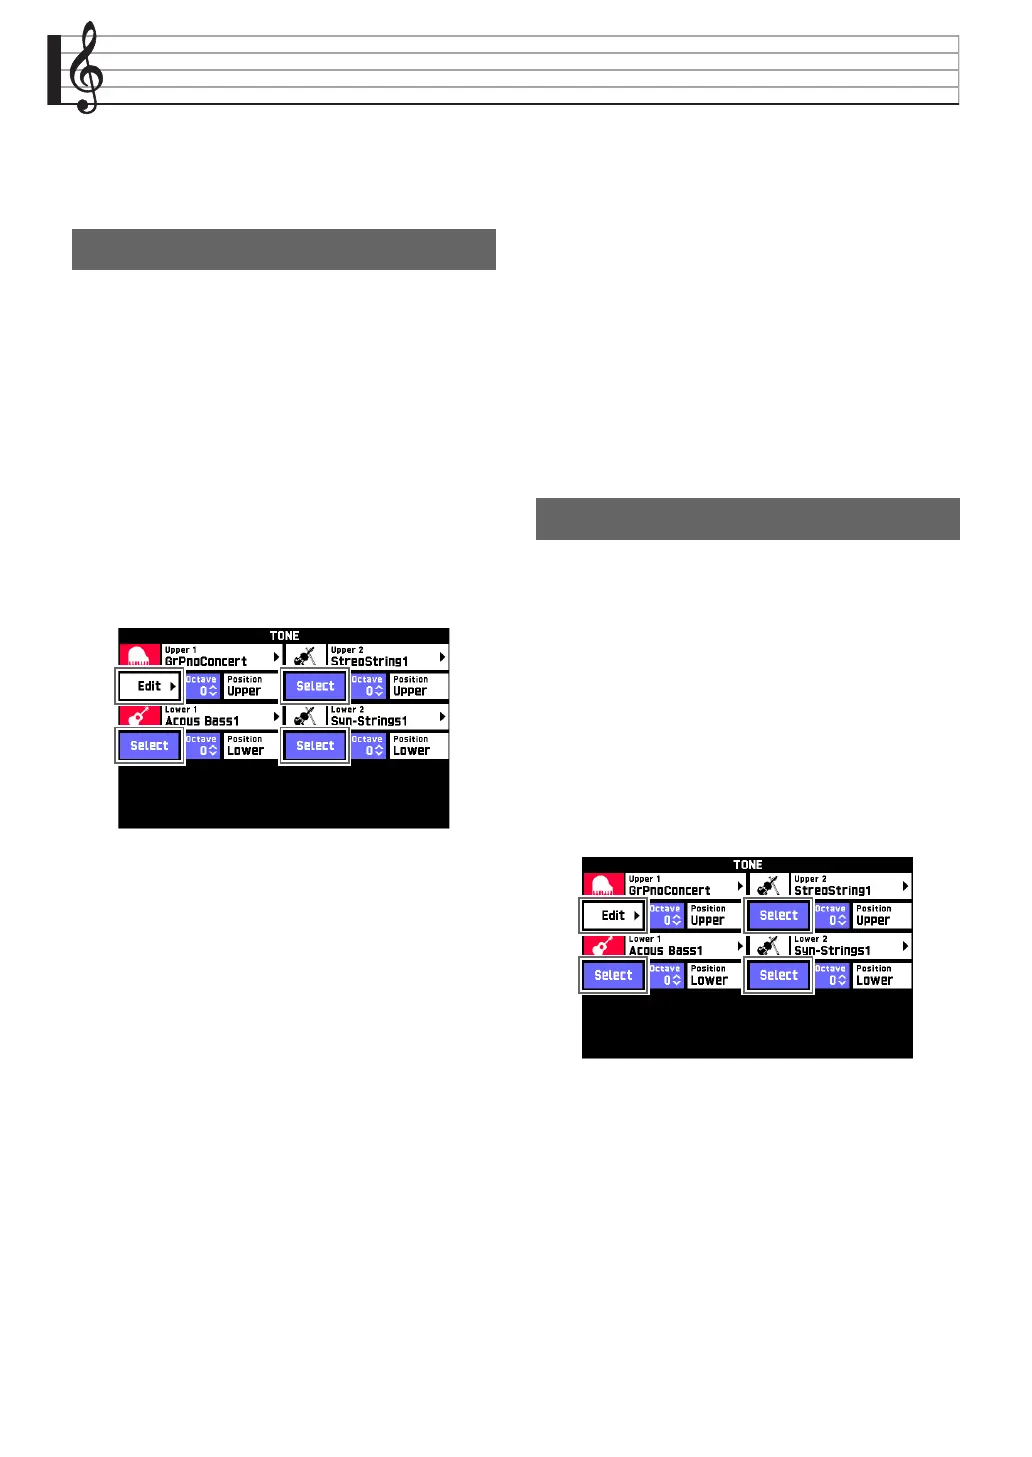
On the MENU screen, touch “TONE”.
2.
Assign the tone you want to edit to one of
Digital Keyboard’s parts.
• For information about how to change the tone
assigned to each part, see the Digital Keyboard’s
USER’S GUIDE (Basics).
3.
Touch the “Edit” button of the part that is
assigned the tone you want to edit.
This displays the editing screen for the tone assigned to
the part.
• If “Edit” is not displayed for the part whose tone you
want to edit, touch “Select”. This will cause the
button to change to “Edit”.
4.
Touch the item whose setting you want to
change.
• To configure more advanced settings, touch
“Advanced”.
• The setting items that appear on the editing screen
depend on the tone you are editing.
• For information about editable parameters, see the
explanations in the applicable tone category table
under “Tone Editing Screen and Editable
Parameters” (page EN-6).
5.
Change parameter settings as desired.
• Use the 9 w /NO, q/YES buttons to change
setting values.
6.
After editing everything you want, touch
“Write” on the TONE EDIT MENU screen.
7.
Touch “Rename”.
8.
Touch the keys of the on-screen soft
keyboard to input the tone name.
9.
After inputting the tone name, touch “Enter”.
10.
Touch the destination tone number.
• If the tone number already has data assigned, there
will be an asterisk (*) next to it.
11.
Touch “Execute”.
If the selected preset number does not have any data
assigned, the message “Sure?” will appear. If it does
have data assigned, the message “Replace?” will
appear.
12.
Touch “Yes”.
This stores the data.
• To return to the screen in step 10 without saving,
touch “No”.
1.
On the MENU screen, touch “TONE”.
2.
Assign the tone you want to rename to one of
Digital Keyboard’s parts.
• For information about how to change the tone
assigned to each part, see the Digital Keyboard’s
USER’S GUIDE (Basics).
3.
Touch the “Edit” button of the part that is
assigned the tone you want to rename.
• If “Edit” is not displayed for the part whose tone you
want to rename, touch “Select”. This will cause the
button to change to “Edit”.
4.
Touch “Rename”.
5.
Input the new name.
6.
After you are finished inputting the name,
touch “Enter”.
This displays the TONE EDIT MENU screen.
7.
Touch “Write”.
Editing a Tone
To rename a tone
 Loading...