CHAPTER 3
Installing the Cisco ASR 903 Router
This chapter describes how to install the Cisco ASR 903 Router.
• Prerequisites, on page 71
• Installing the Router in a Rack, on page 71
• Installing the Chassis Ground Connection, on page 83
• Installing the Fan Tray, on page 86
• RSP Installation, on page 89
• Interface Module Installation, on page 92
• Installing the Power Supply, on page 96
• Connecting the Cisco ASR 903 Router to the Network, on page 107
Prerequisites
Before installing the Cisco ASR 903 Router, it is important to prepare for the installation by:
• Preparing the site (site planning) and reviewing the installation plans or method of procedures (MOP)
• Unpacking and inspecting the Cisco ASR 903 Router
• Gathering the tools and test equipment required to properly install the Cisco ASR 903 Router
For more instructions on how to prepare for the installation of the Cisco ASR 903 Router, see Preparing for
Installation, on page 47.
Installing the Router in a Rack
The following sections describe how to install the Cisco ASR 903 Router in a rack:
Installing the Chassis Brackets
The chassis is shipped with mounting brackets that can be installed on the front or rear of the chassis. To
install the brackets on the front of the chassis, perform these steps:
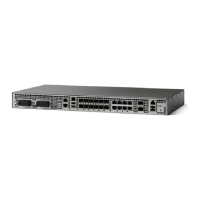
Step 1 Remove the rack-mount brackets from the accessory kit and position them beside the router chassis. The figure below
hows how to attach the brackets on the Cisco ASR 903 Router for a 19-inch EIA rack.
Cisco ASR 903 and ASR 903U Aggregation Services Router Hardware Installation Guide
71

 Loading...