2-6
Cisco PIX Security Appliance Hardware Installation Guide
78-15170-03
Chapter 2 PIX 501
Replacing a Lithium Battery
Step 3 Lower the front of the cover onto the chassis, making sure that the side tabs of the cover fit under the
side panels of the chassis.
Step 4 Slide the chassis cover toward the front, making sure that the cover tabs fit under the back panel, and the
back panel tabs fit under the chassis cover.
Step 5 Secure the chassis cover with the screw you set aside earlier.
Step 6 Reconnect the network interface cables.
Step 7 Place the PIX 501 on a flat, stable surface. The PIX 501 is not rack mountable.
Step 8 Reconnect the power cord to the power outlet to power on the security appliance.
Replacing a Lithium Battery
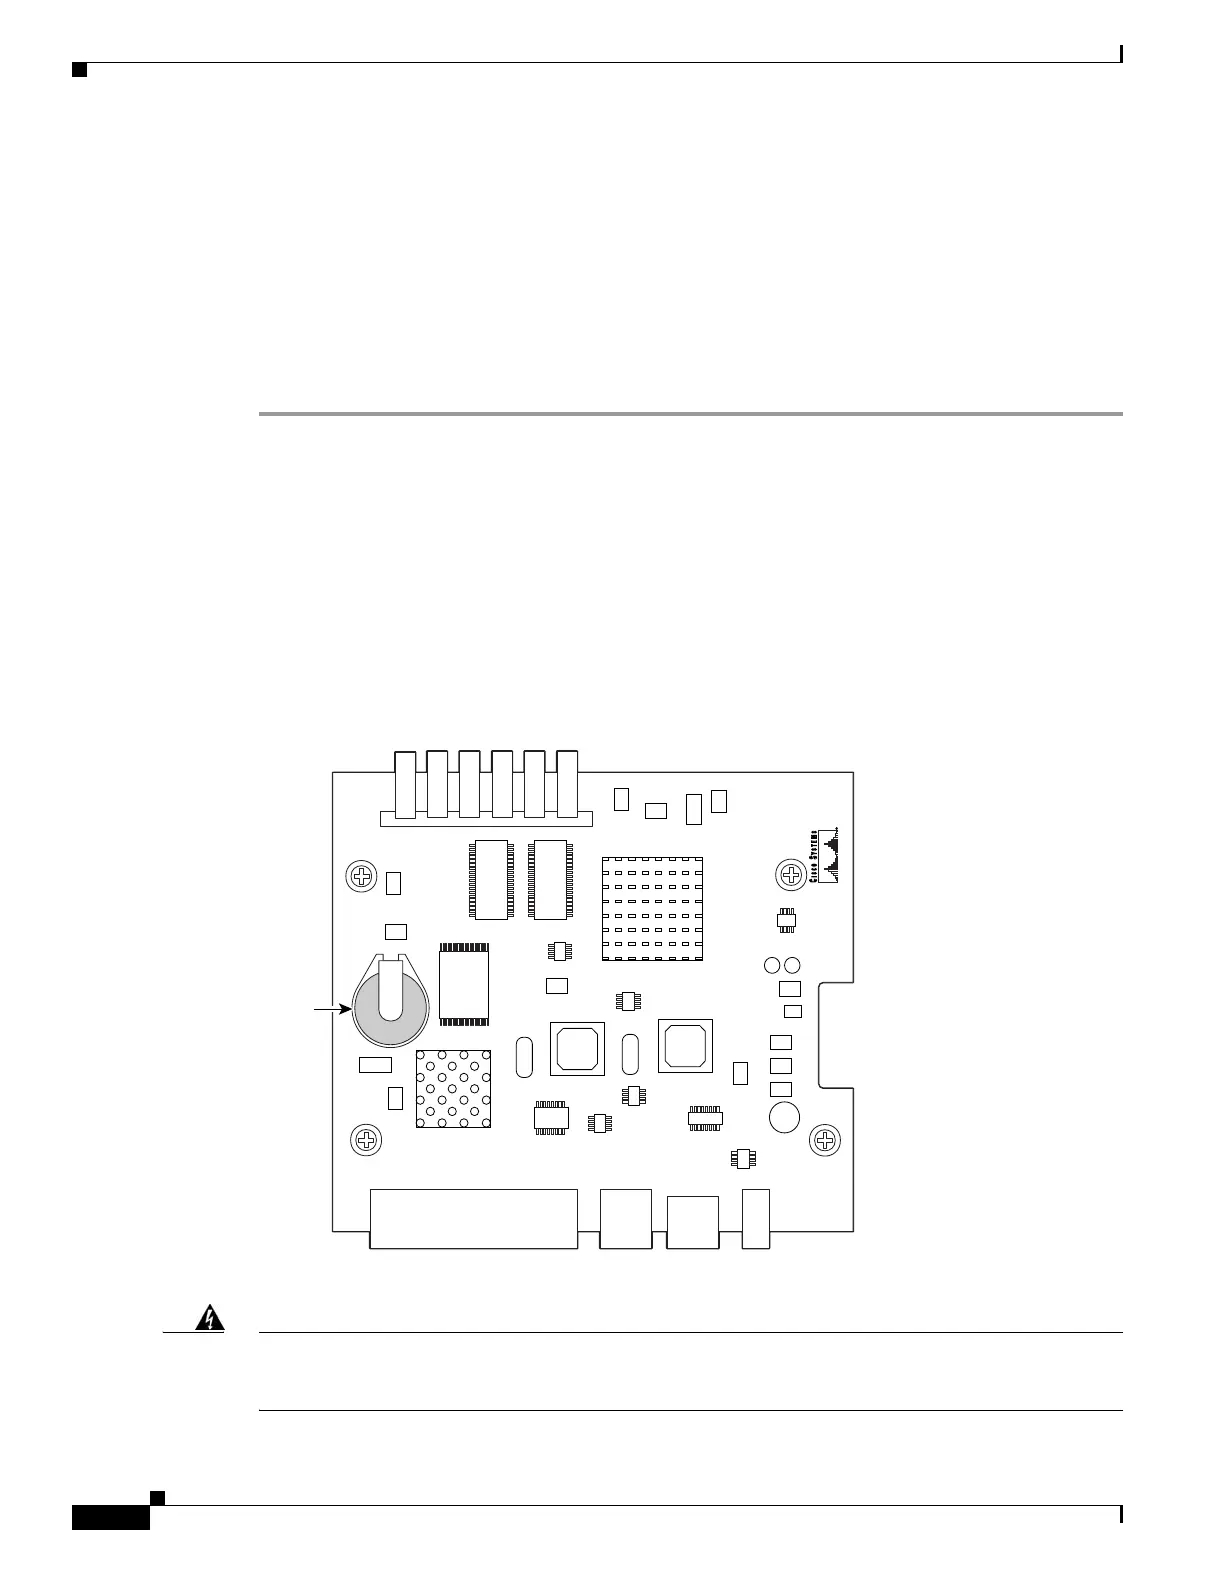
The PIX 501 has a lithium battery on the main circuit board (see Figure 2-8). This battery has an
operating life of about ten years. When the battery loses its charge, the PIX security appliance cannot
function. The lithium battery is a field-replaceable unit (FRU). You can use a standard 3V lithium battery
to replace the used battery.
Figure 2-8 PIX 501 Lithium Battery Location
Warning
Danger of explosion exists if the lithium battery is incorrectly replaced. Replace only with the same
or equivalent type recommended by the manufacturer. Dispose of used batteries according to the
manufacturer's instructions.
119679
Battery
Front
 Loading...