CommScope Era
™
Fiber Low Power Carrier Access Point Installation Guide M0201ANC_uc
Page 46 © June 2019 CommScope, Inc.
Mount the Fiber CAP L
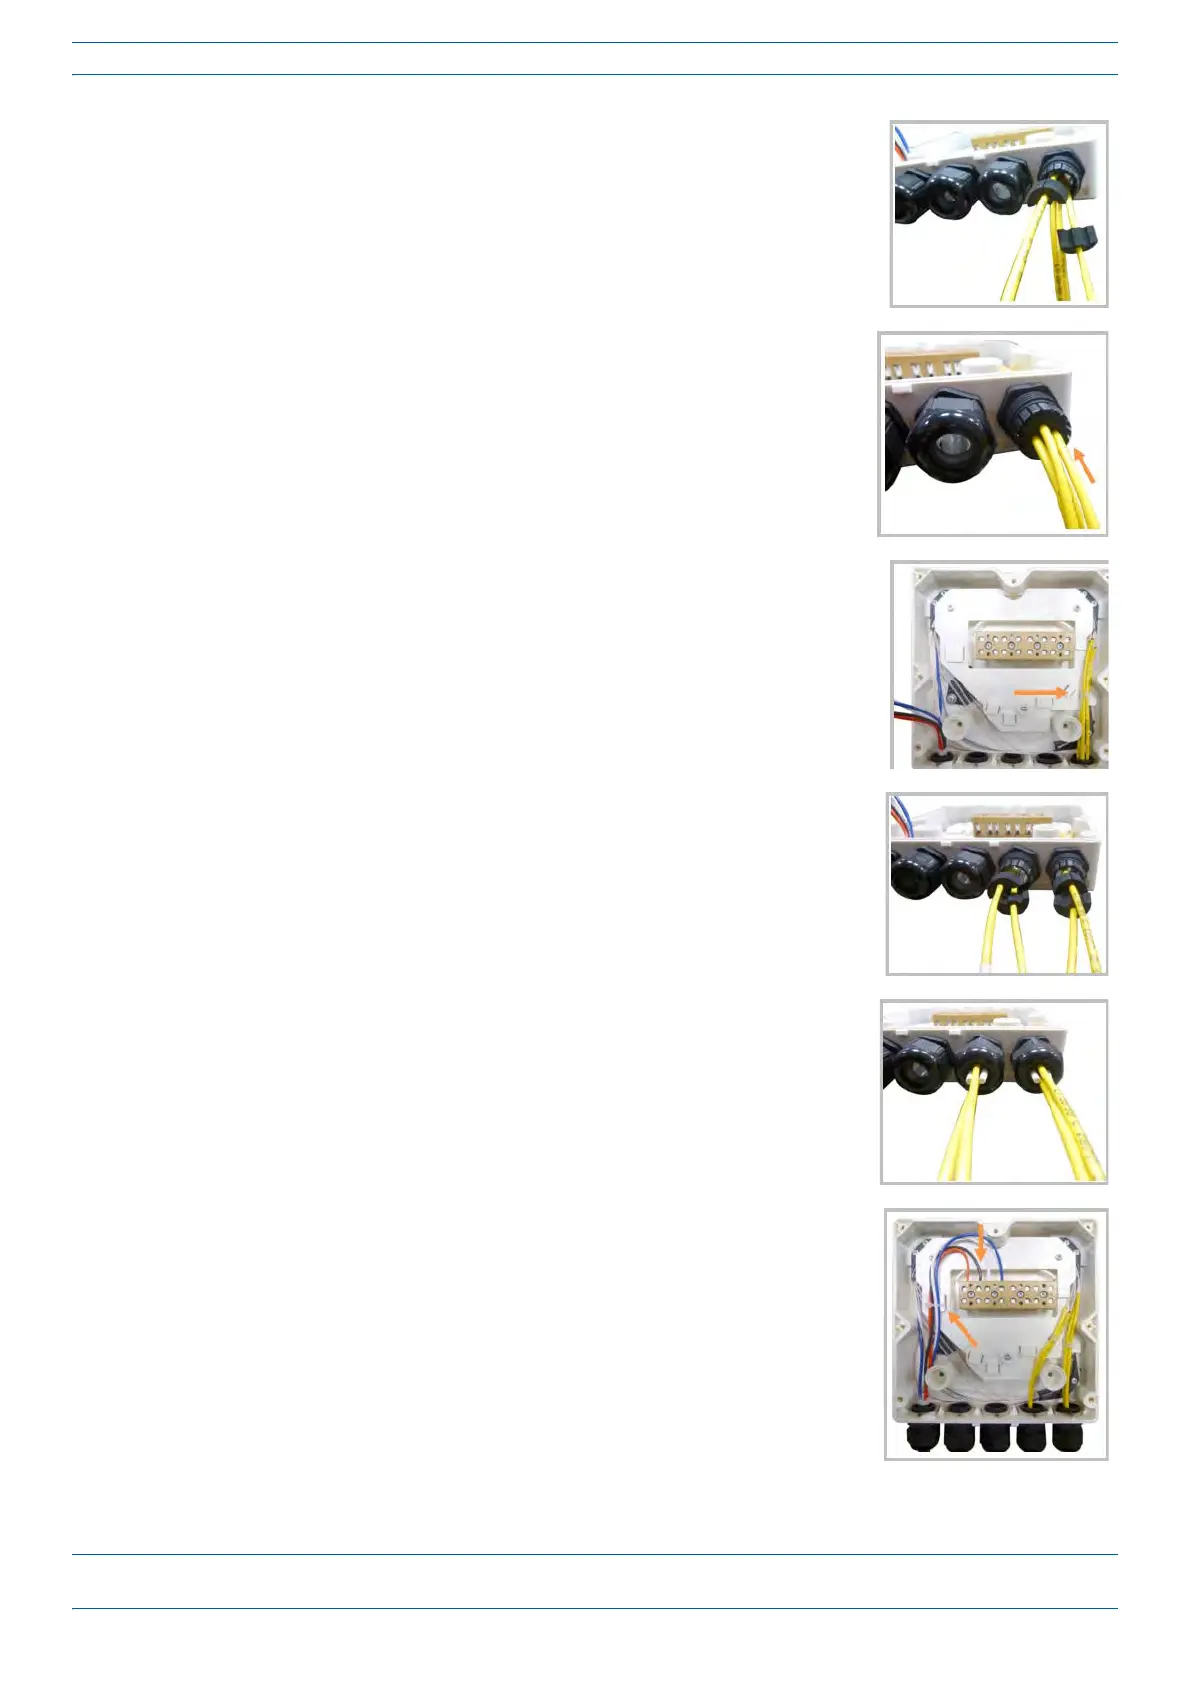
10 Place each cable into one of the grooves of the seal insert.
11 Press the seal insert into the clamp ring opening.
12 Fix the optical cables inside the box using one cable tie and tight the
sealing nut.
13 It is possible to separate the optical cables and use two different cable
glands. Remove the sealing nut and rubber on each cable gland.
14 Close all unused grooves with the plastic cylinders, no matter if one or
two cable glands are used.
15 Insert the copper wires in the first multiple terminal connectors. See
markings on the internal support. Then fasten the copper cables inside
the box using one cable tie.
 Loading...

