10. Hold the square in place and move the
motor slowly until the square is flush with the
blade.
11. Hold the motor tightly and lock the bevel
lock. Do not let the motor move out of place.
12. Check the square to make sure that it is
still flush with the blade.
13. Tighten the four screws behind the yoke.
14. Raise the radial arm until the blade is l-
1/2 inches above the table.
15. Unlock the bevel lock and move the
motor to the 45 ° bevel position. (Figure 83)
_1_ CAUTION: The motor is heavy and
can swing down quickly. You can be cut
or injured if the blade hits you. Hold the
motor when you unlock the bevel lock.
Fig.83
16. Move the motor back to the 0° bevel
position and lock the bevel lock.
17. Lower the radial arm until the blade is just
above the table.
18. Place the long edge of the framing square
on the table and the short edge against the
blade as before. Make sure the square is
against the surface of the blade and not the set
of a tooth.
19. Turn the blade with your hand several
times and check to see if the square is flush
with the blade.
20. If the square is flush with the blade after
each rotation, go to the next section, or
If there is a gap between the square and the
blade after any rotation, go back to step 8 and
repeat.
Squaring Blade to Fence
These steps are done so that your blade will
be perpendicular to the fence. This will help
reduce the risk of kickback when ripping, and
splintering of the workpiece and burning of
the kerf when ripping and crosscutting.
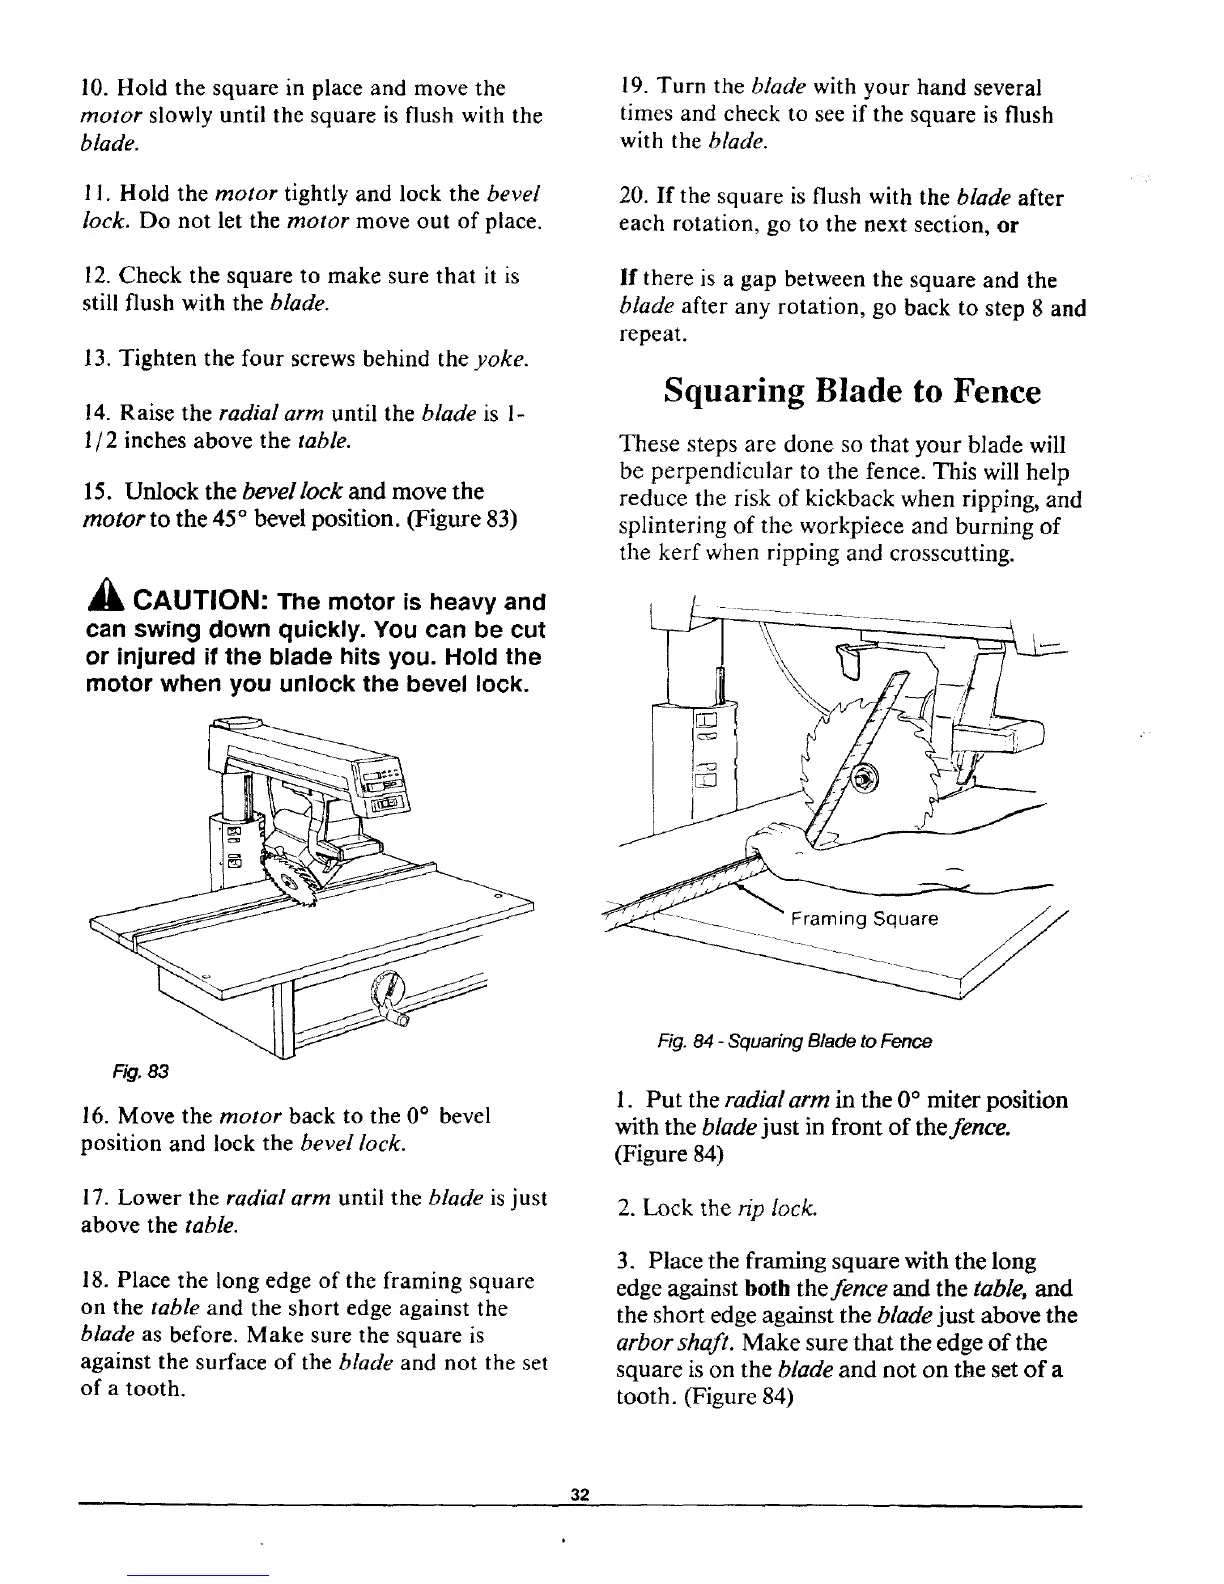
Fig. 84 - Squaring Blade to Fence
1. Put the radial arm in the 0° miter position
with the blade just in front of the fence.
(Figure 84)
2. Lock the rip lock.
3. Place the framing square with the long
edge against both the fence and the table, and
the short edge against the blade just above the
arbor shaft. Make sure that the edge of the
square is on the blade and not on the set of a
tooth. (Figure 84)
32
 Loading...