www.DaikinApplied.com 11 OM 1085-6 • MICROTECH III CONTROLLER
Downloading to Baseboard #668105601
or I/O Expansion Module #668105702
with Renesas E8a Programmer
Getting Started
You will need the following:
• WSHP unit controller baseboard with hardware part
number 668105601 or I/O expansion board with hardware
part number 668105702.
• Renesas E8a programmer hardware and software
website provided in Table 5.
• Computer with a Windows-compatible operating system.
Refer to www.renesas.com for more information.
• WSHP unit controller or I/O expansion module “.mot”
Support Team at 315-282-6434 to request a copy of this
1. Acquire the Renesas E8a programmer and interface
cable as described in Table 5.
2. Download the latest Renesas Flash Development Toolkit
software available at www.renesas.com/us/en/products/
toolkit-programming-gui.html.
NOTE: It is important that you install the Flash Development
Toolkit software before connecting the programmer
to the USB port on your computer. The USB driver is
automatically installed.
3. Connect the E8a programmer to the USB port on your
computer using the USB interface cable.
a. Connect the mini-plug of the USB interface cable
to the USB I/F connector of the E8a.
b. Connect the plug of the USB interface cable to the
USB port on your computer.
NOTE: The E8a programmer is active once connected to the
USB interface cable.
4. Power down the unit controller.
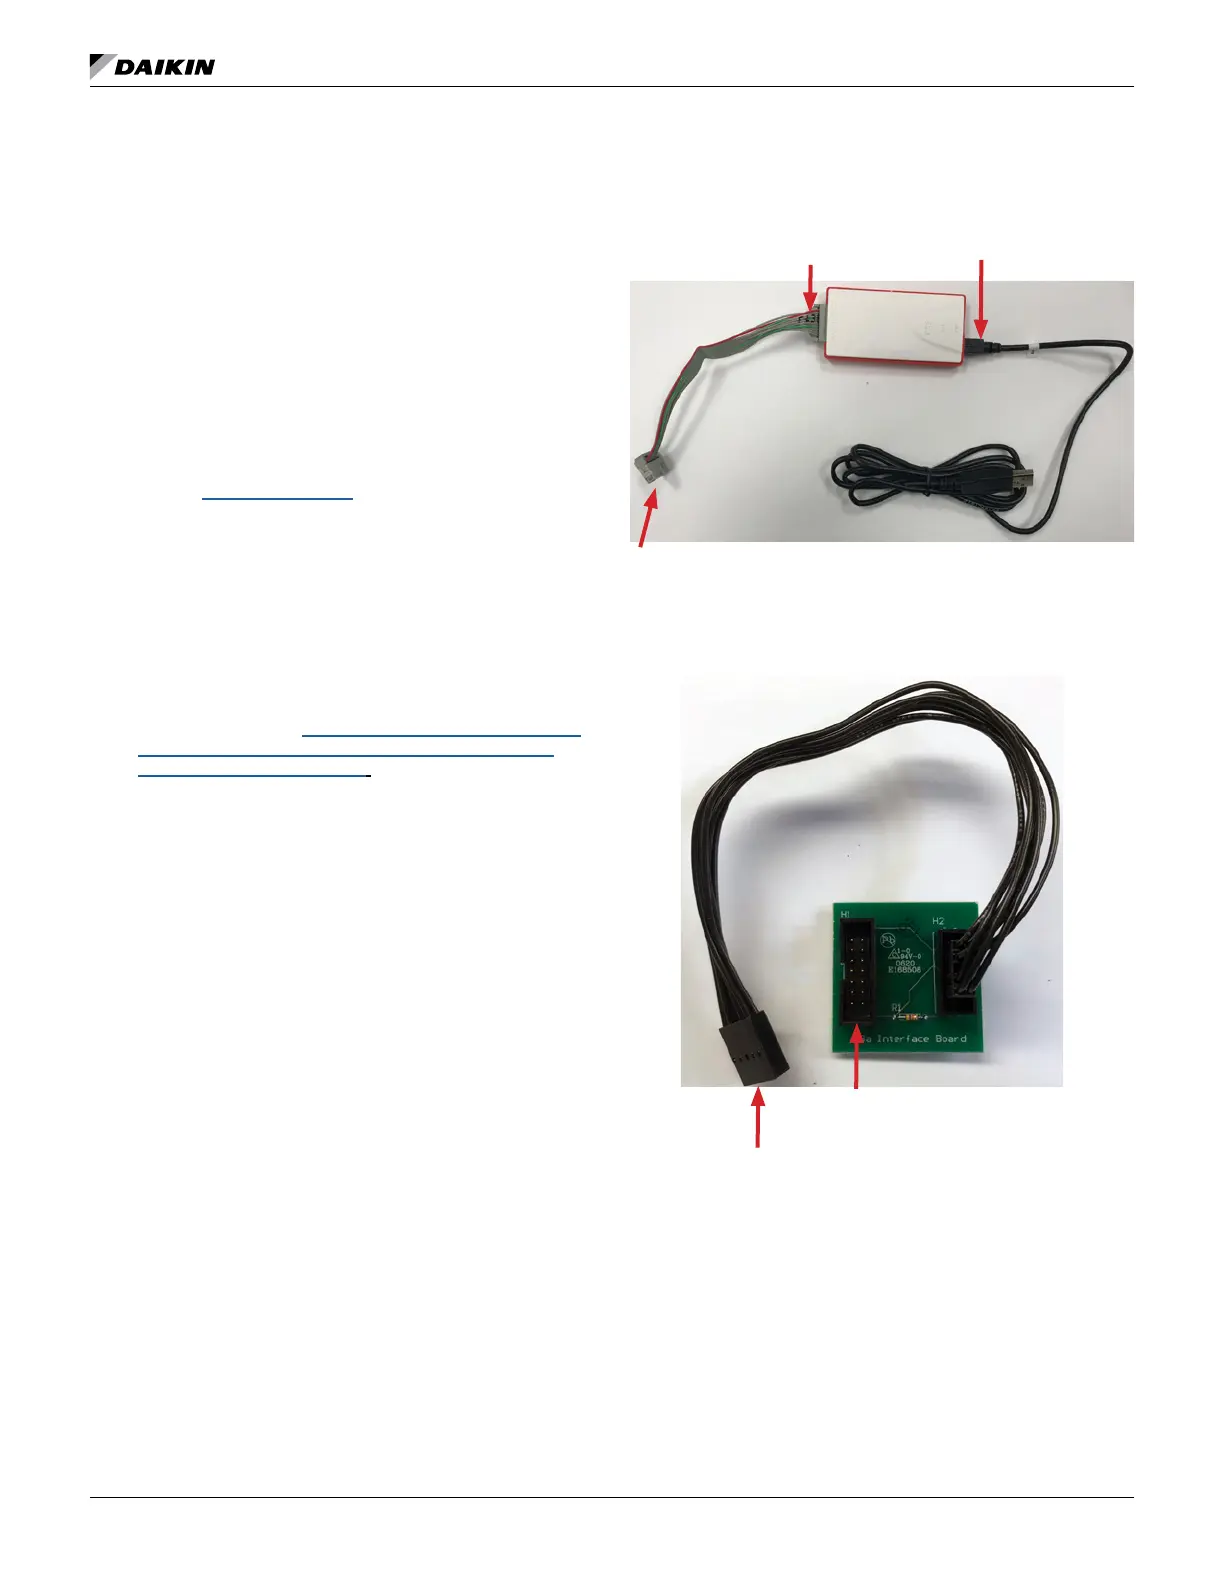
5. Connect the E8a programmer to the MCU:
a. Connect the interface ribbon cable to the user-side
connector of the E8a programmer (Figure 10).
b. Carefully insert the Renesas E8a 14-pin connector
to the interface cable PCB header pins labeled
“E8a Emulator” (Figure 11).
c. Connect the 10-pin connector to the JTAG port on
the control board.
d. Place the RUN/PRG jumper in the PRG position
(Figure 26).
6. Apply power to the unit controller.
NOTE: Do not remove power from the unit controller
or unplug the USB interface cable during this
process. The power supplied from the board to the
programmer could possibly damage the hardware.
7. Open the Renesas Flash Development Toolkit (FDT)
software using the "Flash Development Toolkit 4.09
controller. Proceed to Step 10 to complete this process.
Otherwise, skip to Step 20.
User Side Port
with 14-pin Ribbon
Cable Connected
USB I/F Port with
Interface Cable
Connected
14-Pin Ribbon Cable Connection to Custom Inter-
face Cable
H1, 14-Pin Header to Renesas
E8a Programmer
H2, 10-Pin Connection to Custom
Interface Cable

 Loading...