OM 1085-6 • MICROTECH III CONTROLLER 8 www.DaikinApplied.com
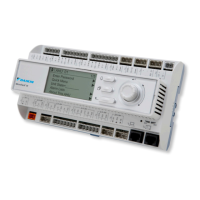
Unit Controller and I/O Expansion Module
The following describes how to download and verify the WSHP
unit controller and I/O expansion module software.
There are two sets of unit controller (baseboard) and
companion I/O expansion module hardware part numbers.
The software loaded on the boards varies depending on the
This section is organized into two separate sub-sections based
on the programming tools needed to download each set of
hardware part numbers.
NOTE: Before proceeding, refer to Table 1 - Table 4 in order
thus which tools to use. Figure 1 and Figure 2 show
Downloading to Baseboard #668105611
or I/O Expansion Module #668105711
with Renesas E2 Lite or E1 Programmer
Getting Started
You will need the following:
• WSHP unit controller baseboard with hardware part
number 668105611 or I/O expansion board with hardware
part number 668105711.
• Renesas E2 Lite or E1 programmer hardware.
• Renesas Flash Development (RFP) software. The
RFP includes the Renesas Project File (.rpj) used for
links to the Renesas website provided in Table 5 and see
Note below.
• Computer with a Windows-compatible operating system.
Refer to www.renesas.com for more information.
•
See Note below.
NOTE: Contact the ATS Technical Support Team at
315-282-6434 to request a copy of the .hex and/or
Daikin Applied website at www.daikinapplied.com/
resources/application-software.
The instructions below apply to downloading the WSHP unit
controller or I/O expansion board using the Renesas E2 Lite
programmer (Figure 4).
The Renesas E1 programmer can also be used but is no
1. Acquire the Renesas E2 Lite programmer and interface
cable as described in Table 5.
2. Download the latest Renesas Flash Programmer (RFP)
software from the Renesas website at www.renesas.
com/us/en/software/D3017334.htm.
NOTE: It is important that you install the Flash Programming
software before connecting the programmer to
the USB port on your computer. The USB driver is
automatically installed.
3. Connect the E2 Lite programmer to the USB port on your
computer using the USB interface cable.
a. Connect the mini-B plug of the USB interface cable
to the USB I/F connector of the E2 Lite.
b. Connect the A plug of the USB interface cable to
the USB port on your computer.
NOTE: The E2 Lite is active once connected to the USB
interface cable.
4. Power down the unit controller.
5. Connect the E2 Lite programmer to the MCU:
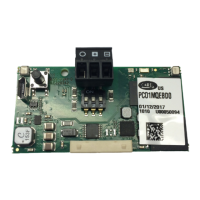
a. Connect the interface ribbon cable to the user-side
connector of the E2 Lite (Figure 8).
b. Carefully insert the Renesas E2 Lite or E1
programmer 14-pin connector to the interface
cable PCB header pins labeled “E1 Emulator”
(Figure 6 and Figure 7).
c. Connect the 6-pin connector to the CN_PGRM port
on the control board (Figure 5).
NOTE: It is important to identify the red cable wire is next to
the arrow on the PCB (Figure 8). Figure 9 shows the
6. Apply power to the unit controller.
NOTE: Do not remove power from the unit controller
or unplug the USB interface cable during this
process. The power supplied from the board to the
programmer could possibly damage the hardware.
7. Open the Renesas Flash Programmer (RFP) software.
8. Click Open Project from the File menu.
9.
Getting Started
10. Click Browse in the Project File section to select the
click Open. See the Note at the end of the Getting
Started
11. If using the E1 programmer, follow steps 11a-b.
Otherwise, if using the E2 Lite programmer, go to Step
12.
a. From the Connect Settings tab, set the
Communication Tool to E1.
b. Click the Operation tab.

 Loading...