www.DaikinApplied.com 19 OM 1085-6 • MICROTECH III CONTROLLER
BACnet Communication Module
This section describes how to do the following:
1. Install the programming tools needed for downloading
BACnet communication module software.
2.
software
There are two programming tools compatible with the BACnet
communication module. Both are referenced in Table 5. The
instructions provided here support the J-Link hardware and
J-Flash ARM software supplied by Segger Microcontroller.
The second tool is the SAM-BA
®
boot programmer. SAM-BA
is considred obsolete and is no longer supported. Refer to a
previous version of this document (OM 1085-5 or older) for
Figure 33 shows the important programming features of the
BACnet communication module for reference during the
BACnet Communication Module Main
Components
Downloading Segger J-Flash ARM
tools for use with the BACnet communication module.
Once complete, follow the steps to download the BACnet
communication module software.
Getting Started
You will need the following:
• BACnet communication module hardware PN 668105901
installed on the WSHP unit controller
• The latest Segger J-Link hardware (J-Link Plus bundle,
which includes JTAG ribbon cable and licensed
hardware) from www.segger.com/products/debug-probes/
j-link/models/j-link-plus/
• The latest Segger J-Link Software and Documentation
pack for Windows from www.segger.com/downloads/
jlink/#J-LinkSoftwareAndDocumentationPack
• Computer with a Windows-compatible operating system.
Refer to www.segger.com for more details
•
Contact the ATS Technical Support Team at 315-282-6434 to
Installation and Setup
If the software has not been previously installed, follow steps
1- 7 below. Otherwise skip to the next section.
1. Download the most recent version of J-Link Software and
documentation pack for Windows from www.segger.com/
downloads/jlink/#J-LinkSoftwareAndDocumentationPack
NOTE: Purchase the J-Link Plus bundle package to make
sure the hardware is properly licensed for use with
J-Flash software.
2. Open the JLink_Windows application and click Next from
the welcome screen.
3. Review the terms of the license agreement and click
I Agree.
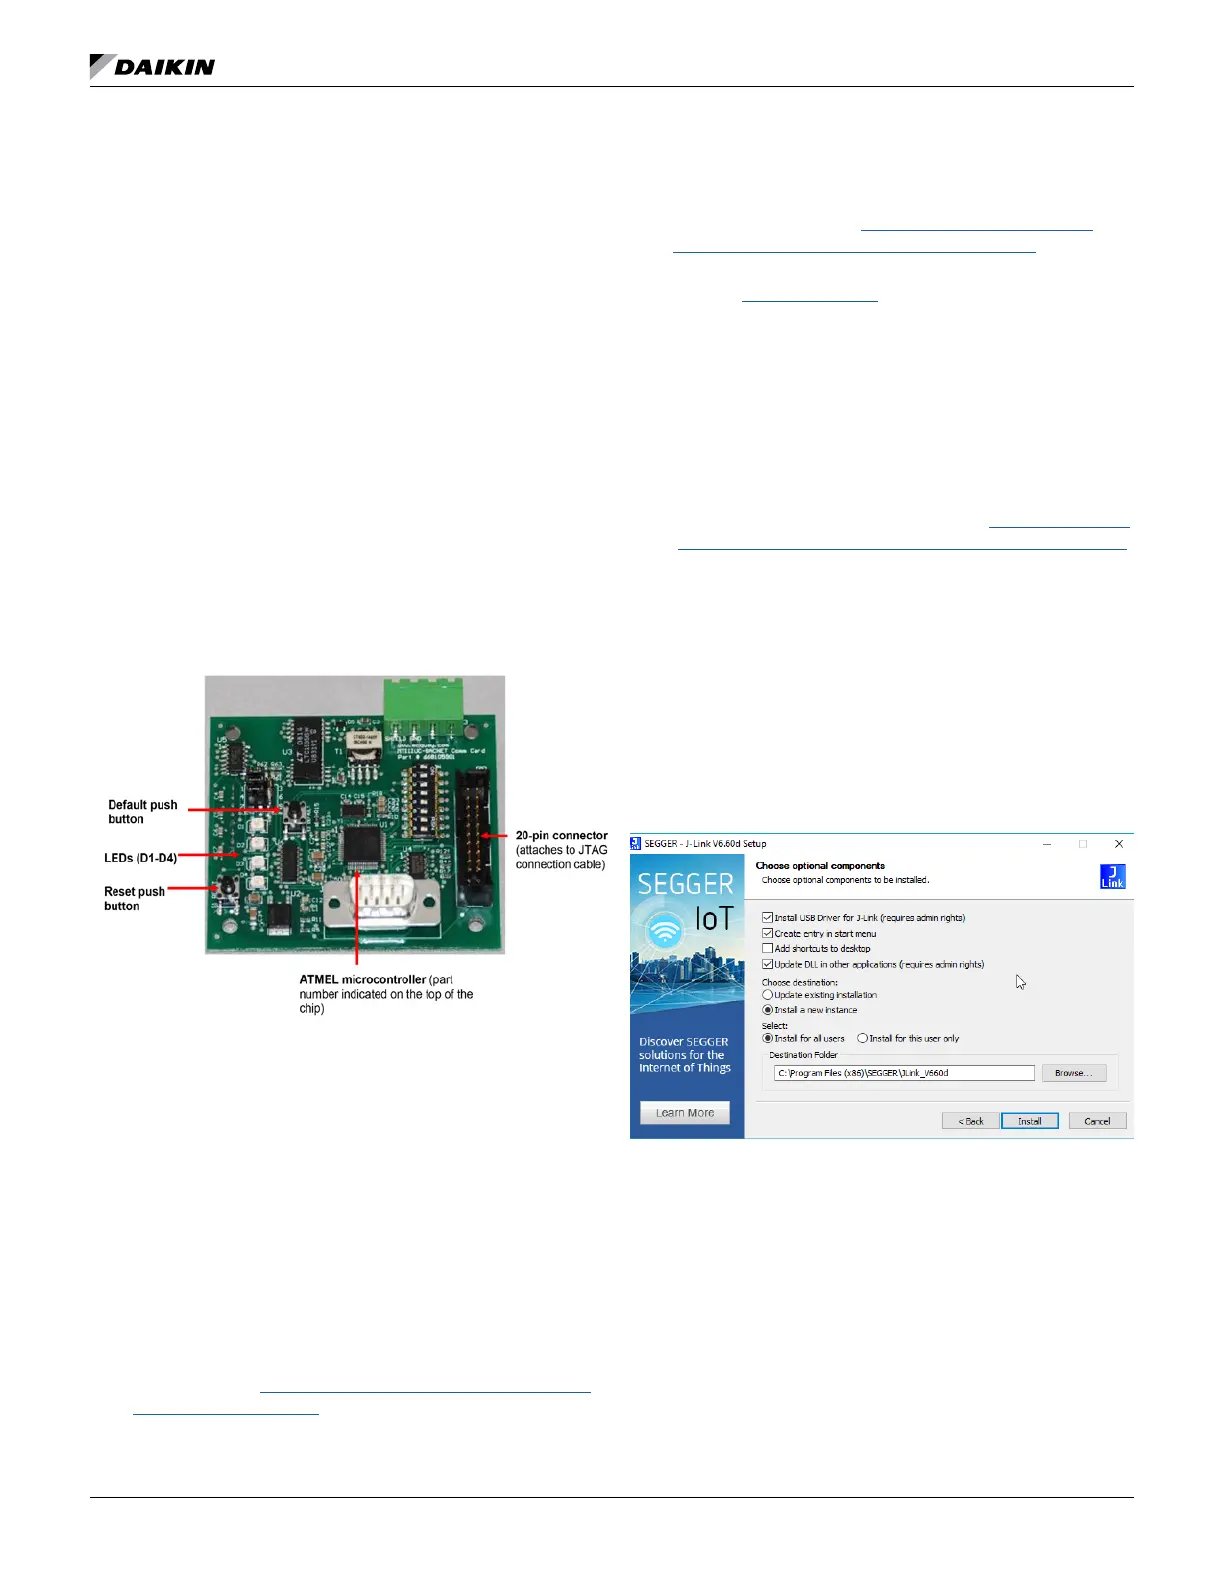
4. Choose the optional component settings as shown in
Figure 34.
5. Click Install.
6. Click Finish when prompted. Installation is now complete
7. Proceed to the next section.

 Loading...