60 Installing System Components
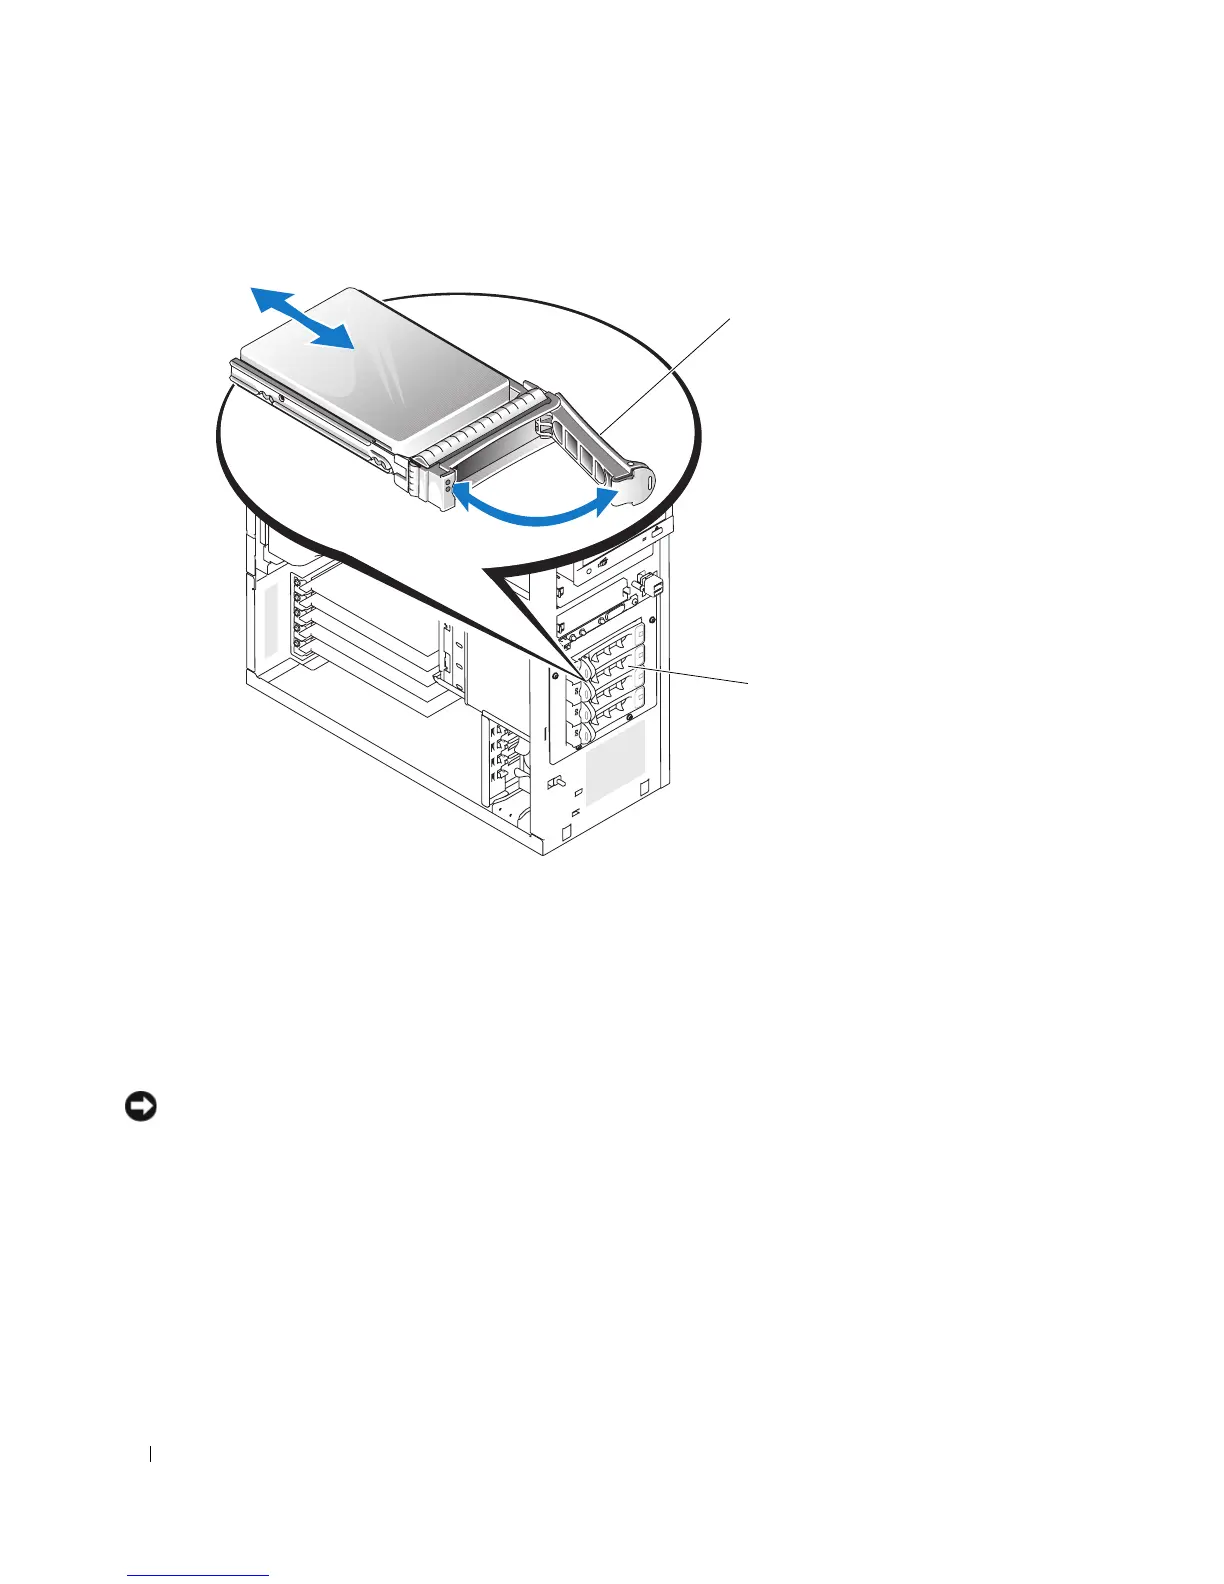
Figure 3-11. Removing or Installing a SCSI Hard-Drive Carrier
Installing an Hard Drive in the Lever-Release Drive Carrier
1
Turn off the system, including any attached peripherals, and disconnect the system from the electrical
outlet.
2
Remove the bezel. See "Removing the Bezel" on page 43.
3
Open the hard-drive carrier handle. See Figure 3-11.
NOTICE: Do not insert a hard-drive carrier and attempt to lock its handle next to a partially installed carrier. Doing
so can damage the partially installed carrier’s shield spring and make it unusable. Ensure that the adjacent drive
carrier is fully installed.
4
Insert the hard-drive carrier into the drive bay. See Figure 3-11.
5
Close the hard-drive carrier handle to lock it in place.
6
Install the bezel. See "Installing the Bezel" on page 47.
7
Reconnect the system to its electrical outlet and turn the system on, including any attached
peripherals.
8
Install any required device drivers.
1 hard-drive carrier handle 2 lever-release drive carrier
1
2
 Loading...