74 Removing and Installing Parts
Removing a PCI Express Card
1
Follow the procedures in "Before You Begin" on page 61.
2
If necessary, disconnect any cables connected to the card.
3
Gently pull back the securing tab, grasp the card by its top corners, and then ease it out of its connector.
4
If you are removing the card permanently, install a filler bracket in the empty card-slot opening.
NOTE: Installing filler brackets over empty card-slot openings is necessary to maintain FCC certification of the
computer. The brackets also keep dust and dirt out of your computer.
5
Replace the computer cover (see "Replacing the Computer Cover" on page 96), reconnect the
computer and devices to electrical outlets, and then turn them on.
6
Uninstall the card’s driver.
Drives
Your computer supports a combination of these devices:
• One SATA (serial ATA) drive
• One FlexBay drive (optional floppy drive or Media Card Reader)
• One CD or DVD drive
Connect a SATA optical drive to the connector labeled "SATA1" on the system board. A serial ATA hard
drive should be connected to the connector labeled "SATA0 (blue connector)" on the system board.
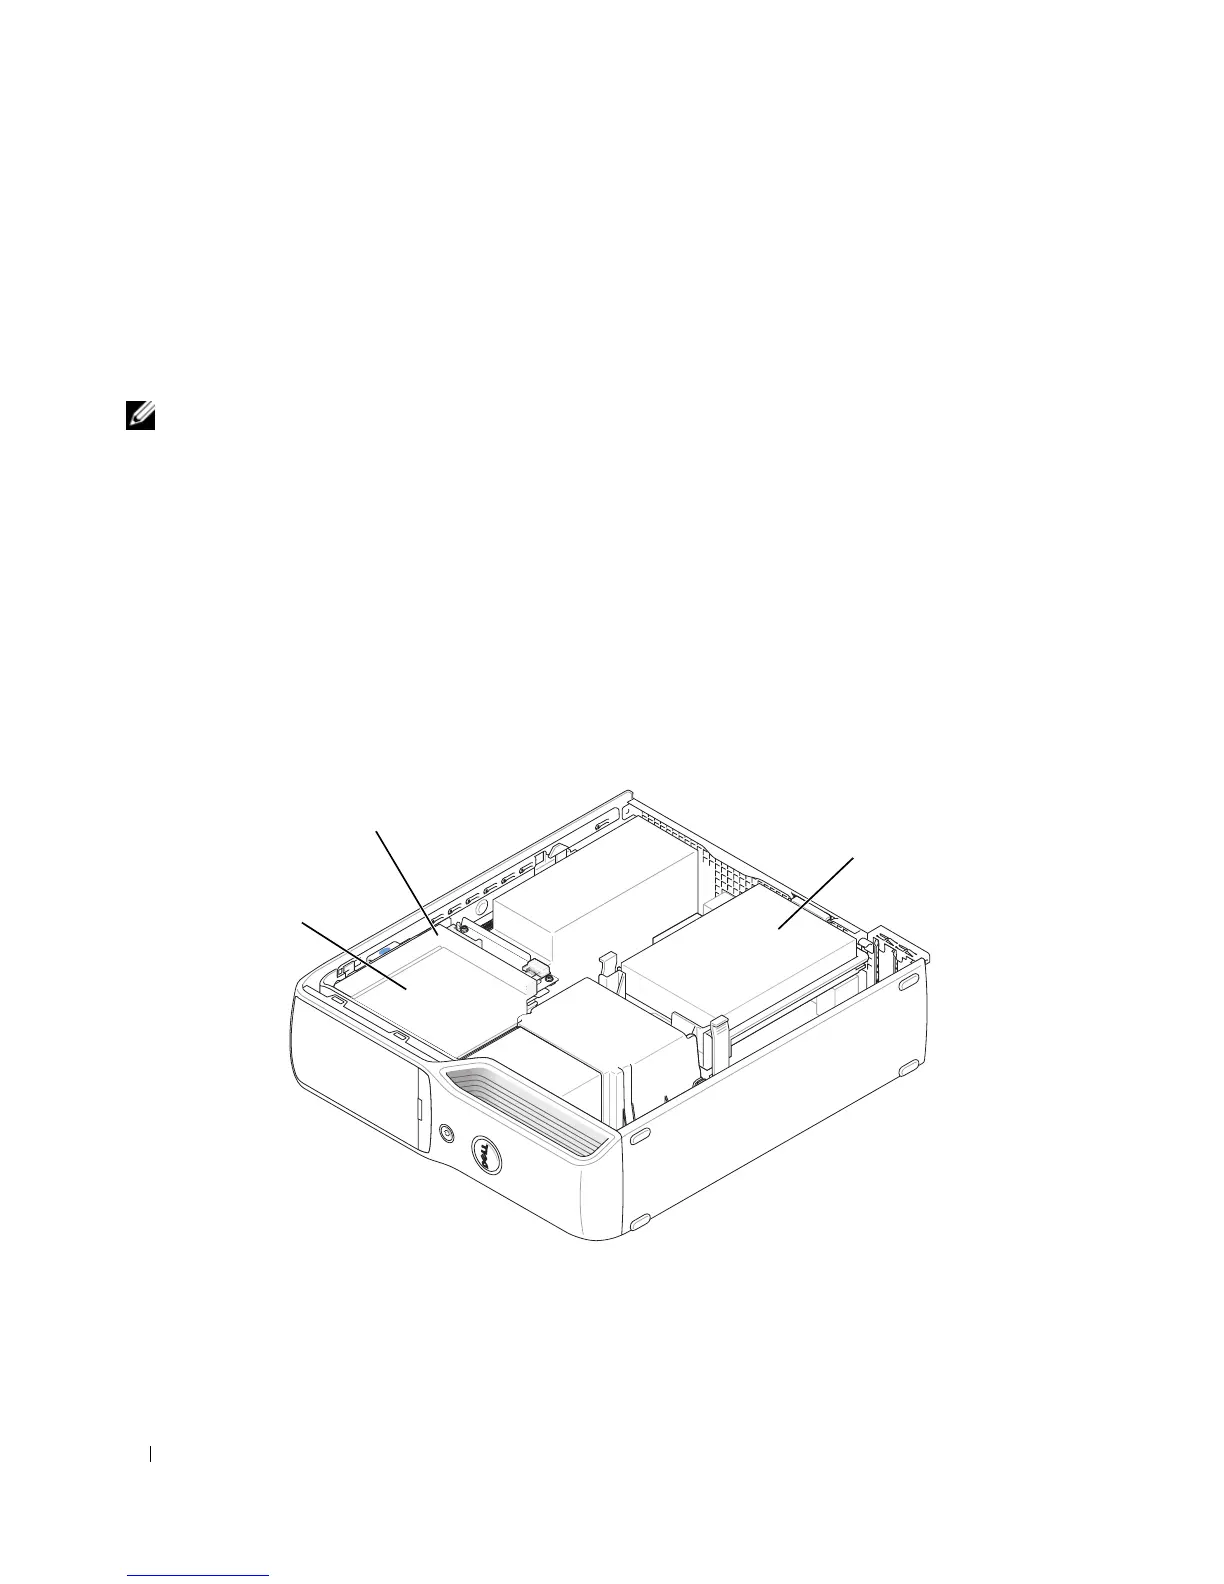
1 FlexBay for optional floppy drive or
Media Card Reader (under CD/DVD drive)
2 CD/DVD drive 3 hard drive
1
3
2
 Loading...