33
Copyright © 2022 Eaton Corporation plc. All rights reserved.
4.3. System Installation
4.3.1. Mechanical installation
NOTE
• Before performing the following steps, please make sure that the forklift or pallet lift
can bear the cabinet's weight (see
Table 3-1 Dimensions and Weights
).
• Do not tilt the cabinet more than 10° from vertical line, otherwise the cabinet may tip
over.
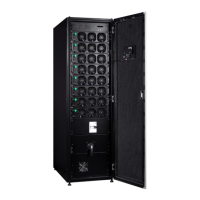
4.3.2. Cable installation
To facilitate installation, the power supply and control signal cables can be led in through the
bottom or top part of the cabinet. Please see
Figure 4-3
and
Figure 4-4
for the specic locations .
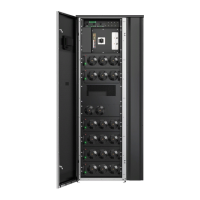
1. For 15–40k, open the side cover plate (
Figure 4-3
). For 60–80k, open the cover plate of the
terminal block (
Figure 4-4
).
• Put the cables through the wiring port to connect them with the corresponding terminal
blocks, and fasten them with the torques specied in Table 3-4/Table 3-5/Table 3-6. Fasten
the grounding wire onto the grounding screw (For 15–40k, see (
Figure 4-3
). For 60–80K,
see
Figure 4-4
).
2. Arrange the cables and use cable ties to fasten them at the bonding hole, then try to move
the adjustable insulating plate leftward to cover and lock the wires and lock it (to prevent the
intrusion of sundries).
3. Clear the sundries inside the cabinet before mounting the side cover plate.
4. Install the parallel system, and repeat the above steps for each UPS.
5. Execute the instructions of Section
4.4
Installation of external battery cabinet.
WARNING
Remember to lay the wires on both sides of the cabinet to prevent it from blocking the hot
air venting area in the rear part.