Envoy Installation and Operation
2013 Enphase Energy Inc. 141-00011 Rev 05
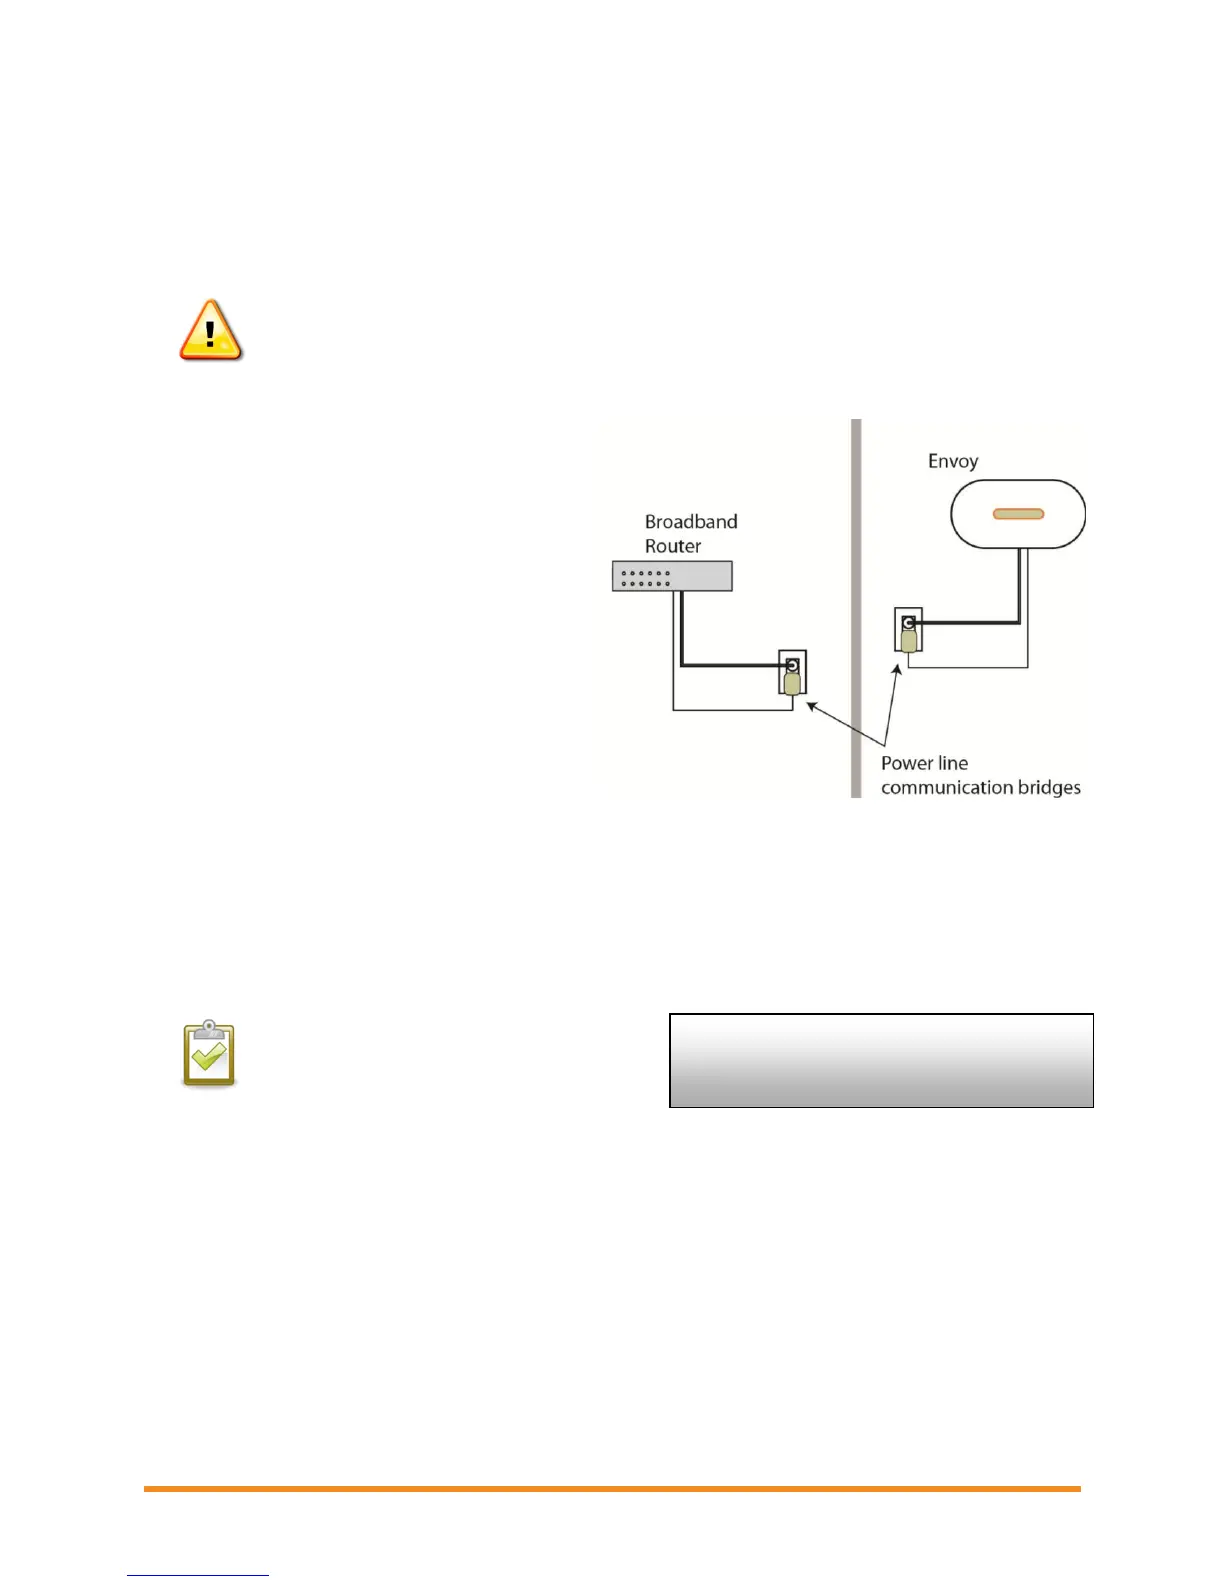
5. Connect Power Line Communication Bridges (if required)
If you need to locate the Envoy away from the router, at a distance where an Ethernet cable is not
practical, use power line communication bridges with the Envoy or purchase a wireless Ethernet bridge.
Bridges allow the Envoy to communicate with the broadband router without the need for additional
Ethernet cabling. To install the power line communication bridges:
WARNING! Do not remove power from the Envoy if the LCD displays:
“Upgrading. . . Do Not Unplug.”
a. Plug one of the bridges into the same AC outlet that the Envoy is using.
b. Connect one end of the Ethernet cable
into the Ethernet port on the Envoy.
c. Connect the other end of that Ethernet
cable into the bridge.
d. Plug the other bridge into an AC outlet
near the broadband router.
e. Connect one end of a second Ethernet
cable into the second bridge.
f. Connect the other end of that Ethernet
cable into the broadband router.
g. If the broadband router is operational,
press and hold the Envoy menu button.
Release the button when the LCD
displays Get New IP Address. Wait for
15 minutes. If this fails, unplug the
Envoy, wait for 20 seconds, and plug it
back in. Wait 5 minutes for connection.
6. Check the Internet Connection
a. Look for the “+Web” indication.
b. If it still shows “-Web” 5 minutes after connecting to the broadband router, see “Network Basics
and Troubleshooting” on page 30.
NOTE: Power production shows as 0W and
0kWh (see definitions of W and kWh on
page 19) until the microinverters are
discovered and microinverter monitoring
begins. Power production also shows 0W
and 0kWh for about a minute whenever the
Envoy powers up.
192.168.2.140 +Web
0W 0kWh 0
 Loading...