EasyManua.ls Logo

enphase Envoy Communications Gateway User Manual

enphase Envoy Communications Gateway
59 pages
To Next Page IconTo Next Page
To Previous Page IconTo Previous Page
Page #33 background image
Envoy Installation and Operation
2013 Enphase Energy Inc. 141-00011 Rev 05
33
The Envoy connects to these servers using their DNS names. If you add firewall rules for Envoy reporting,
Enphase recommends using the DNS names rather than the underlying IP addresses. This is because
the IP addresses are subject to change without notice.
WARNING: Do not change the Envoy DHCP setting to use a static IP address unless you
also reserve the same IP address on your broadband router. See the section on DHCP
Reservations in your router's setup manual. Failure to reserve the static IP address on the
router will result in duplicate IP addresses and intermittent Internet connection problems.
Replacing an Envoy
If problems remain after following the troubleshooting steps above, contact Enphase at
support@enphaseenergy.com. If Customer Support authorizes an Envoy replacement (RMA), perform
the following steps.
1. Disconnect the Ethernet cable and power cord from the old Envoy.
2. When the replacement Envoy arrives, connect it to the Ethernet cable and power cord.
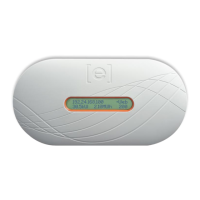
3. Verify that the new Envoy powers up. The Envoy LCD may display "Upgrading... Do Not
Unplug" for up to 20 minutes. Wait for this to complete before proceeding.
4. Verify that the new Envoy indicates “+Web within 5 minutes. If not, follow the network
troubleshooting steps above.
5. Verify that the new Envoy start discovering microinverters within 20 minutes of starting up. If
necessary, use the LCD menu (or the Enlighten Envoy page) to start a new device scan
during daylight hours. (See Using the Envoy LCD Menu on page 19.)
NOTE: If the old Envoy has communicated to the microinverters on the same day that the
new replacement Envoy is installed, the new Envoy will be unable to discover the
microinverters. Contact Enphase at support@enphaseenergy.com for assistance in this
situation.
6. After all microinverters have been discovered, stop the new device scan using the LCD
menu. (See Using the Envoy LCD Menu on page 19.)
7. Assess the power line communications by running a Communication Check from the LCD
menu (or from the Enlighten Envoy page) during daylight hours. (See Using the Envoy LCD
Menu on page 19.) If fewer than three bars are shown, relocate the Envoy for better power
line communications.
8. Ship the old Envoy to Enphase using the supplied RMA shipping label.

Table of Contents

Questions and Answers:

enphase Envoy Communications Gateway Specifications

General IconGeneral
Product TypeCommunications Gateway
CompatibilityEnphase microinverters
Weight2.2 lbs
Power Supply12V DC
CommunicationEthernet, Wi-Fi
MonitoringReal-time monitoring

Summary

Important Information

Getting Started with Envoy

Key initial information, safety, and audience for the Envoy manual.

Safety and Audience Guidelines

Adherence to electrical codes, safety precautions, and manual intended audience.

Enphase Envoy System Overview

System Components and Functionality

Describes Microinverters, Envoy Gateway, and Enlighten monitoring software.

Envoy Communication and Data Flow

Explains how the Envoy transmits data via power lines and the internet to Enlighten.

Envoy Installation Procedures

Installation Planning and Preparation

Covers system sizing, preinstallation checks, and location selection criteria.

Installation Flow and Key Steps

Outlines the sequence of installation tasks, from serial number to system performance view.

Envoy Operation and Interface

Initial Startup and Device Scanning

Covers initial scan, boot sequence, device discovery, and communication checks.

Normal Operation and LCD Display

Details normal operation, understanding the Envoy LCD screen, and system status.

Using the Envoy LCD Menu System

Guide to navigating the Envoy's menu for various functions and settings.

System Configuration and Management

Covers initiating scans, grid configuration, IP address, and connection settings.

Checking Envoy Status via Enlighten

How to monitor system status, signal strength, and device counts using Enlighten.

Accessing the Envoy Local Interface

Steps for connecting to the Envoy via LAN or direct connection for local access.

Troubleshooting Envoy Issues

Power Line Communication Problems

Resolving issues related to signal strength, device detection, and communication levels.

Network Connectivity and IP Issues

Addressing IP address problems, web connection failures, and system error messages.

Device-Specific Faults and Event Messages

Clearing GFI conditions, DC resistance faults, and interpreting system event messages.

Managing Scans, Time Zones, and Devices

Configuring controlled scans, setting time zones, and ZigBee device setup.

Technical Data and Specifications

Envoy Hardware and Communication Specs

Details Envoy interface types, monitoring capacity, power requirements, and dimensions.

Compliance and Warranty Information

Covers product compliance standards, meter accuracy, and warranty terms.

Related product manuals