Fusion Pro Rim-Drive Rotary Attachment
The optional Fusion Pro Rim-Drive Rotary Attachment allows you to mark and engrave on cylindrical
objects.
Note: Using the IRIS™ Camera to place artwork on the rotary is not suggested. The rotary will
be far away from the camera, so the image will become distorted.
Rotary Attachment Installation
1. Lower the engraving table far enough so the Rotary Attachment will not inteere with the lens
carriage.
An important note: Turn o the power to the engraver. It’s important that the laser system is
turned o before installing (or removing) the Rotary Attachment. The Fusion Pro laser system
will not recognize the Rotary Attachment until the system is rebooted, and you could damage
the electronics if the rotary is installed while the laser system is powered on.
2. Place the Rotary Attachment in the upper le corner
of the table so that the baseplate is positioned
against the sides of the le and top rulers. The rotary
rests on the table against the rulers and does not
need to be locked in place.
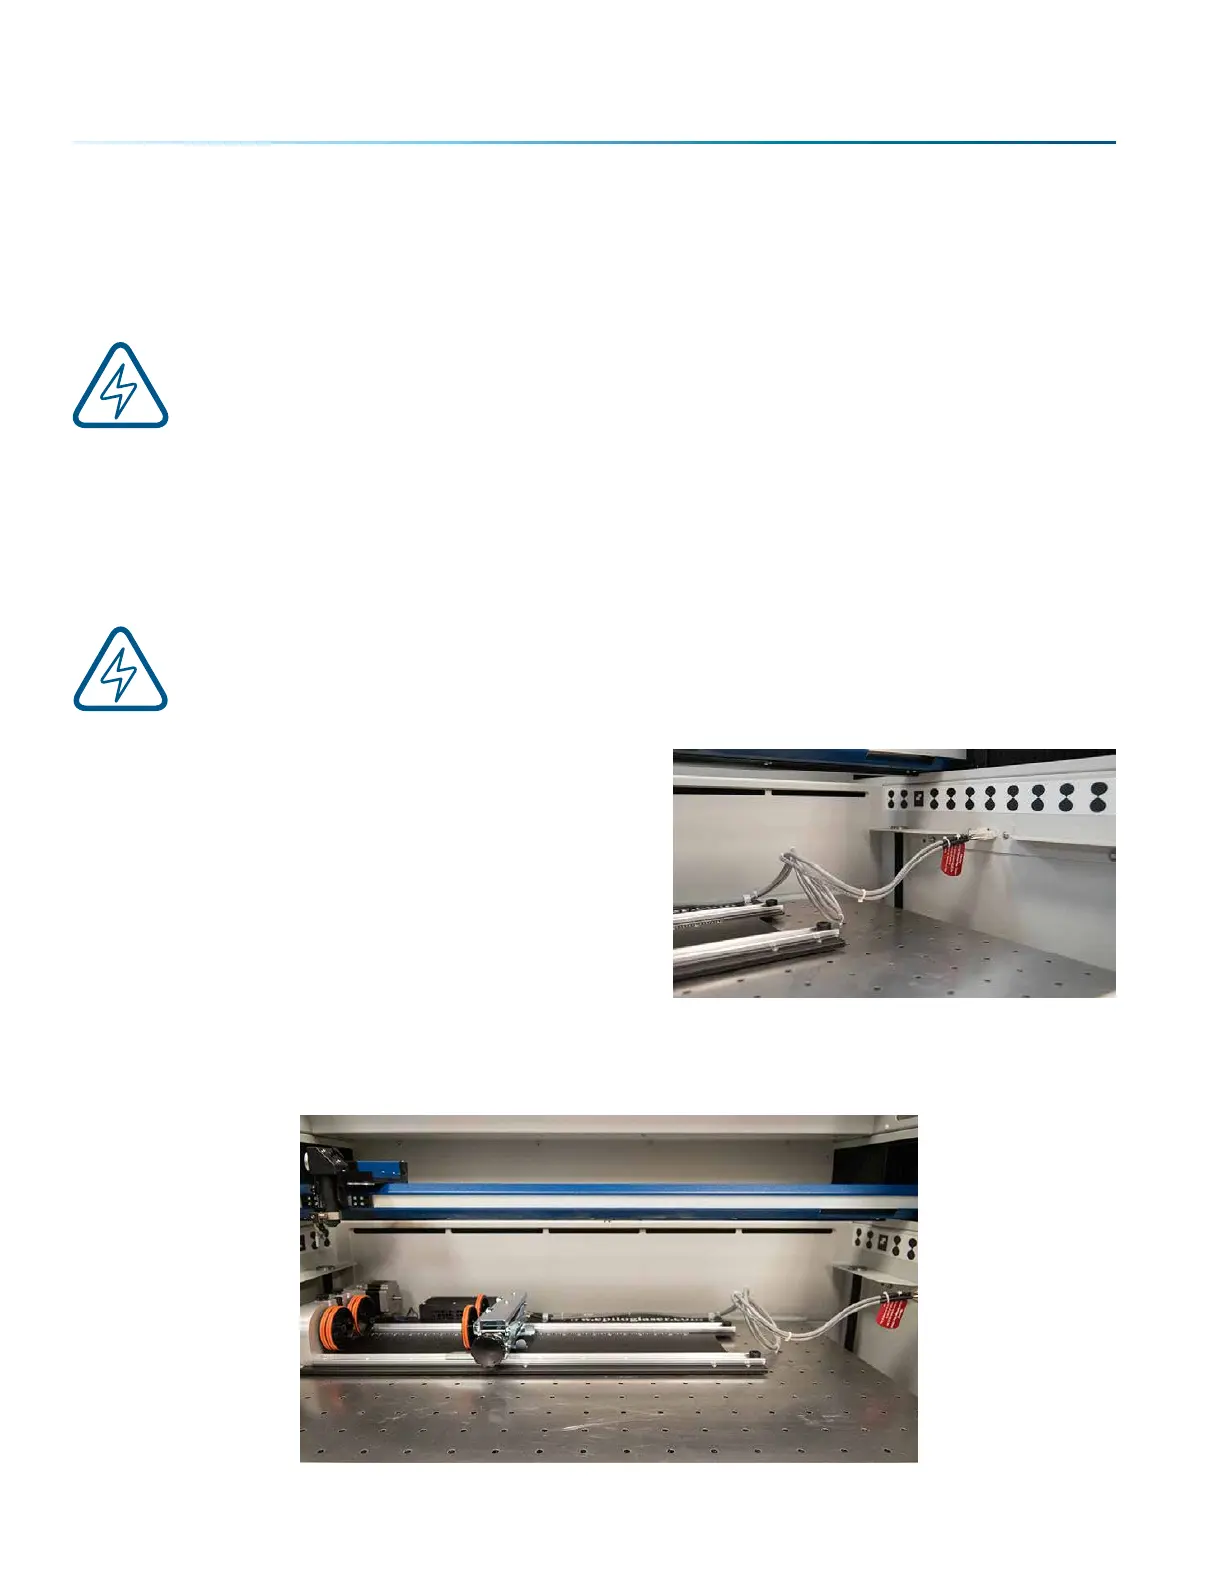
3. With the Fusion Pro powered o, mate the cable
connector to the plug located at the right side of the
cabinet as shown in the photo.
4. Once the Rotary Attachment cable is connected, you can power on the laser system. The Fusion
Pro senses that the Rotary has been installed. During machine initialization the lens carriage will
find its new Home Position over the center of the Rotary Attachment, as shown below.
- 128 -
SECTION 9: OPTIONAL FEATURES

 Loading...


