1. INITIAL SETTING AND ADJUSTMENT
1-9
12. To connect a service gateway, select [Connected] at [Service Gateway] then the
IP address and the port number appear below the [Connected] item. Do not
change these settings.
13. Click [Save] on the info bar. Several confirmation messages appear. Click [OK] to
reboot the system. To discard all changes, click [Discard Changes].
Note 1: If the monitor does not display images correctly after system reboot, re-
boot the monitor.
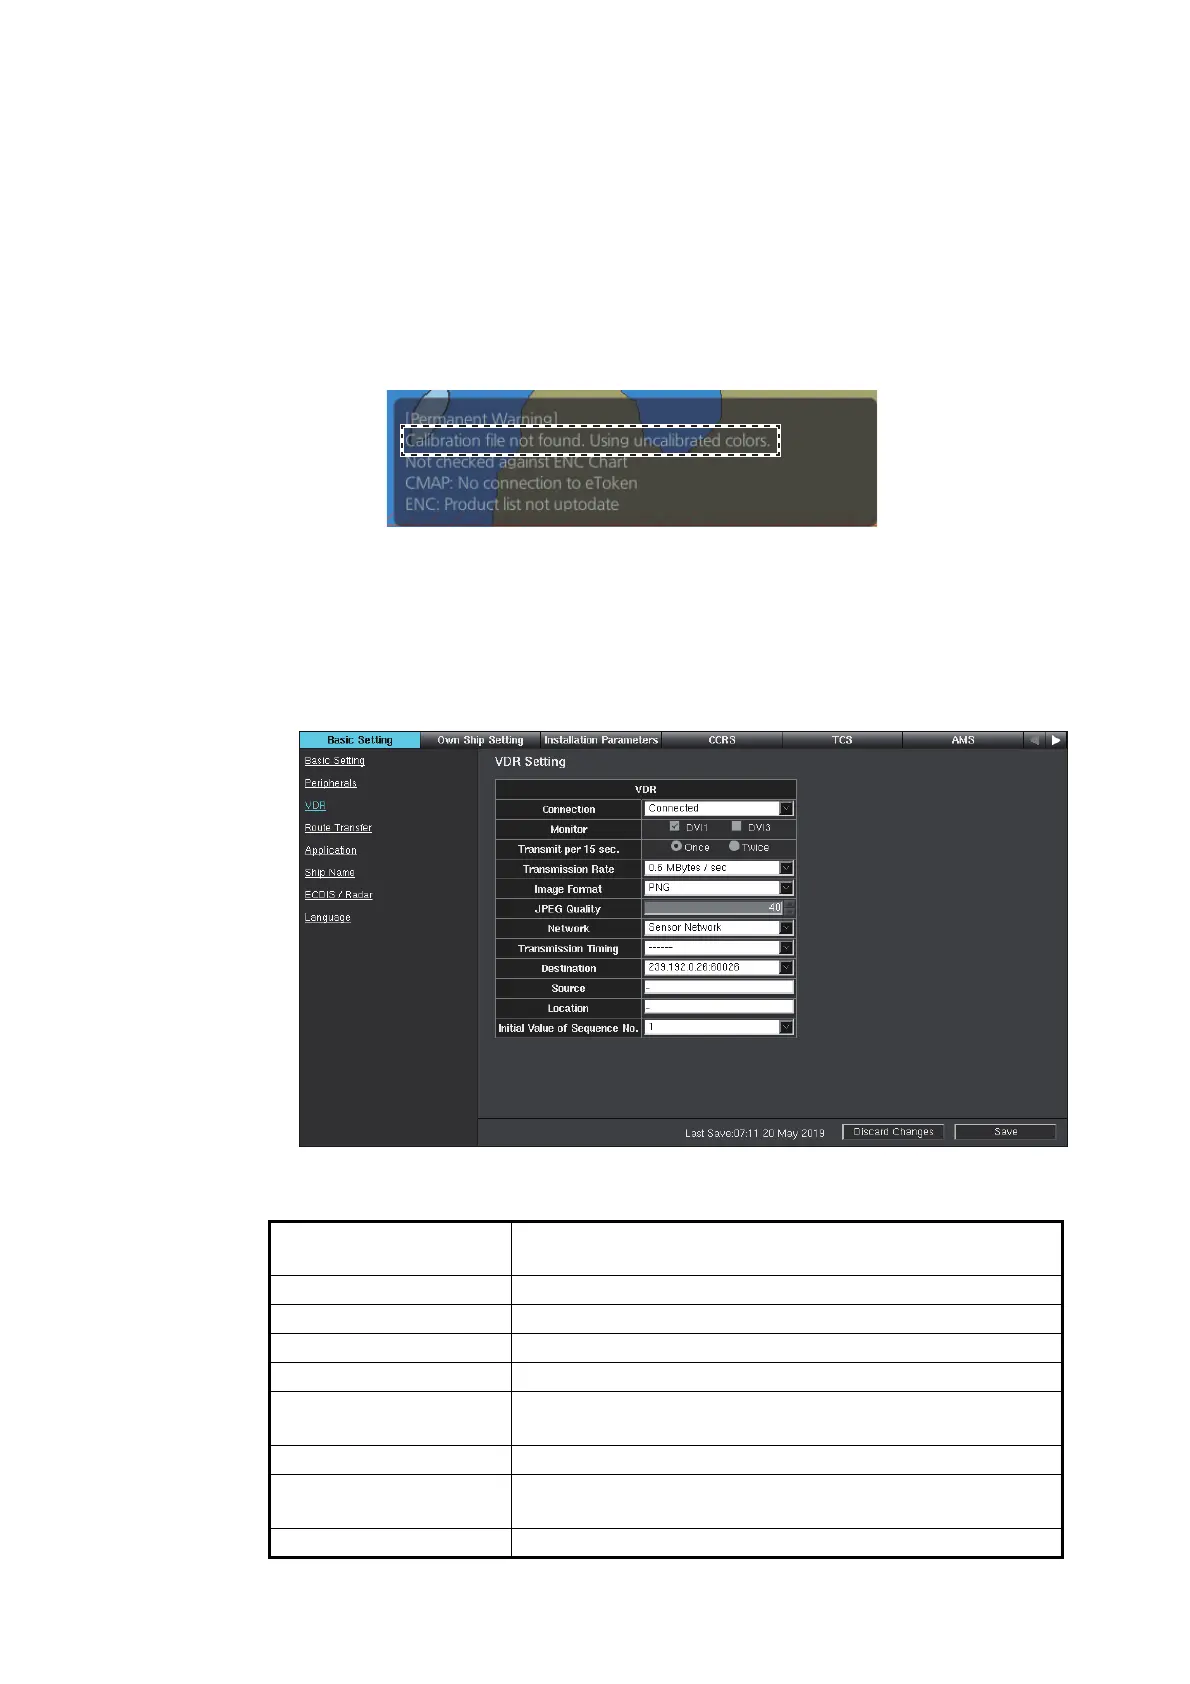
Note 2: When the message shown below appears after system reboot, confirm
the connection and settings of the system.
1.2.3 [VDR] window
1. Access the [Common Installation Setting] menu and click [Basic Setting] on the
tab bar.
2. Click [VDR] on the menu bar.
3. If a VDR is connected, select [Connected] from the [Connection] pull-down list.
Refer to the table below to set the items in the menu.
Menu item/
interactive field
Description
[Monitor] Select the DVI port connected with the VDR.
[Transmit per 15 sec.] Set the number of transmissions in 15 seconds.
[Transmission Rate] Set the transmitting rate.
[Image Format] Set the image format.
[JPEG Quality] Set the quality of JPEG data. Available when [JPEG] is se-
lected for [Image Format].
[Network] Select the network connected with the VDR.
[Transmission Timing] Set the delay timing. The delay is applied regardless of the
Display Mode selected (RADAR or Back-up ECDIS).
[Destination] Set the IP address and port of the destination.
 Loading...