HygroPro User’s Manual Page 5
Chapter 1: Installation
1.3 Mounting the Transmitter (cont.)
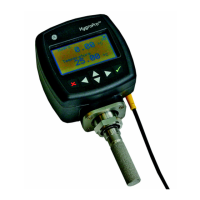
1. Make sure the sintered or stainless-steel shield is in place over the
sensor. This shield protects the aluminum oxide sensor from
damage during operation.
2. Using the integral 3/4-16 straight male thread, screw the probe end
of the transmitter into the process or sample system fitting. Make
sure not to damage the threads.
Note: A 3/4-16 to G 1/2 thread adapter is available from GE.
3. Using a 1-1/8” wrench on the probe hex nut, tighten the probe
securely into the process or sample system fitting.
!CAUTION!
Do not apply torque to the transmitter electronic module
to tighten the unit into its fitting.
Note: If there is insufficient space to rotate the HygroPro during
installation, remove the Replaceable Transducer Element
(RTE)
from the transmitter, install it in the fitting, then re-install the
the transmitter onto the RTE.
1.4 Wiring the Transmitter
Proceed to the appropriate section for instructions on:
• Standard Wiring Connections (proceed to next page)
• Hazardous Area Wiring Connections (proceed page 15)

 Loading...