Supplied By www.heating spares.co Tel. 0161 620 6677
17
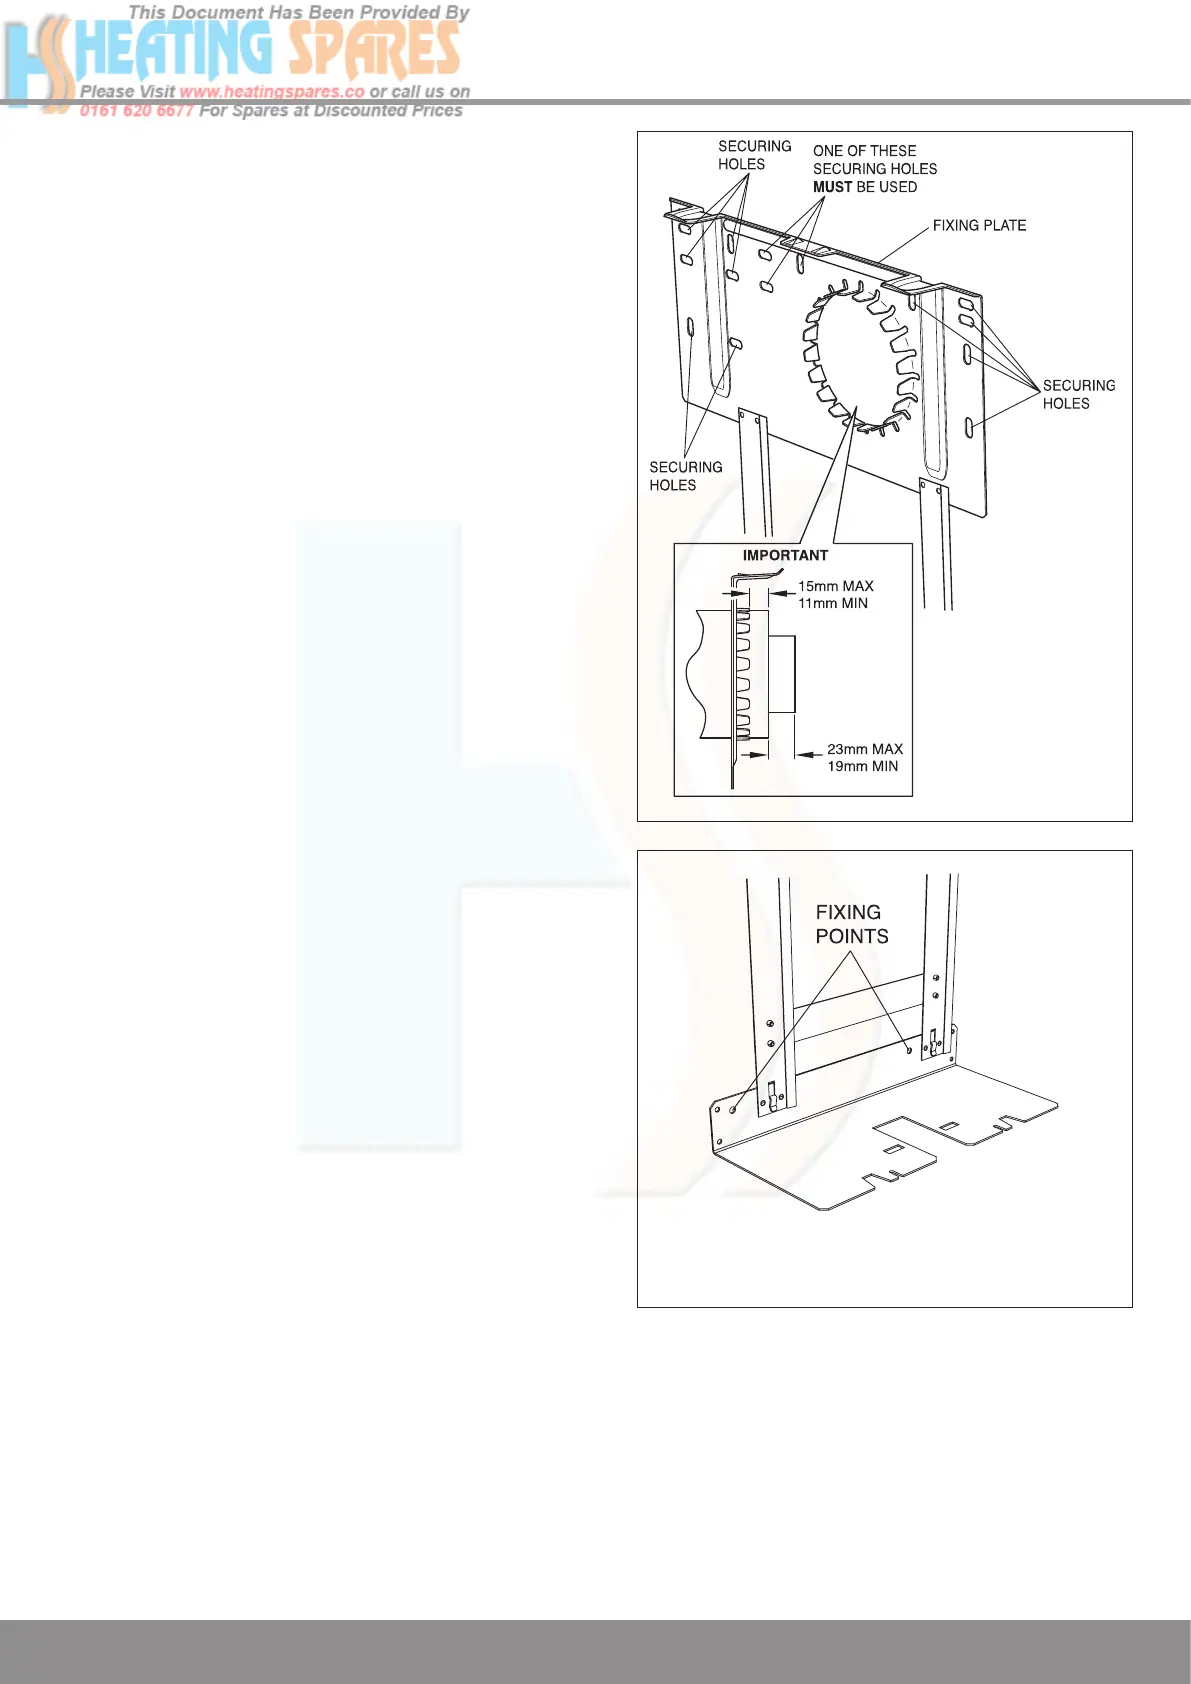
Diagram 6.2
13024
HANGING
BRACKET
FIXINGS
Diagram 6.3
13025
JIG SUPPORT
PLATE FIXINGS
6 Installation Preparation
6.5 Wall Hanging Bracket Assembly
The Wall Hanging Bracket is supplied in the main boiler
packaging at the rear of the boiler.
Reposition the wall template over the flue hole and mark
the position of the fixing holes for the hanging bracket, see
diagram 6.2.
NOTE: Due to the varied site conditions we do not supply
fixings and advise that the installer should supply those which
are suitable.
Drill fixing holes and insert suitable wall plugs.
Rear Flue only - If external access is not available the flue
to be used should be assembled as described in section 9
and inserted through the hole in the wall before fitting the wall
hanging bracket.
Fit the fixing jig support plate to the bottom of the wall hanging
bracket, push down to locate.
Mark, drill and plug at fixing points and secure the jig support
plate, see diagram 6.3.
 Loading...