Supplied By www.heating spares.co Tel. 0161 620 6677
29
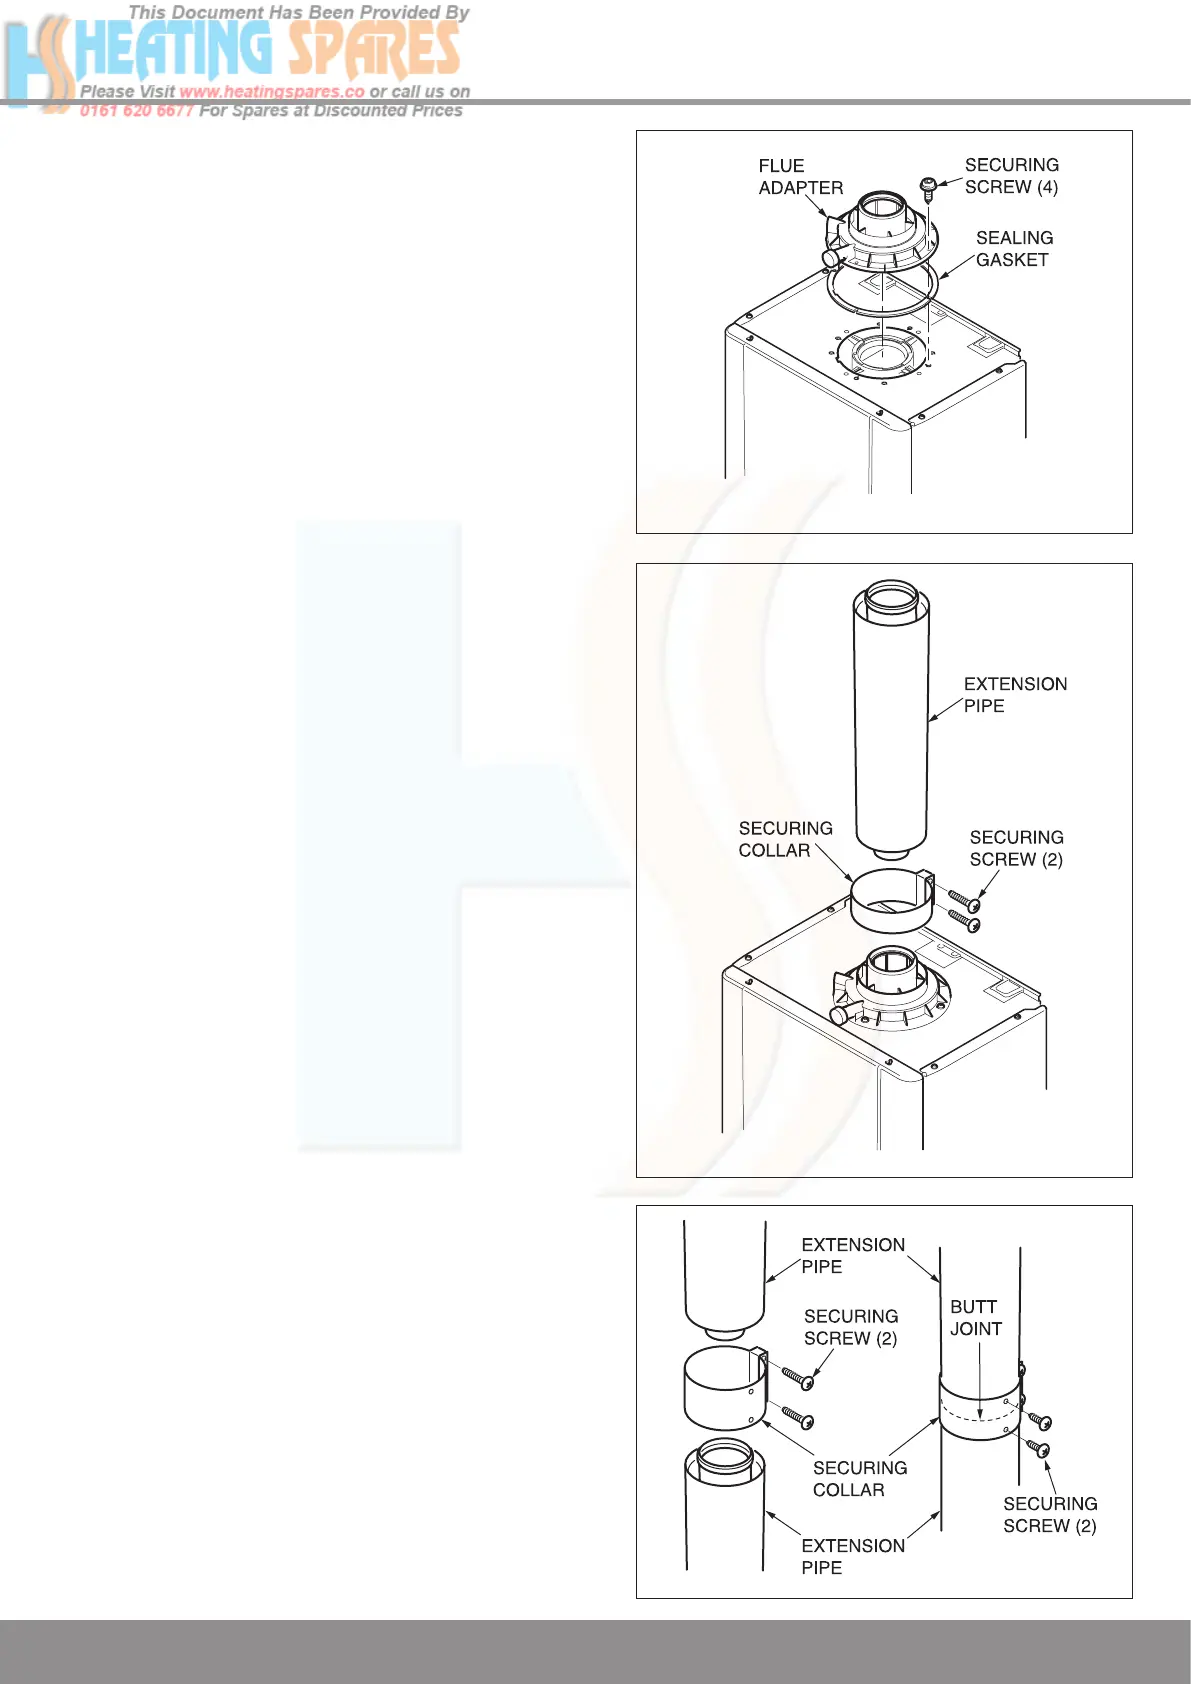
9 Flue Preparation and Installation
Flue Terminal Installation
(a) Pitched Roof
Fit the required pitched roof weather collar over the 150mm
hole in the roof. Make good the tiling or slating around the
collar incorporating the flashing of the weather collar. Position
the angle cap over the weather collar in the correct orientation
to attain the correct angle for your roof.
(b) Flat Roof
Fit the aluminium weather collar over the 150mm hole in the
roof ensuring a weather tight seal.
From above carefully place the flue terminal through the
weather collar.
Completion of Installation
With the flue terminal positioned in the roof the length of the
final pipe can be determined. If a telescopic length cannot
be used, then a standard flue length can be cut to make the
correct length. Cut the flue to the desired length measuring
from the ‘O’ ring end and discard the plain end of the tube.
The cuts must be square and made free of burrs to allow
correct assembly. (NOTE: The flue pipe is 10mm longer than
the air pipe), see diagram 9.21. Carefully push the terminal
assembly upwards to allow room for fitting the final flue piece.
Fit a fixing bracket to the terminal assembly. Pull the terminal
assembly down and join to the flue system. Ensure that the
terminal is making a weather tight seal on the weather collar.
Secure the fixing bracket fitted to the terminal to the roofing
struts or a purpose made batton.
Diagram 9.18
13023
Diagram 9.19
12981
Diagram 9.20
12982
 Loading...