Supplied By www.heating spares.co Tel. 0161 620 6677
12 Servicing
Monitor the combustion reading and at min rate the read-
ing should be 9.3% ± 0.5.
If adjustment proves necessary then proceed as follows:
Press the “reset” button on the controls fascia, release and
immediately press and hold in the “+” button. After approxi-
mately 5 seconds “Hi” will be displayed. Pressing the “+” or “-”
buttons will cycle between “Hi” and “Lo”. Pressing the mode
button when “Lo” is selected will force the boiler to minimum
rate, the display will flash between “Lo” and the “default dis-
play” this will indicate the boiler has been forced to minimum.
Refer to diagram 12.3, remove the offset screw cover.
Adjustment of the CO
2
at minimum rate is very coarse so
carefully adjust the CO
2
with the offset adjustment to 9.3%.
(Rotate clockwise to increase).
Refit the offset cover and the cap on the test point.
To exit the check sequences press the “mode” and “+” buttons
simultaneously, this will reset the boiler to the default display.
12.1 General
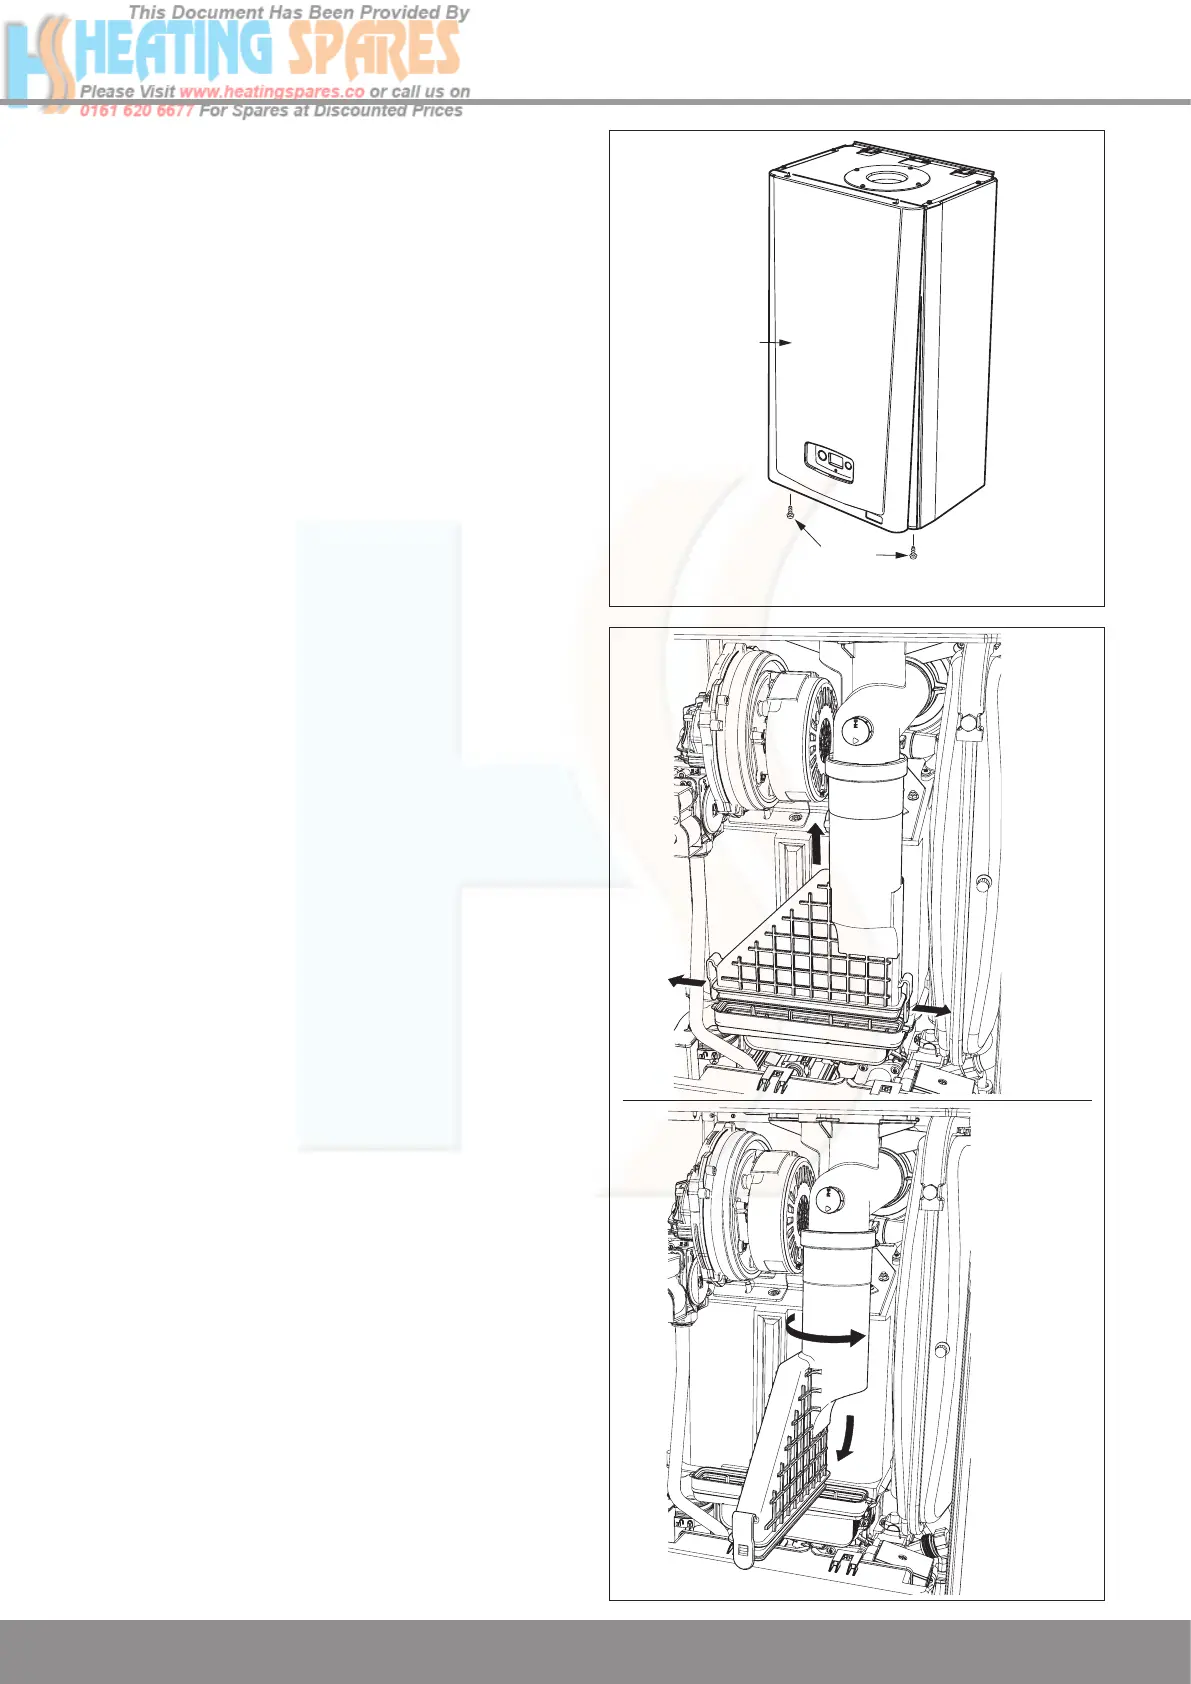
Removal of the front panel is required for all routine servicing.
Remove the two screws on the underside of the front panel,
see diagram 12.4 and lift off the retaining pins.
For access inside the appliance a Torx T20 drive is required
or alternatively a flat blade screwdriver can be used.
Unless stated otherwise any part removed during servicing
should be replaced in the reverse order to removal.
Servicing should always include the removal of any debris
from the condensate pipe and siphon.
After completing any servicing of gas carrying components,
ALWAYS test for gas soundness and carry out a functional
test of the controls.
12.2 Flue Hood
Pull the flue hood securing clips away from the flue hood
sump and push flue hood up slightly towards flue hood top,
see diagram 12.5.
To remove swivel flue hood 90
0
and pull down and out to-
wards front of boiler.
Check seal for wear or damage and replace if necessary.
IMPORTANT: Do not allow fixings, nuts, screws, etc. to fall
into the open flue hood sump, use a temporary cover whilst
removing any parts.
Diagram 12.4
13093
12672
Diagram 12.5
12673
 Loading...