EN - 31
5. Remove transaxle drive belt.
Install Transaxle Drive Belt
See Figure 48 and Figure 49.
1. Install transaxle drive belt around engine
sheave and transaxle sheaves.
2. Align belt with transaxle drive idler.
3. Reinstall clutch stop bracket and J-clamp
and secure with original hardware. See
Figure 45.
4. Reinstall PTO belt onto clutch. See Install
PTO Belt on page 29.
ADJUST ANTI-SCALP WHEELS
Models 988172, 988173, 988174
See Figure 50.
The anti-scalp wheels are set at the factory
for typical mowing height, but can be adjusted
for high or low cutting conditions. Make sure
all wheels are set to the same height.
1. Place unit in service position. See
Service Position on page 18.
2. Remove hardware securing anti-scalp
wheels to deck and remove wheels.
3. Position wheels as necessary:
• For a very high cutting height, set the
anti-scalp wheels in the lowest position
on the bracket.
• For a very low cutting height, set the
anti-scalp wheels in the highest position
on the bracket.
4. Secure with original hardware.
IMPORTANT: All anti-scalp wheels MUST be
set to the same height.
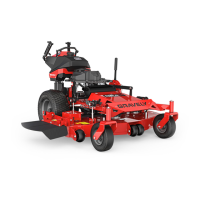
Figure 47
1. Transaxle Idler
2. Spring
3. Anchor Bolt
1
2
3
Models 988172, 988173, 988174
Figure 48
1. Engine Sheave
2. Transaxle Drive Idler
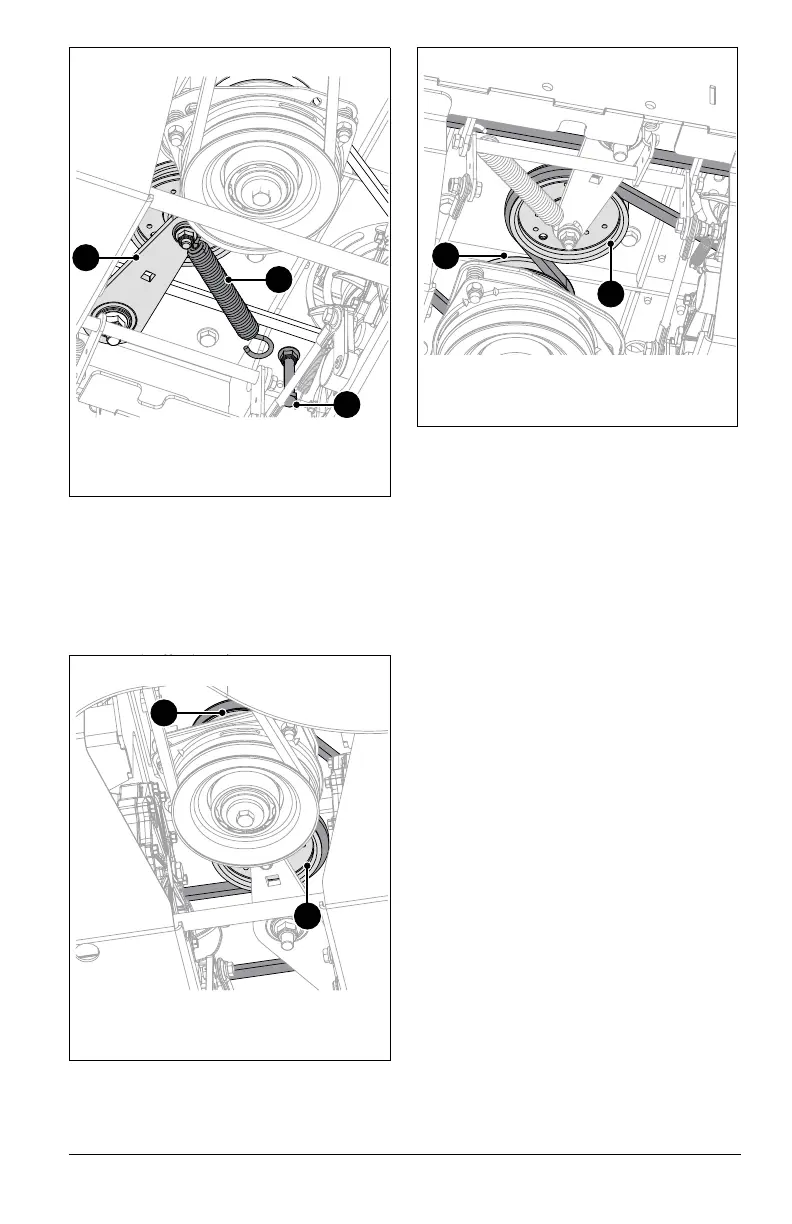
Model 988171
1
2
Figure 49
1. Engine Sheave
2. Transaxle Drive Idler
1
2
Models 988172, 988173, 988174
 Loading...