70
Multi VRF Indoor
Unit Service Manual
4 INSTALLATION OF DRAIN PIPE
4�1 Precautions When Doing the Piping Work
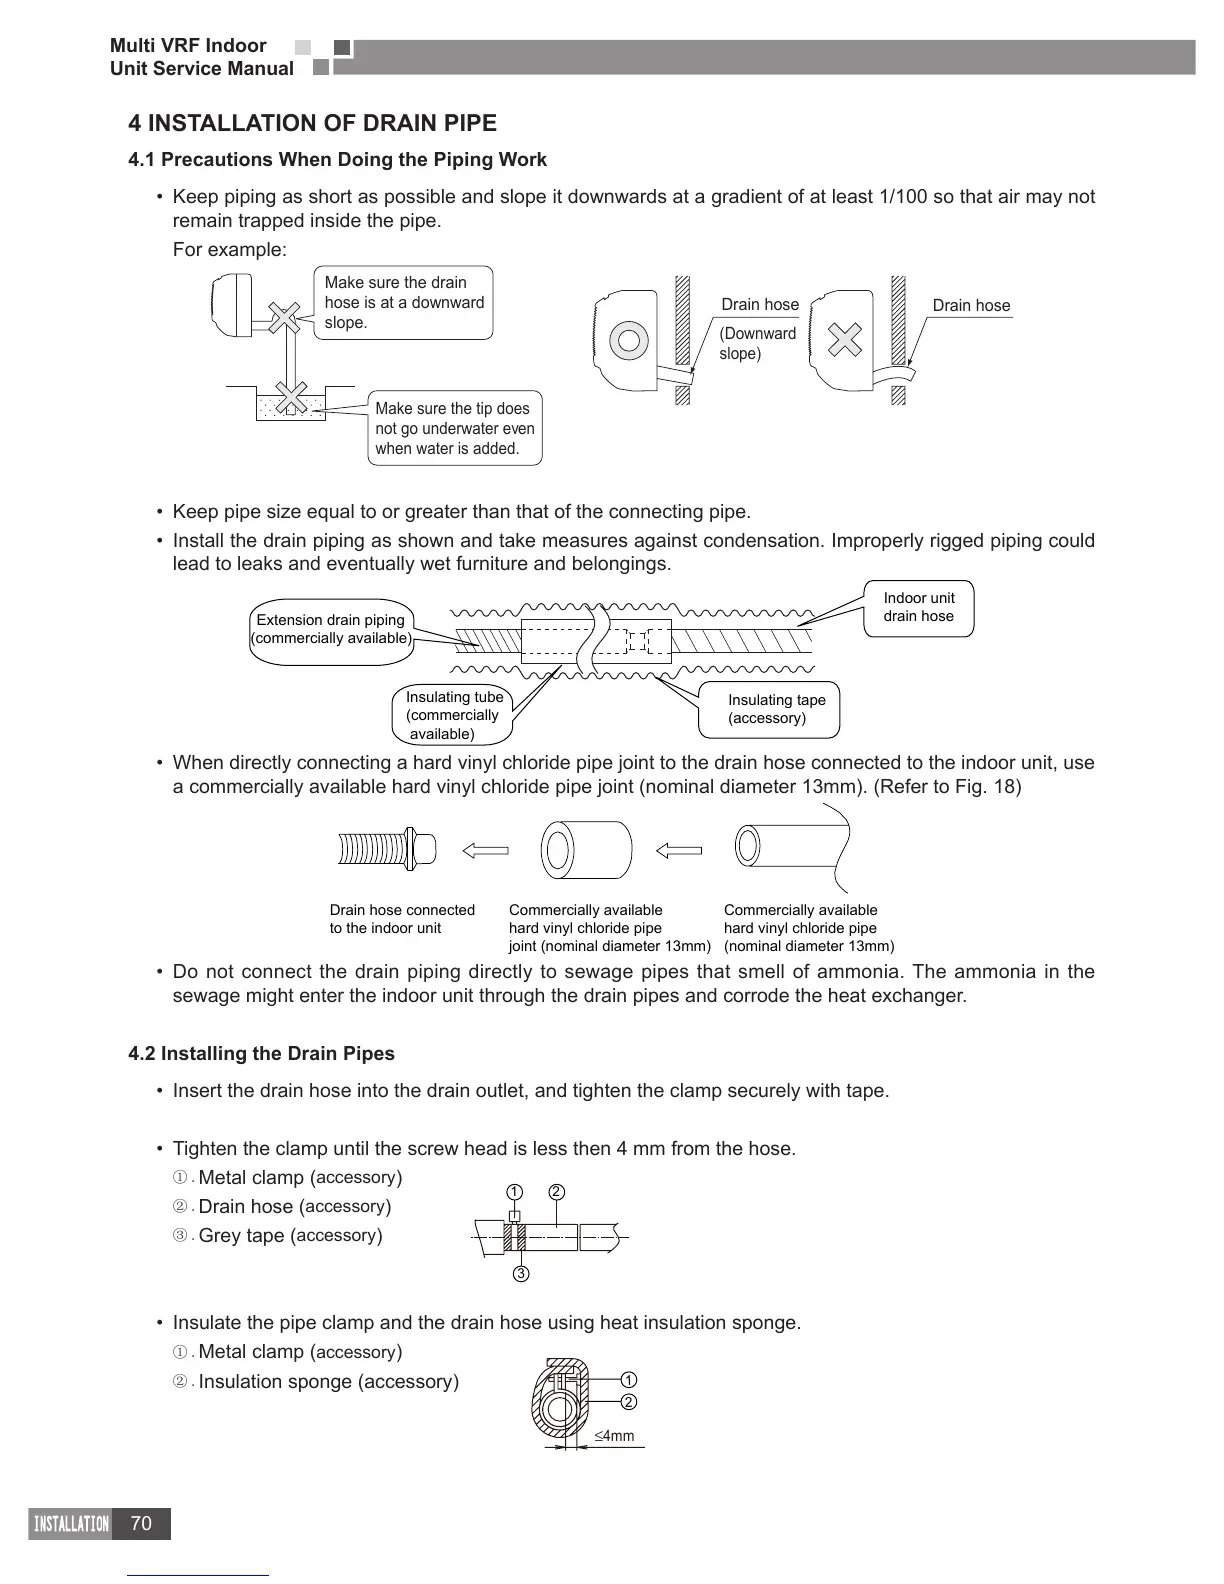
Keep piping as short as possible and slope it downwards at a gradient of at least 1/100 so that air may not
remain trapped inside the pipe.
For example:
Make sure the drain
hose is at a downward
slope.
Make sure the tip does
not go underwater even
when water is added.
Drain hose
(Downward
slope)
Drain hose
Keep pipe size equal to or greater than that of the connecting pipe.
Install the drain piping as shown and take measures against condensation. Improperly rigged piping could
lead to leaks and eventually wet furniture and belongings.
Extension drain piping
(commercially available)
Insulating tube
(commercially
available)
Indoor unit
drain hose
Insulating tape
(accessory)
When directly connecting a hard vinyl chloride pipe joint to the drain hose connected to the indoor unit, use
a commercially available hard vinyl chloride pipe joint (nominal diameter 13mm). (Refer to Fig. 18)
Drain hose connected
to the indoor unit
Commercially available
hard vinyl chloride pipe
joint (nominal diameter 13mm)
Commercially available
hard vinyl chloride pipe
(nominal diameter 13mm)
Do not connect the drain piping directly to sewage pipes that smell of ammonia. The ammonia in the
sewage might enter the indoor unit through the drain pipes and corrode the heat exchanger.
4�2 Installing the Drain Pipes
Insert the drain hose into the drain outlet, and tighten the clamp securely with tape.
Tighten the clamp until the screw head is less then 4 mm from the hose.
①.
Metal clamp (
accessory
)
②.
Drain hose (
accessory
)
③.
Grey tape (
accessory
)
Insulate the pipe clamp and the drain hose using heat insulation sponge.
①.
Metal clamp (
accessory
)
②.
Insulation sponge (accessory)
1 2
3
≤
4mm
1
2